©All rights reserved, not to be copied or referenced without permission
This is a continuation, sort of a photo essay, of the previous short article on door skinning. Thank my wife, Kathleen, for playing photographer and not falling asleep.
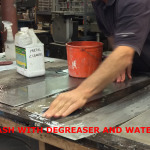
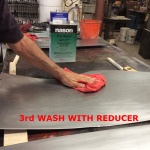
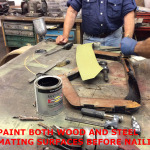
Step 1: Clean and prep the new steel. The paint can be drying while you remove the old door skins. Or, if you forget (like I do), do it after removing the old door-skins. After all the prep steps paint with an etching type primer (no photo because camera lenses and etching paint are not happy together).


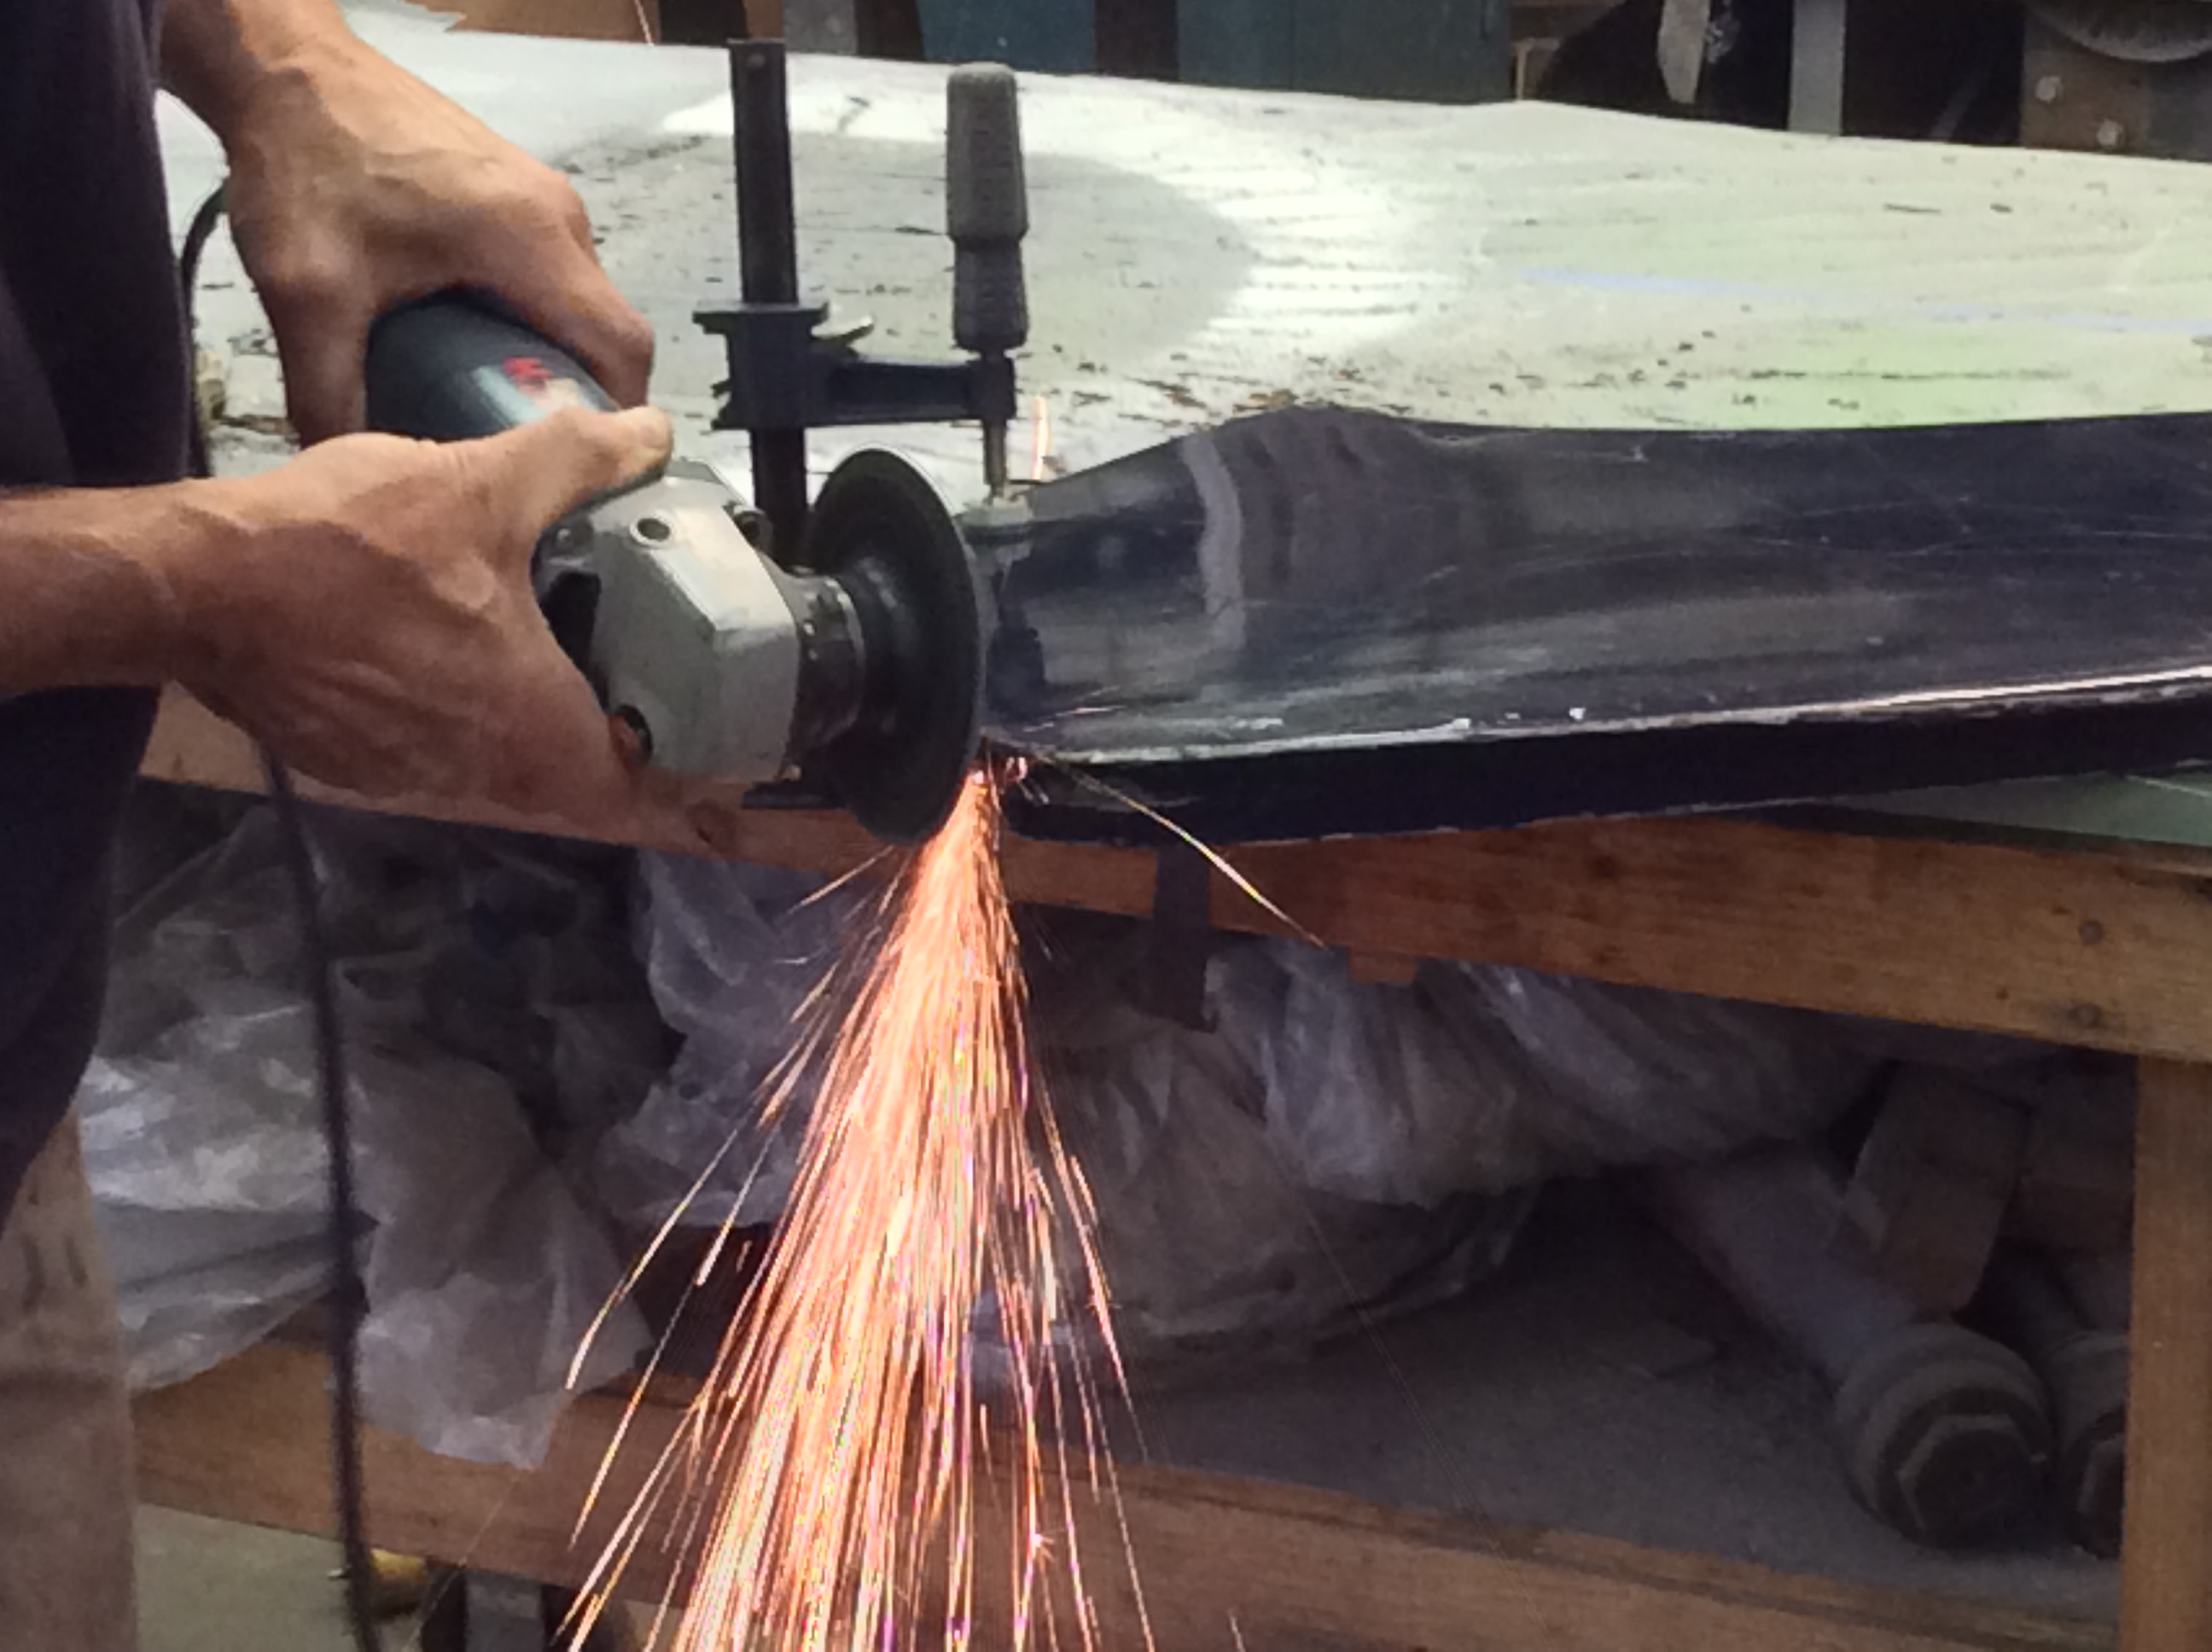
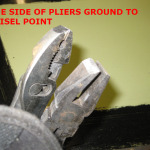
Step 2: Remove the old door skins and see what you have to work with. Note: Clamp the door on the bench with the outside facing up. Use the 4″ grinder as shown with the spark going down. The hem will curl off the bottom when the grinder goes through. You will know when you have cut enough and it will prevent taking off more than necessary. Also, it looks cool and makes you feel like you know what you are doing. Illusions are important.
Before Step 3: Repair any wood defects. Remove the screws from any joints that are loose. Refit the door frame into the car and epoxy, clamp and screw being certain that everything is aligned correctly.


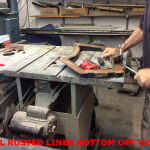
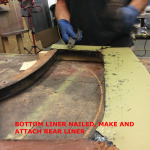
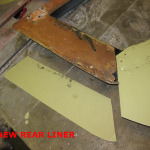
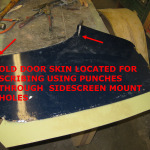
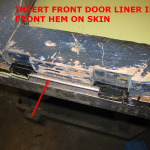
Step 3: Replace any liners that are rusted. Do one at a time. Slide the new steel under the existing liners and scribe for accurate matching of joints. Use the old door skin as a pattern to trim the new liners.


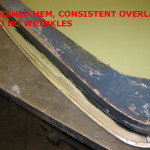
Step 4: Install the new outer skin. First make the hem at the front between the hinges then the small hem at the top rear. The front hem is particularly important because if it is too long the door will hit the drip wire and/or rub when opening. Be very fussy to duplicate the original length. LIGHTLY clamp the outer skin to the liners. Bend (lifting motion) the hem beginning at each of the round corners and working away equally. Work slow bending a few degrees at a time. When all the hems are near 90° switch to a body hammer and finish closing the hem. Work on an anvil or metal surface.


Step 5: Bend the top flange (under the armrest). I forgot to get a picture of this. I will update in a few weeks when I have some more doors to do. The process is hard to describe but easy to understand with a single picture. In essence a piece of plywood is clamped to the outside of the door as near the armrest flange as possible. This provides some resistance so the flange bends over the wood without buckling back into the outside surface. A round faced hammer is best working from the corners into the part where the radius is tightest. (when hemming the door skin you start at the corners and work away because you need to compress the steel. On the arm rest part, you are stretching the steel so you work into the bend.)
Step 6: Use hand shears and a file to make the hinge notch. One goof and you get to start the whole process from the beginning. Work in small bites.