Click any image to start a slide show.
The best way to make louvers is to take your panel to a shop that has a proper louver press and dies that are the right shape. Conventional sheet metal shops are plentiful but the dies commonly used for air-conditioning and similar sheet metal applications are not the right shape for a Morgan. If you are fortunate, and a hot-rod shop with the right tools is nearby then, by all means, pay the price and let the professional do the job.
I first read about making louvers by hand in the Morgan Three Wheeler club USA newsletter in 1984. The article was by Tony Gayoso whom I have since lost track of. I needed to make a +4 bonnet half to replace one that had an amateurish and ugly scoop cut into it. Tony’s system consisted of making a saw cut in the sheet metal and then using a block of wood to form the metal into a channel-like die built up from three pieces of steel. It was simple, cheap and worked great. The unique part was that the wood forming tool was only ¾” wide and the operation was not the “one big bang” of a real louver die but rather a whole lot of taps back and forth along the saw cut to gently stretch and shape the metal into the die. The die and forming tool took less than an hour to make and cost nothing. This is a good thing for a tool that you only plan to use once. Several bonnets later (a few bonnet scoops and three-wheeler bodies also) my louver die was still going strong. Last year I needed to make a new trike skirt. Beetle-back three wheelers typically have six long louvers at the rear on each side. The original panel was beyond repair but the louvers were impressive because the ends were so sharply defined. My homemade louvers have always looked pretty good mostly because I know how to make metal move and can coax it to an acceptable shape with the forming tool. To match the definition of the original louvers and to take some of the art out of the job, I decided to make a bottom die that was not an open channel but was louver shaped. Since this, like all of my tools, was expected to be a one-time tool it had to be simple.
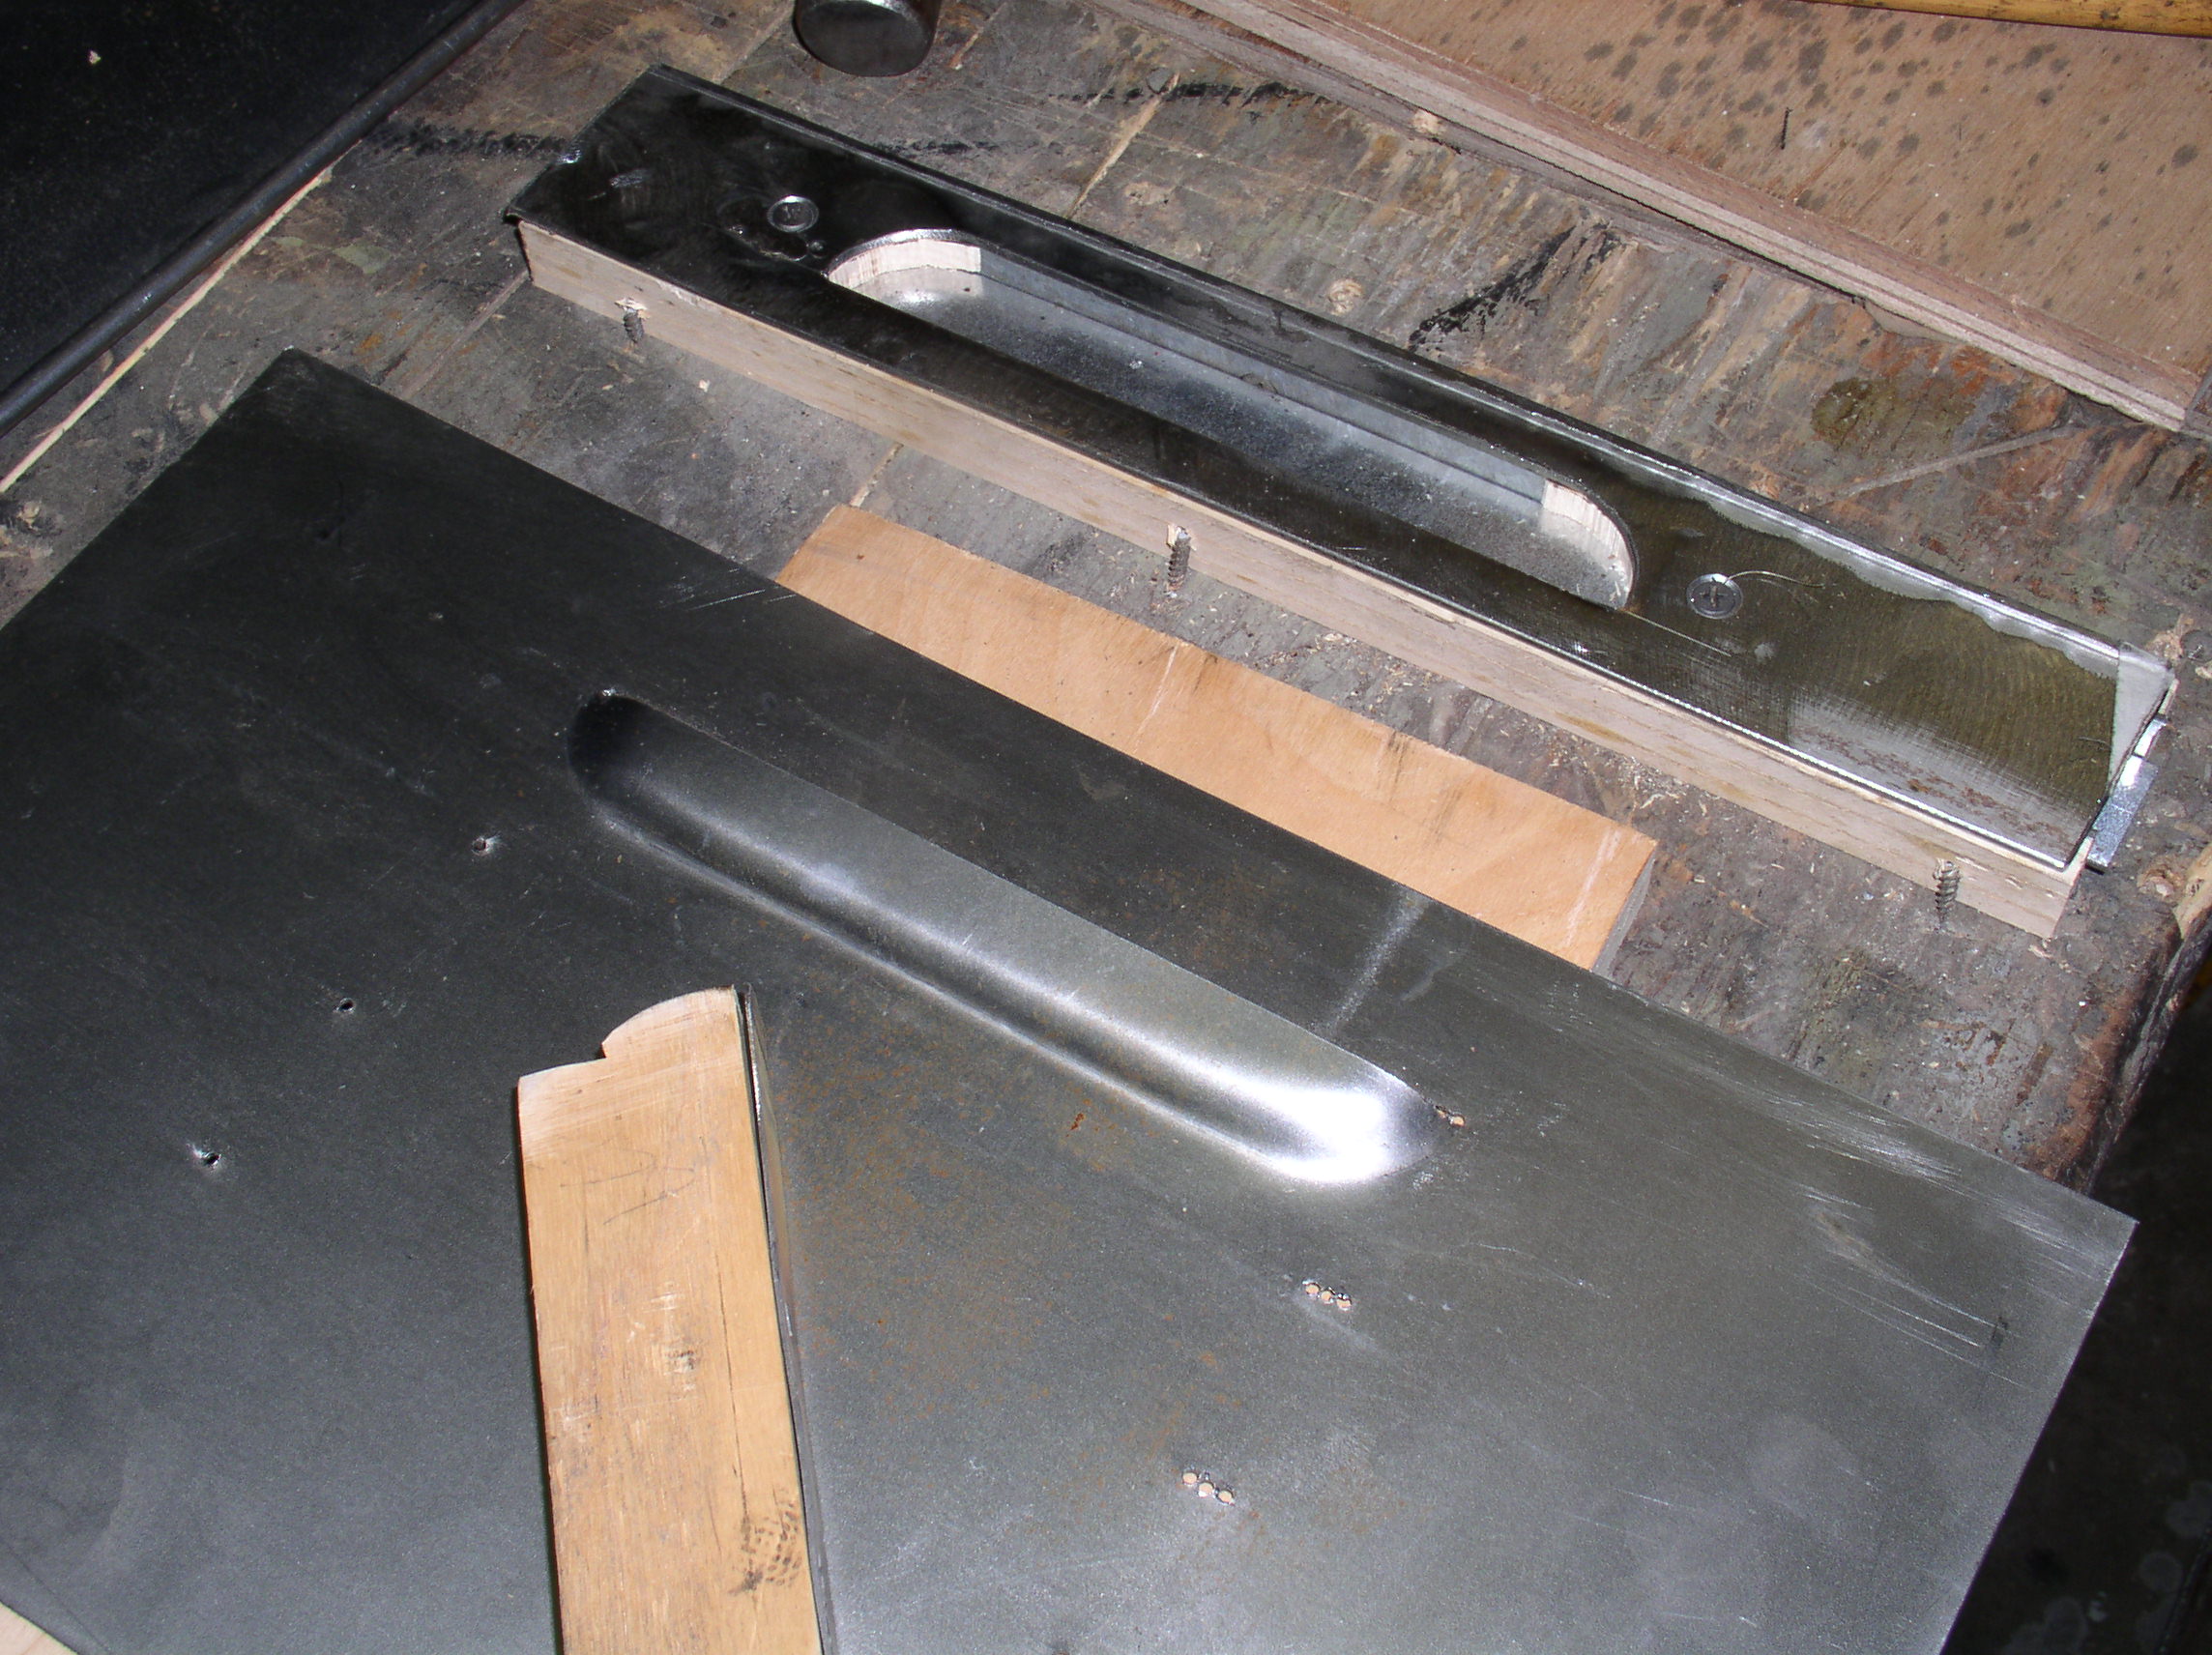
The new bottom die is similar to the open channel type except that it has a top facing of 1/8” steel with the louver outline cut into it. A saber saw (aka: jig saw) with metal cutting blade easily made the cutout and some basic files dressed the edges to make them clean and straight. The rest of the die consisted of an Ash wood spacer and 1/8” steel bottom plate. The whole thing gets screwed to a piece of plywood for support and clamping.

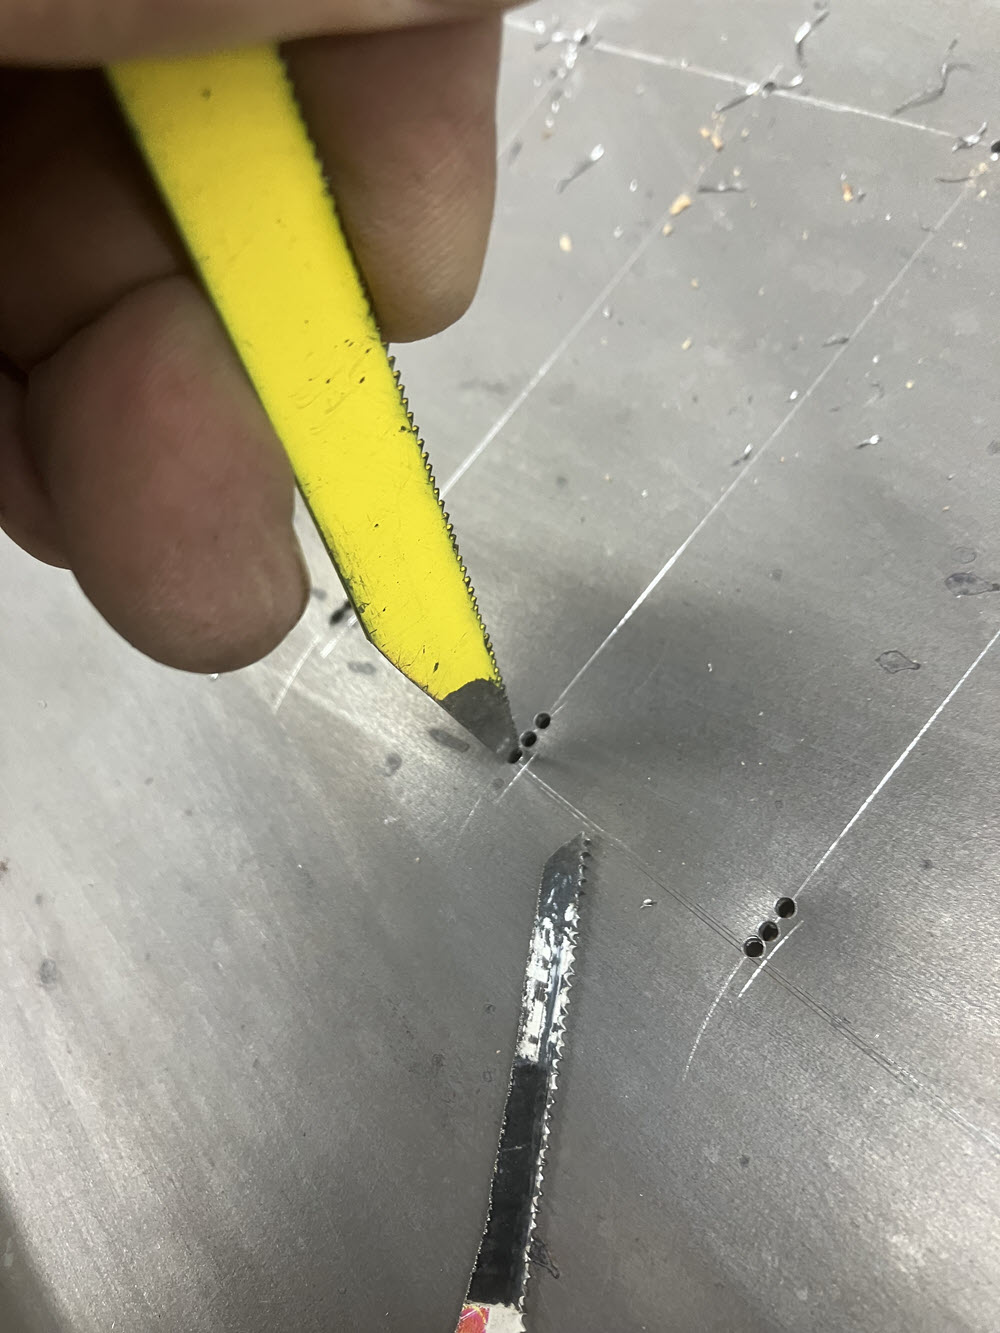
Accurately layout the louver cuts on the panel with a scribe. Drill three 1/16” diameter holes close together at one end and a single hole at the opposite end of each scribe line. Use something solid (hardwood, steel, etc.) behind the panel and a sharp center punch to make centers for starting the drill.
Use a saber-saw to cut the slot for the aft-most slot. The finer the tooth pattern the better. A standard saber-saw blade is about 3/8” deep and has a wavy tooth pattern. The wavy teeth make a wider kerf. A thin kerf is advantageous so I dress the sides of the blade on a grinder to make them flat. I also reduce the depth by about half. Use the tip of a spare blade to break the webs connecting the three starter holes. Form the louver before cutting the next slot.
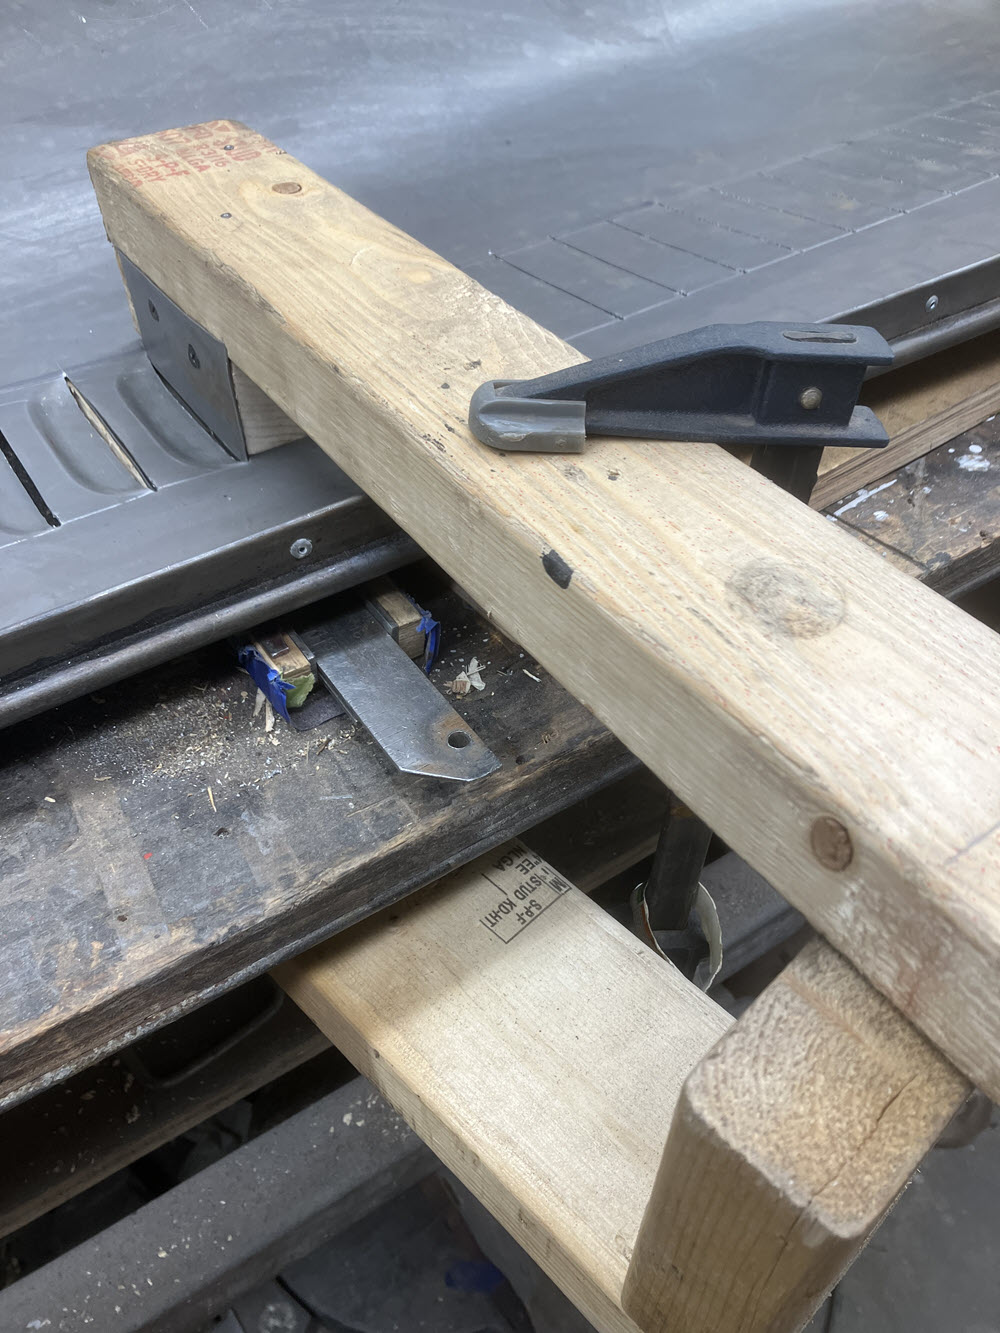
Locate the slot over the bottom die. A putty knife is helpful. Clamp the panel!
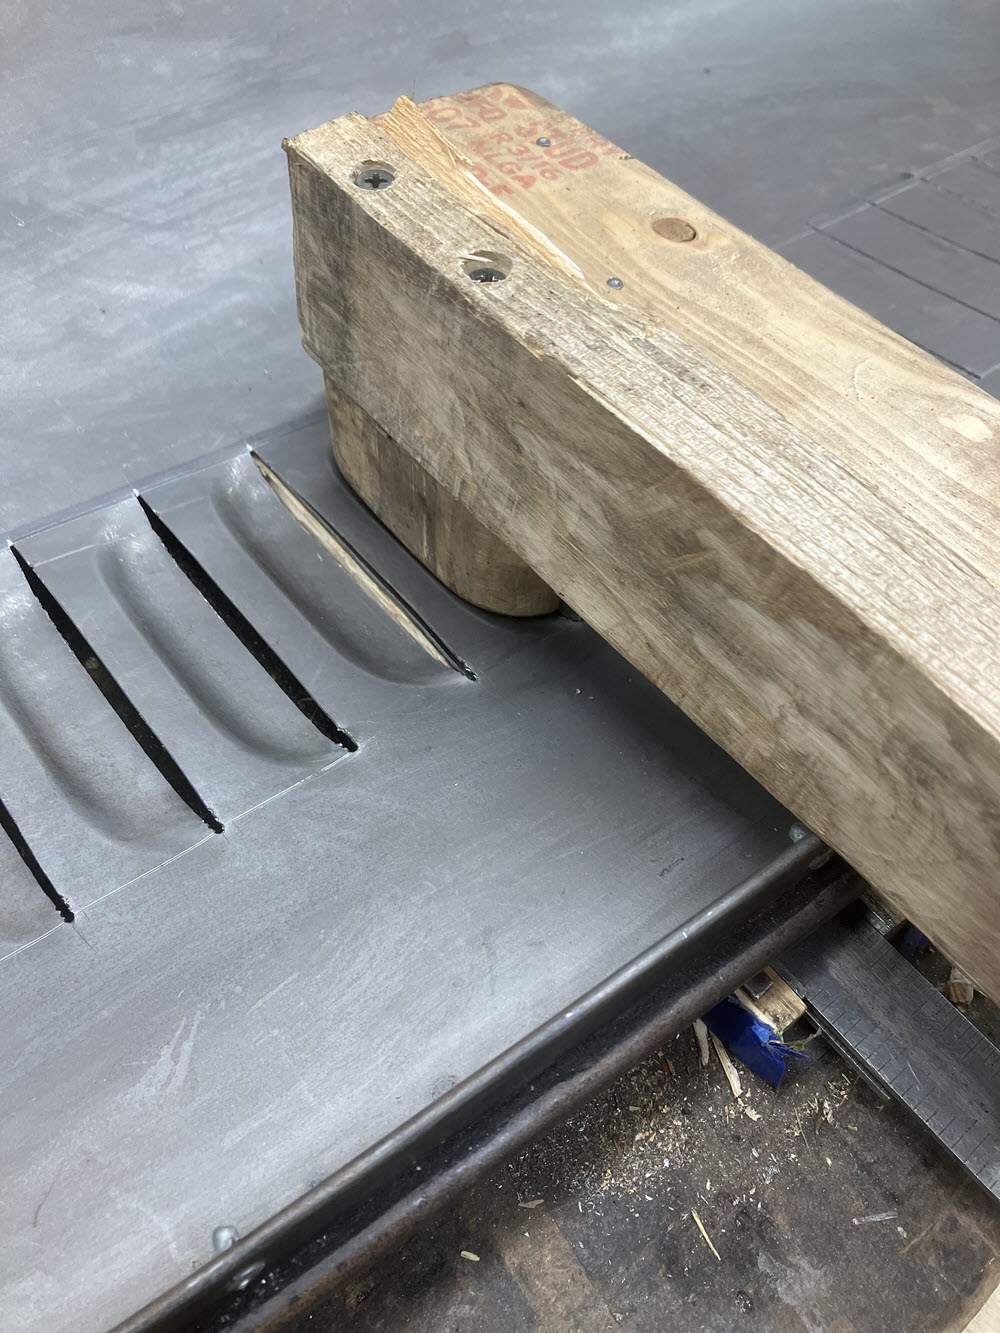
Tap-tap-tap…. Starting in the center and working to both ends, hammer the forming die into the bottom die. Use light taps and work the metal into the die evenly.
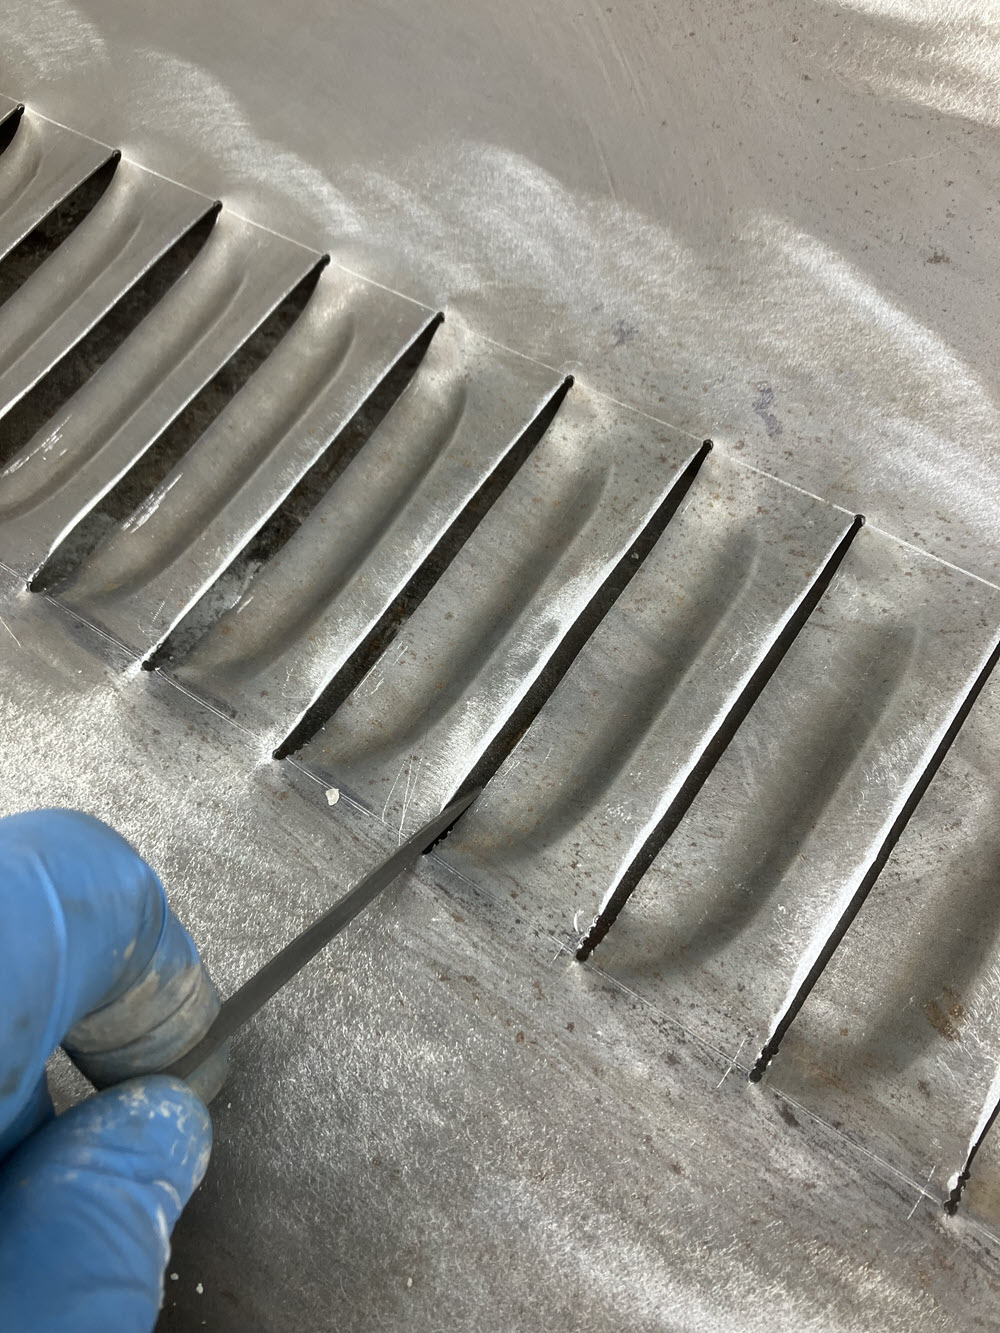
Drive the Finishing block into the formed louver. You can take your frustrations out on the finishing block. Give it a few real good wallops! The finishing block minimizes any tool marks and makes the louvers consistent.
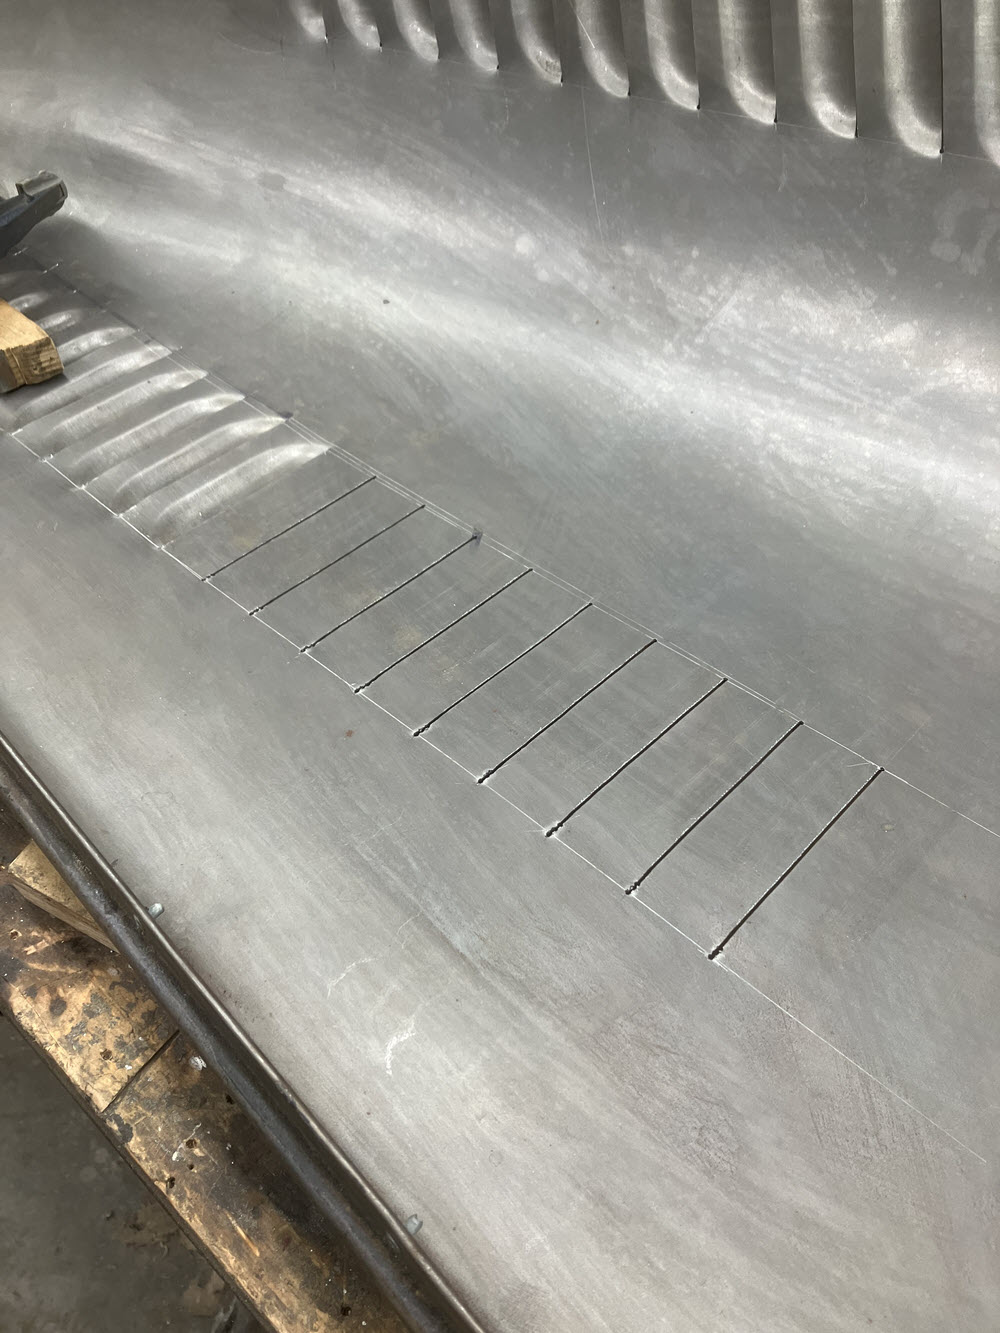
From start to finish it takes about ten minutes per louver. It can take an hour or two to get the tool set up and make a few samples but it is a sure fire cure for 4/4s suffering from bonnet-louver envy.
So much for “never doing this job again”. I first wrote this sometime around 2014. It is now 2023 and needless to say I’ve had to punch more than a few louvers since then. Only on one occasion did I take my own advice and brought the job to someone that had a proper press and die set. That was a 14 hour round trip plus overnight expense etc. Hmmm; back to the tap, tap, tap, routine.
I’m still using the same ‘one time only’ tools I made in 1984 with some minor additions. The following should illustrate the process. One caution: be fussy. Check the layout and then check it again, and again. One mistake anywhere and you will be back to buying new sheet metal.