Early Morgans seats were, well, different. The roadsters and DHCs had Mosley “Float on Air” blow-up cushions resting on a plywood base with no fore/aft adjustment. The cushions really weren’t that bad when they worked but when I bought a 1965 4/4 in 1972 the rubber was already well past its use-by date. No matter how many patches I put on it the air would be gone before I got from Santa Monica to East LA. Foam eliminated the deflating problem but didn’t resolve the lack of adjustment. My second Morgan was a ’53 four seater. The seat springing left a lot to be desired.
Four-seater front seats are adjustable. Loosening two wingnuts under the seat and pushing the seat fore or aft is doable but hardly convenient. And then there is the springing; ugh! The network of different size coil springs sag immediately when you sit on them, bounce when you go over bumps and squash down if you tighten a lap belt.
Early on I started trying to make these seats bearable.
First try was to add a panel under the seat with thick foam under the original springs.
Next came adapting slides to the seat so my wife could move the seats and reach the pedals. I tried several different makes of slides finally settling on Sparco. My final version of the seat has the Sparco slides on flat topped ash mounts, upholstery type springs instead of the network of coil springs, structural support to prevent the back of the seat from bending (they all do) and headrests. I have made these modifications on three four-seat cars and added the same seats to my DHC. Comfort is subjective but after MANY miles and some very long legs while touring Europe I like what I have.
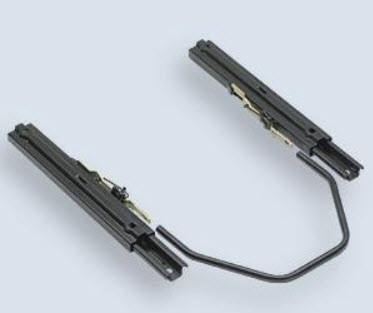
the Sparco Seat Slides
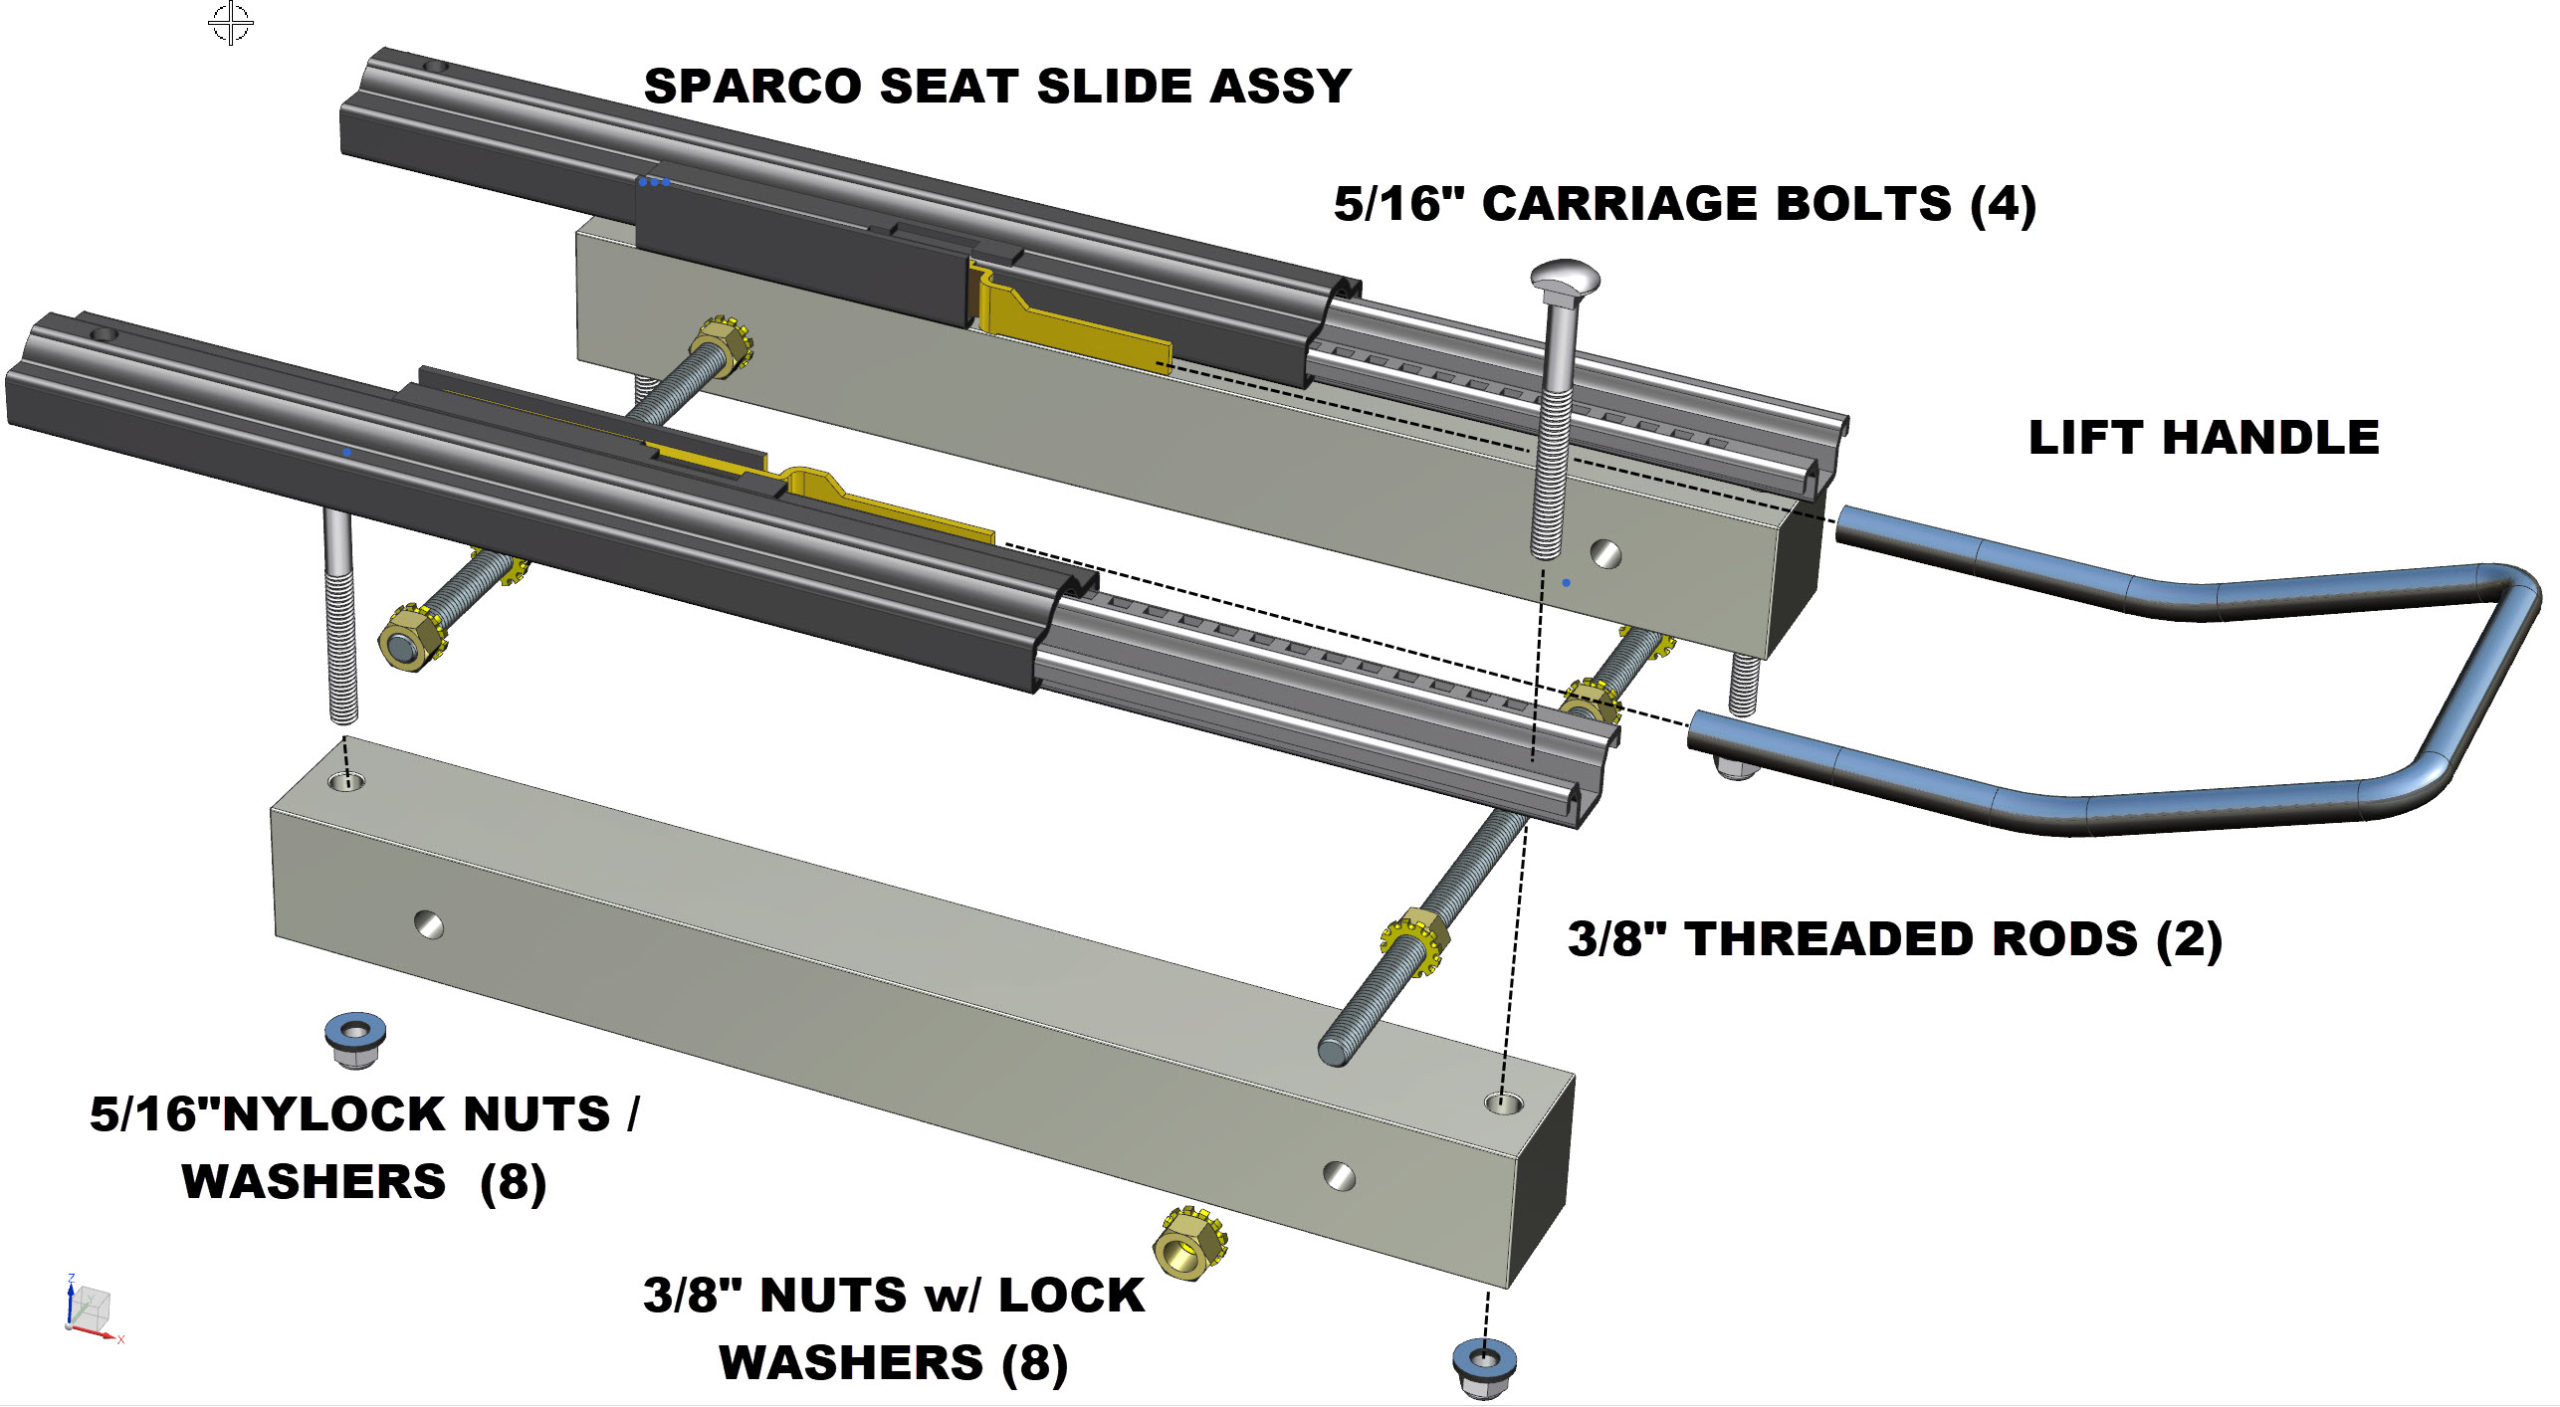
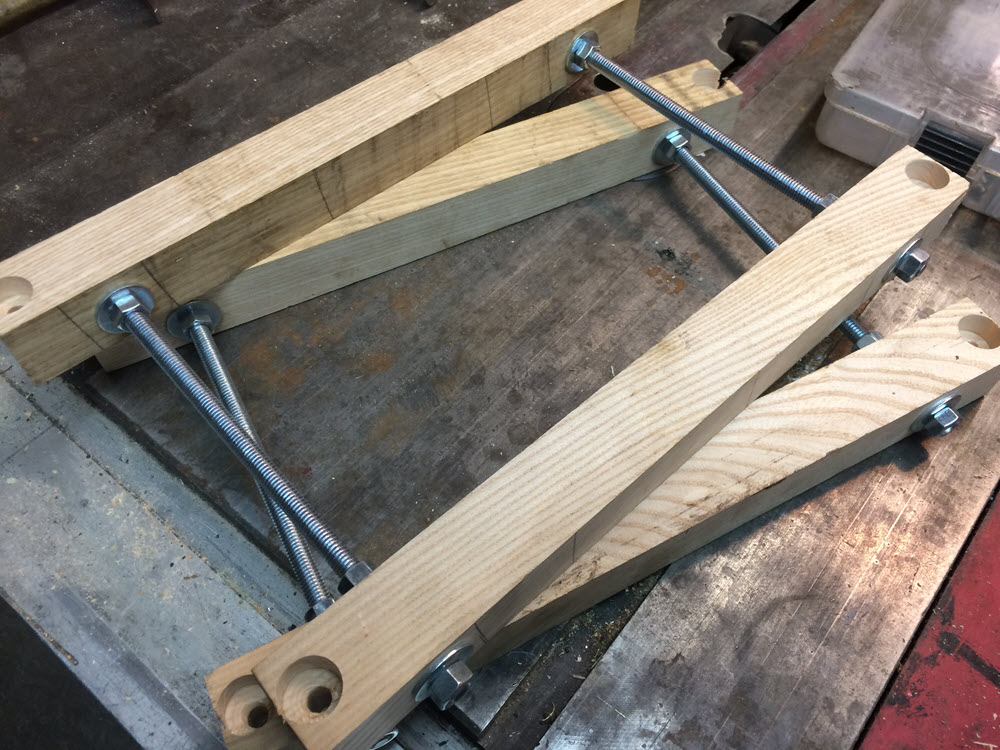
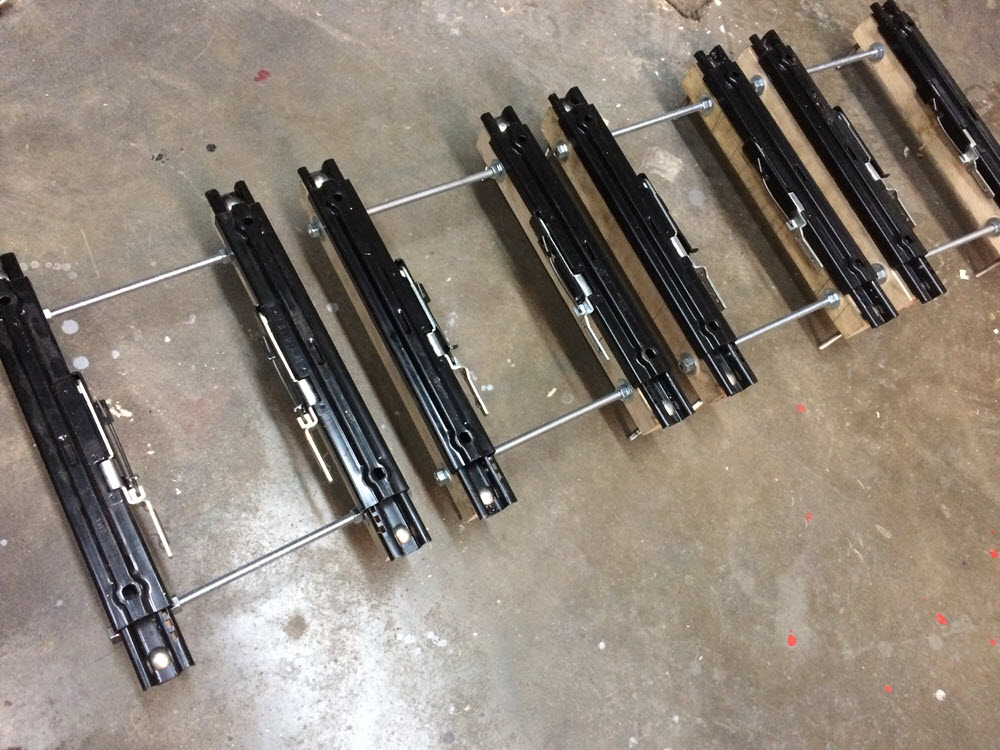
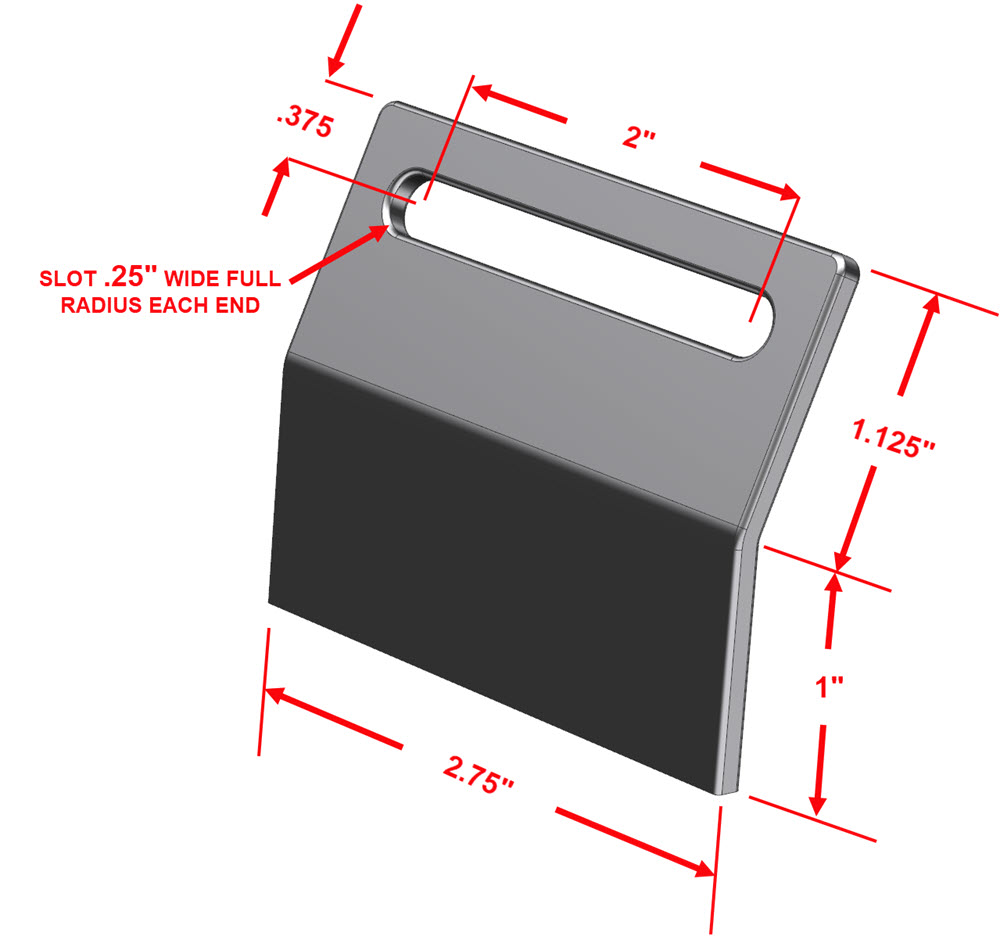
I buy the slides from Summit Racing although they are available elsewhere. Drill holes and screw the top half of the seat slide to the bottom tubes of the Morgan seats. Be fussy and make the holes as vertical as possible. The seat slides do not tolerate much out of square/plane missalignment. Make two ash wood blocks to fit snugly between the chassis crossmembers. Drill a counterbored hole on each end to match the bottom of the slide. The counterbore is from the underside to recess the nuts. Mount the bottom half of the seat slide to the blocks using 5/16″ carriage bolts. Note: grind flats on each side of the bolt head so that it fits between the slide sidewalls. Use 3/8″ threaded rods between the blocks to make a rigid and parallel structure. Drill through the car floorboards and crossmemeber flange and mount the seat structure. Add springs between the top rear of the seat slide and the forward chassis crossmember for forward assist. The supplied lift handle is for a wider seat. I use oxy/act to heat, straighten and rebend the tube to fit the new width.
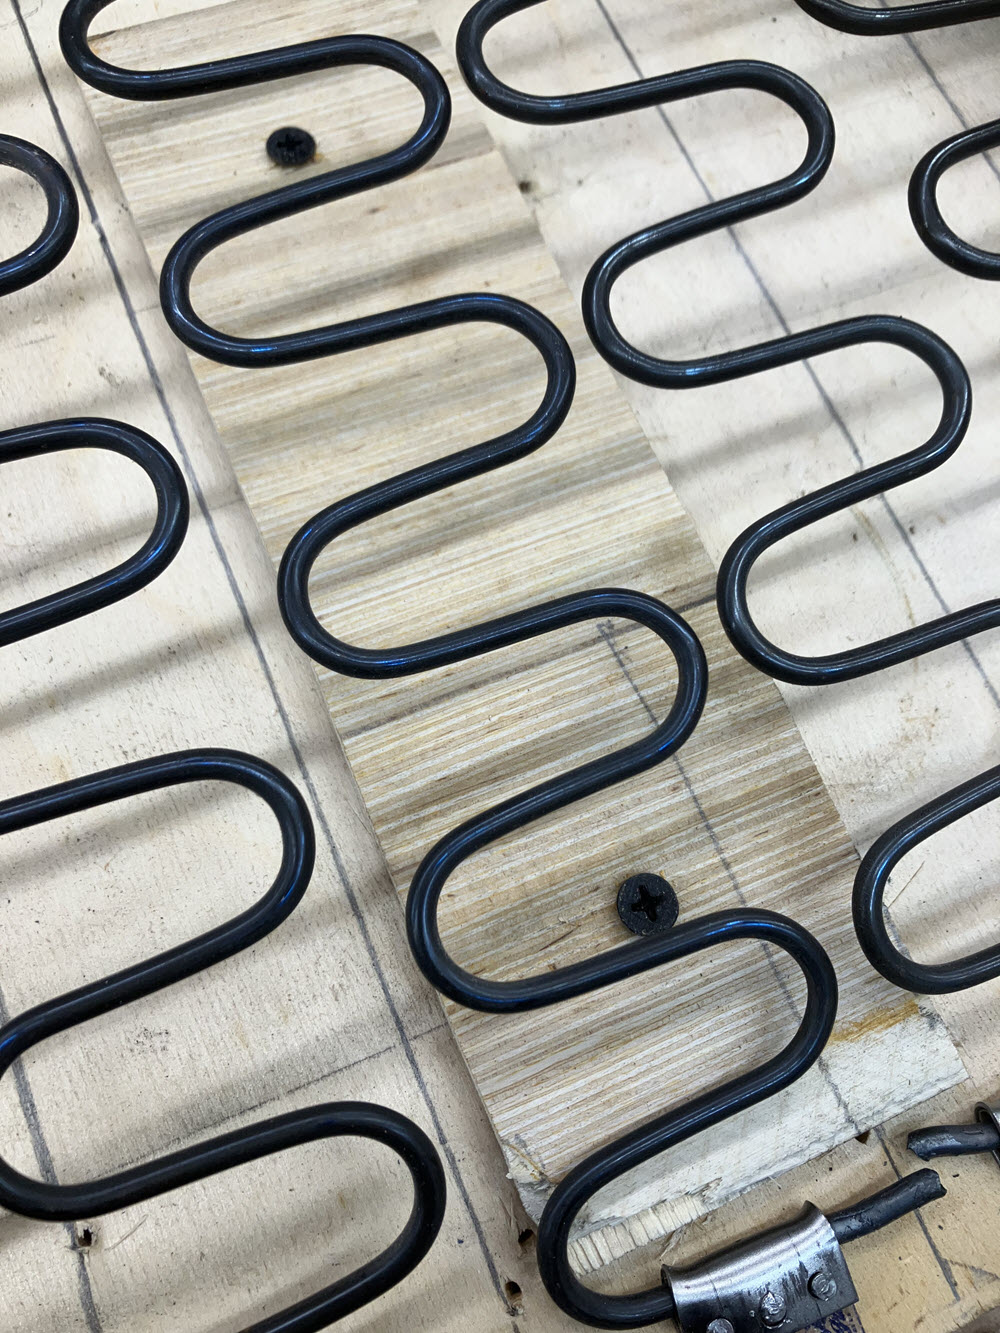
Springs
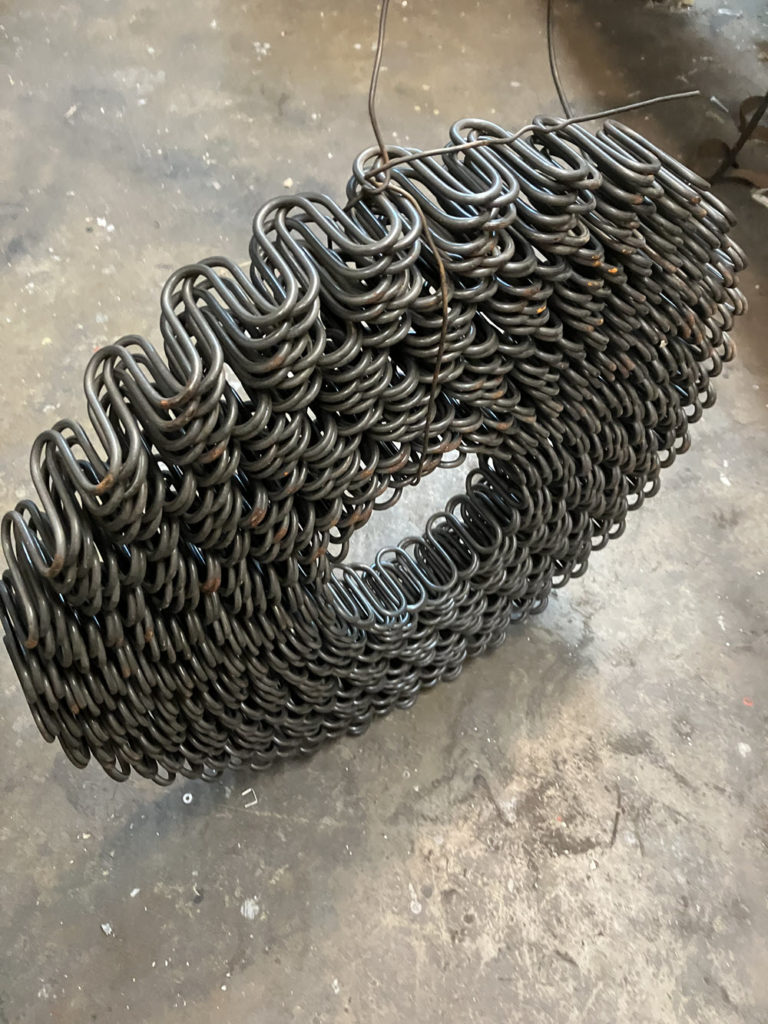
Many auto seats, sofas, etc. use a zig-zag steel spring that comes in a big coil. I buy it from an upholstery supply house. I don’t know anywhere that it is available in smaller pieces but you can try your local upholstery shop.
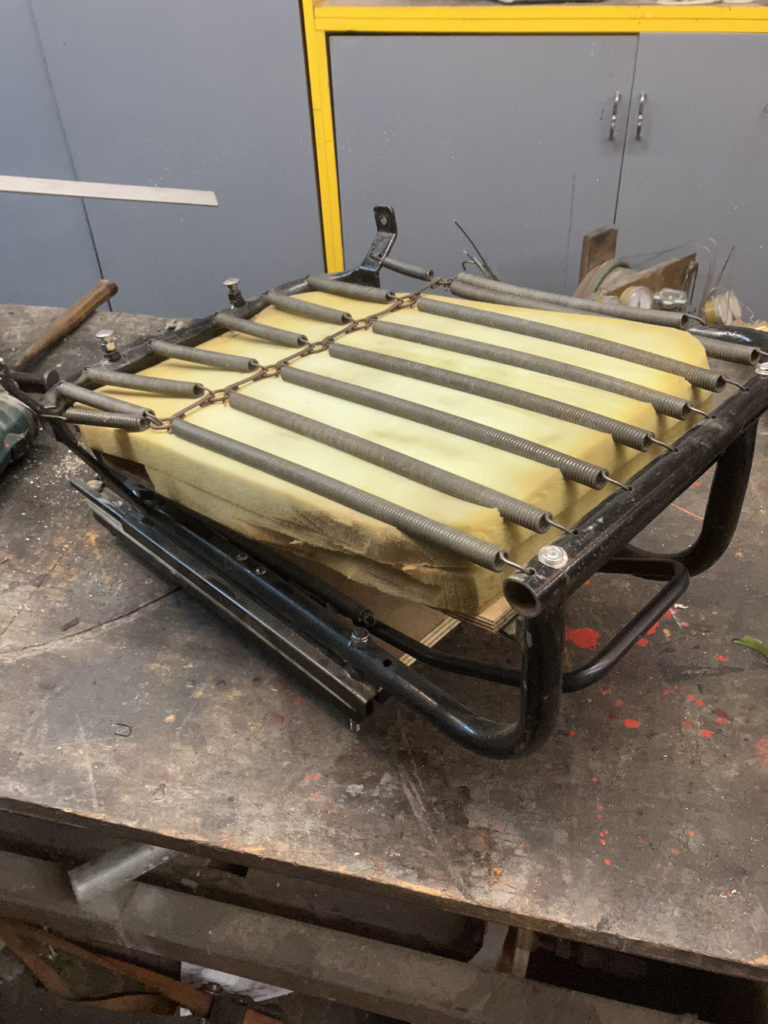
Measure and cut lengths to fit using a cut-off wheel on a disc grinder.
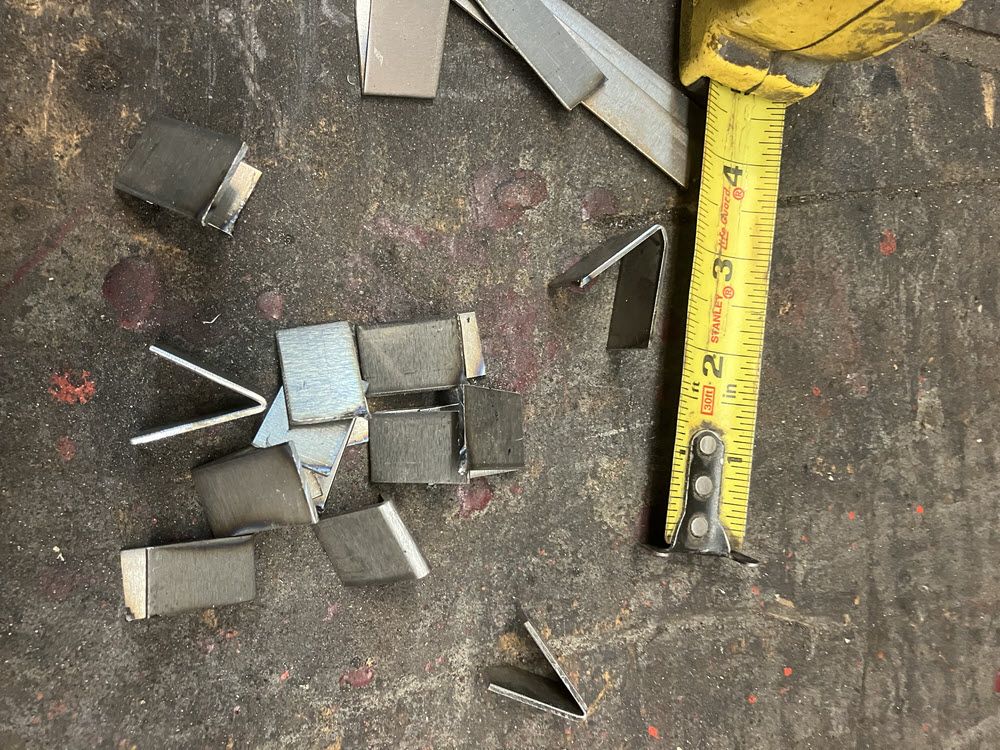
Remove the original springs. Decide how many new springs will be fitted to the seat bottom and back. Make 2 V shaped clips from 18ga sheet steel to anchor each spring you plan to use. The clips are about 3/4″ wide and about 1″ deep as shown. Weld the clips to the front/rear, bottom/top seat frame tubes

Making the Springs
BE CAREFUL. Extended or compressed springs are dangerous.
Cut one spring from the coil. make it one or two zig-zags longer than you think neccessary. Use an Oxy/Acy torch to bend the tip as shown. After stretching the spring to determine the correct length, cut off the extra material. Count the “zigs” and cut all the required springs the same.


Note: Stretching these springs flat enough to be good seating is not easy. You won’t do it by hand and trying is dangerous. I first tried using hose clamps around the tubes and the spring to pull the spring flat. It worked but not well. The best/safest/easiet solution is to make a spring expanding tool. I used 3/8″ threaded rod in a square tube with a flat steel hook on one end.


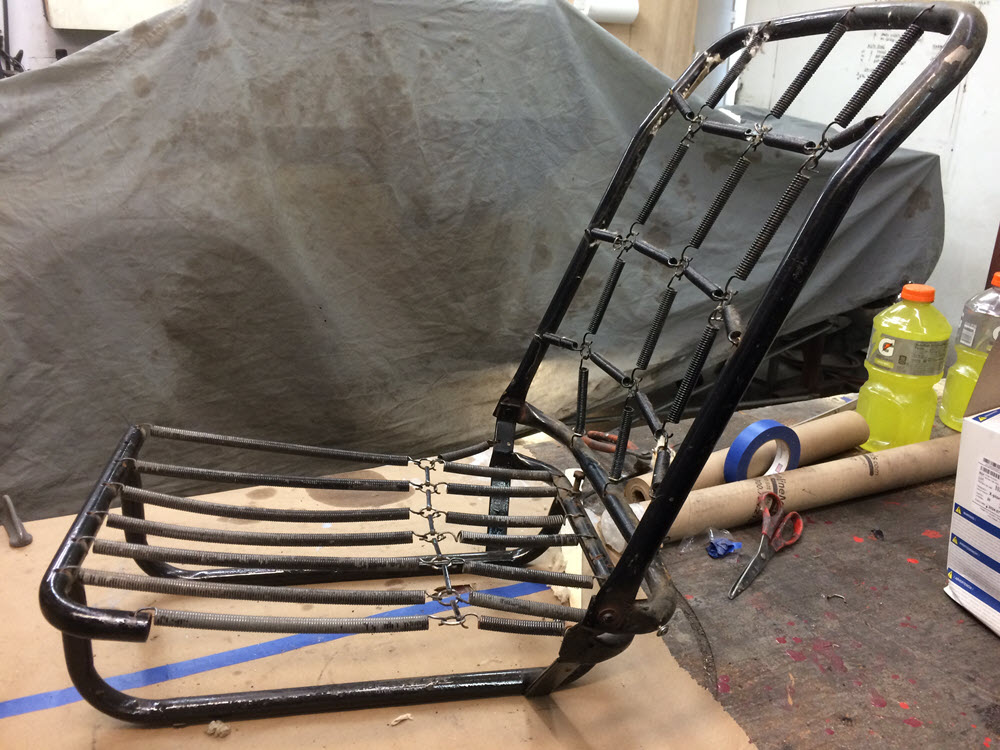
Seat Back; additional structure
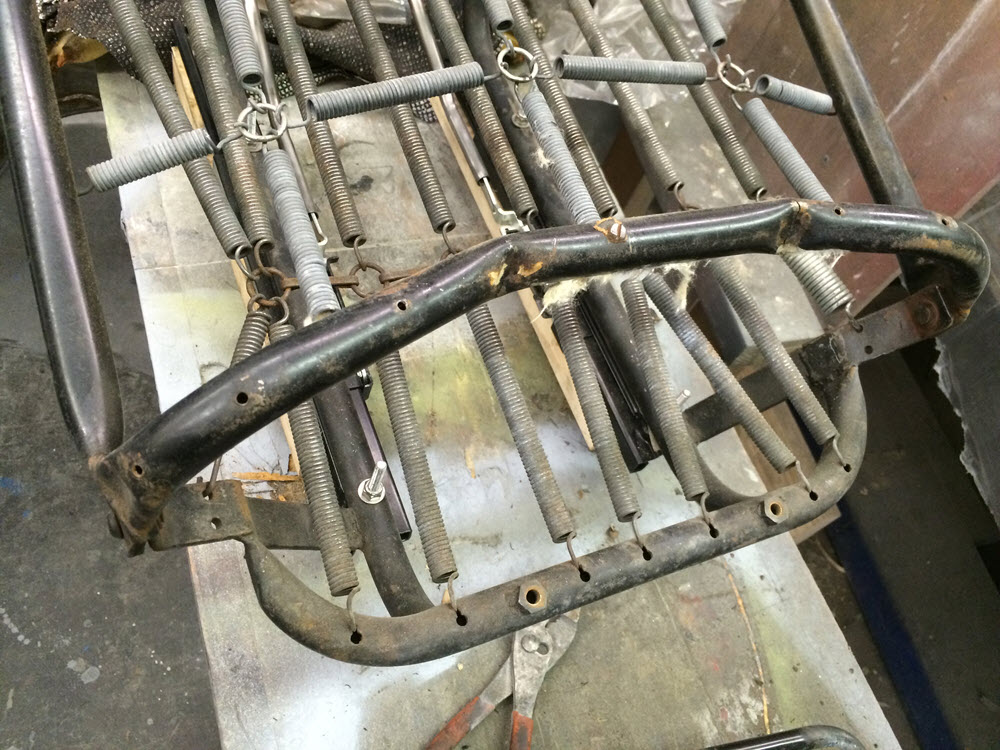
The origianl seat back design is weak where the bottom tube rests on the adjustment screws. The tall back tube and the lower tube (that bears on the adjustment screws) are roughly at right angles. The springs and the seat occupant act to lever the tall tube and bend the lower reducing the angle between them and increasing the slope of the seatback. The bending and increased angle are common. The picture below is the worst I have seen.
There are several options for adding structure but I have settled on what is probably the most difficult one. I tack weld sheet metal on the entire back. Additionally, sort of belt and suspenders, I weld tubes top to bottom. the tubes are also useful for supporting the adjustable headrest.

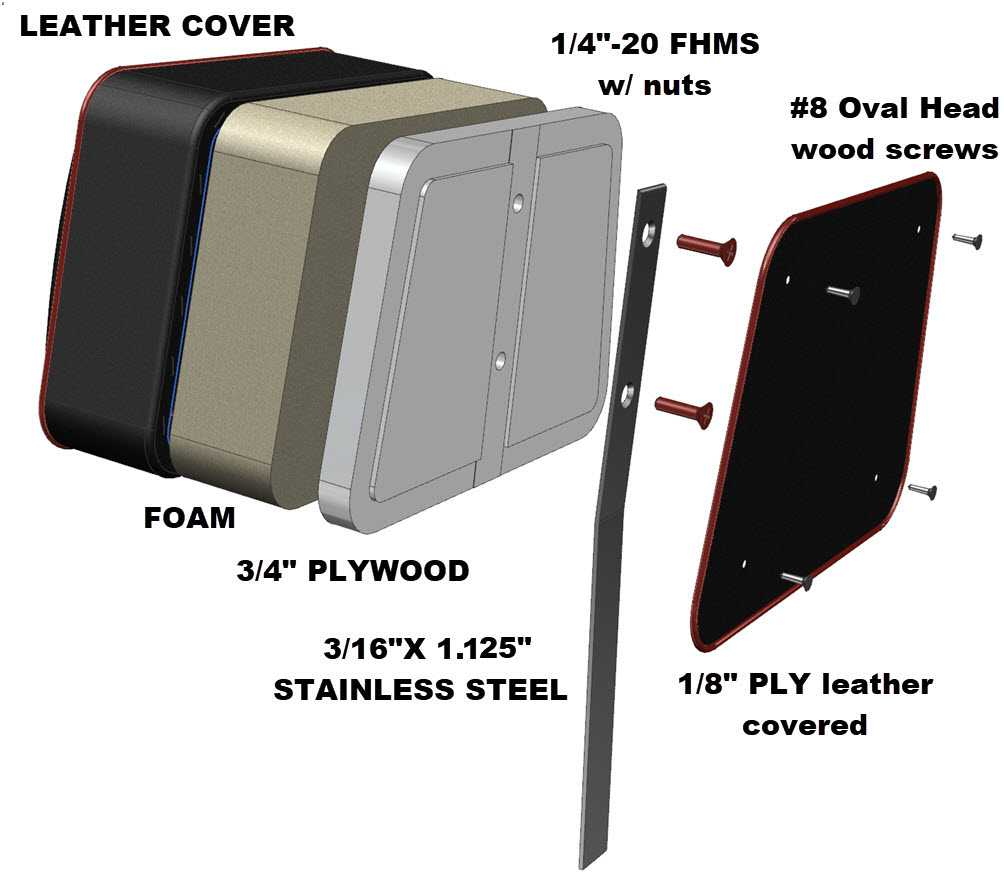
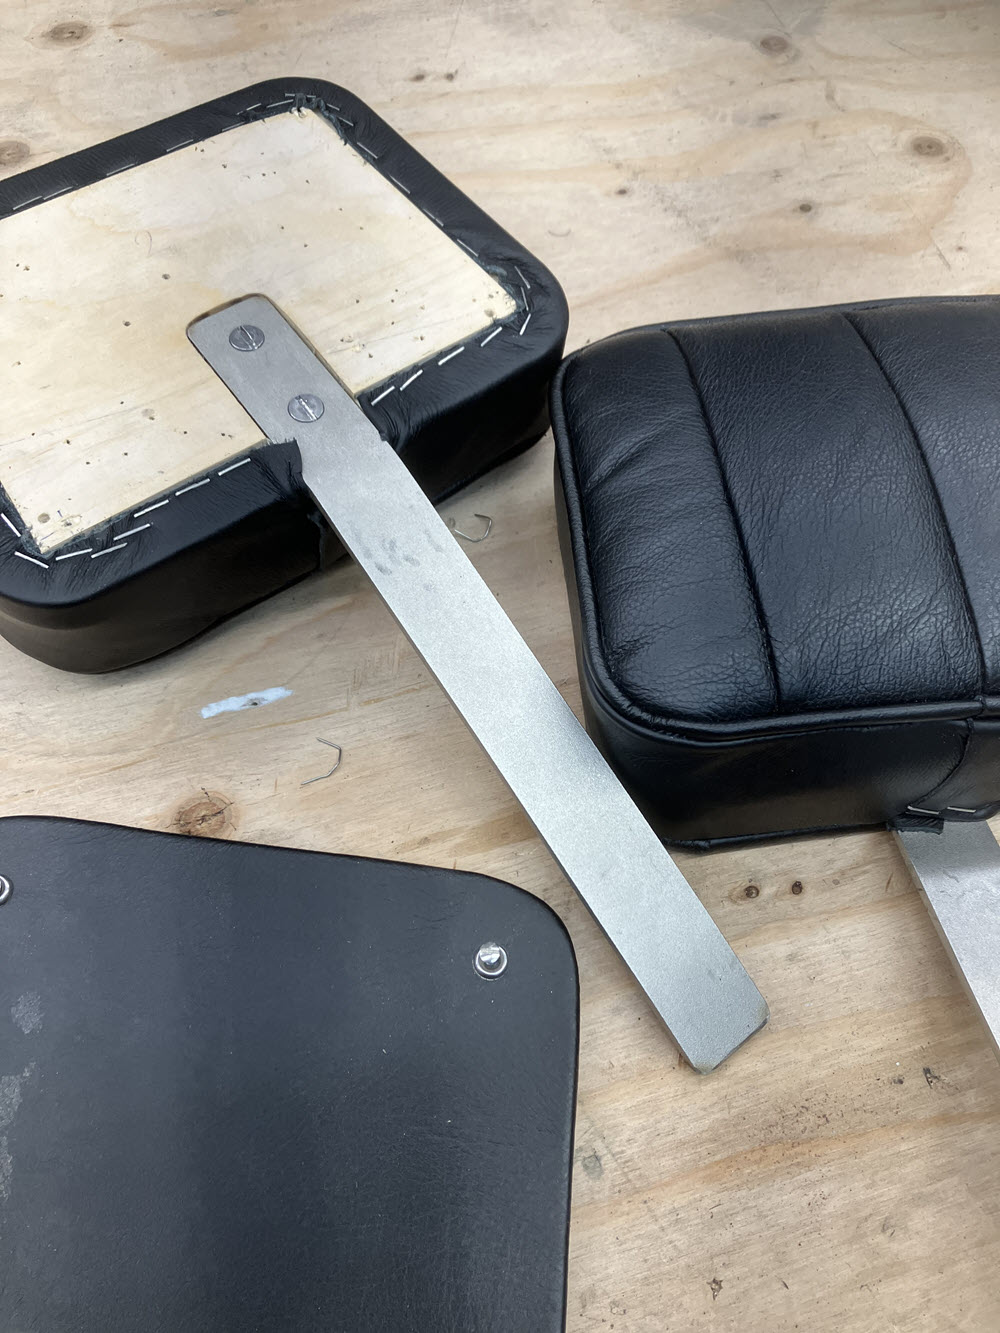
Headrests
Neck injuries are no fun. I have experience designing cervical implants and related instruments for spinal surgery. I’m not comfortable driving without headrests. Making the headrest is no big deal; a piece of stainless steel, a piece of foam and leather or vinyl covering. Attaching it to an existing Morgan seat is not so obvious. On four-seater type seats where I added vertical tubes and sheet metal backs I simply cut a slot in the original top tube and weld guide material between the vertical tubes. A nut welded to the sheet metal back provides support for a 1/4″ threaded hand knob for up and down adjustment.


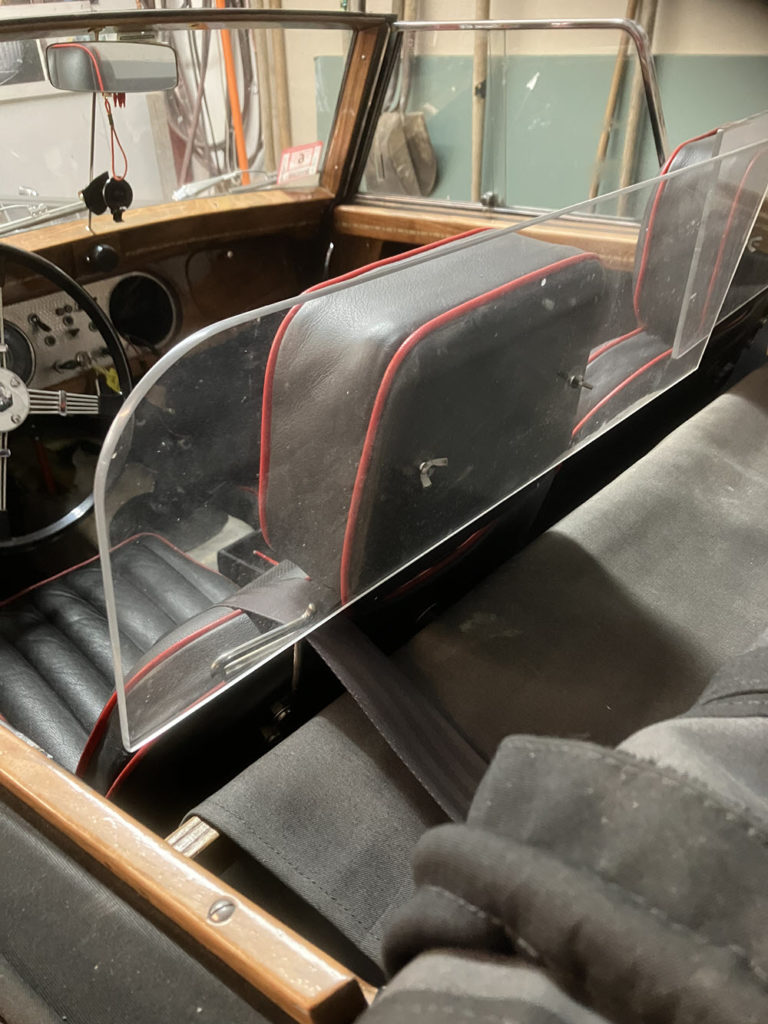
Driving for long periods at a time is tiring. Sidescreens help to minimize the beating from the wind. I tour with my DHC and have added Acrylic wind deflectors to the back of the headrests. Big Difference! Worth it for any long trip and easily removeable.
Bench Seats:
Oringinal seat backs have coil springs; not bad but they add a lot of thickness to the seat back. When I sit in an original roadster; particularly flat rad cars, the steering wheel is too close for comfort. The seat back can’t go back so the only option is to make the seat back thinner. I start with 1/2″ thick Baltic Birch or euivalent hardwood plywood and use the zig-zag springs. When installed the springs bow about 1″ from the plywood back and are every bit as comfortable as the original. Note: This is a lot of work. Is it worth it? Not really. I do it because I have the spring material sitting around. Otherwise I would just use foam.


I use the same design headrests for bench seats but the attachment is different.


Seatbelts: DHC
This section originated due to a query from Colin in Scotland asking about the seatbelt/harness in a DHC. The following is a cut-and-paste of my reply. It is followed with some examples of seatbelt installations in other Morgan models. NOTE: Everything applies to pre-1969 four wheel models. I know nothing about later models.
The first time I do anything it usually works but… The second time it is better. Perfection may come with the third try. The fourth try is usually a disaster because of overconfidence. I mention this in starting because I have put many seatbelt/harnesses in Morgans over the years but only once in a DHC; my BENE. Looking back thirteen years at this one and only try, I see that even though it has worked just fine the design leaves a lot to be desired. Caveat Emptor.
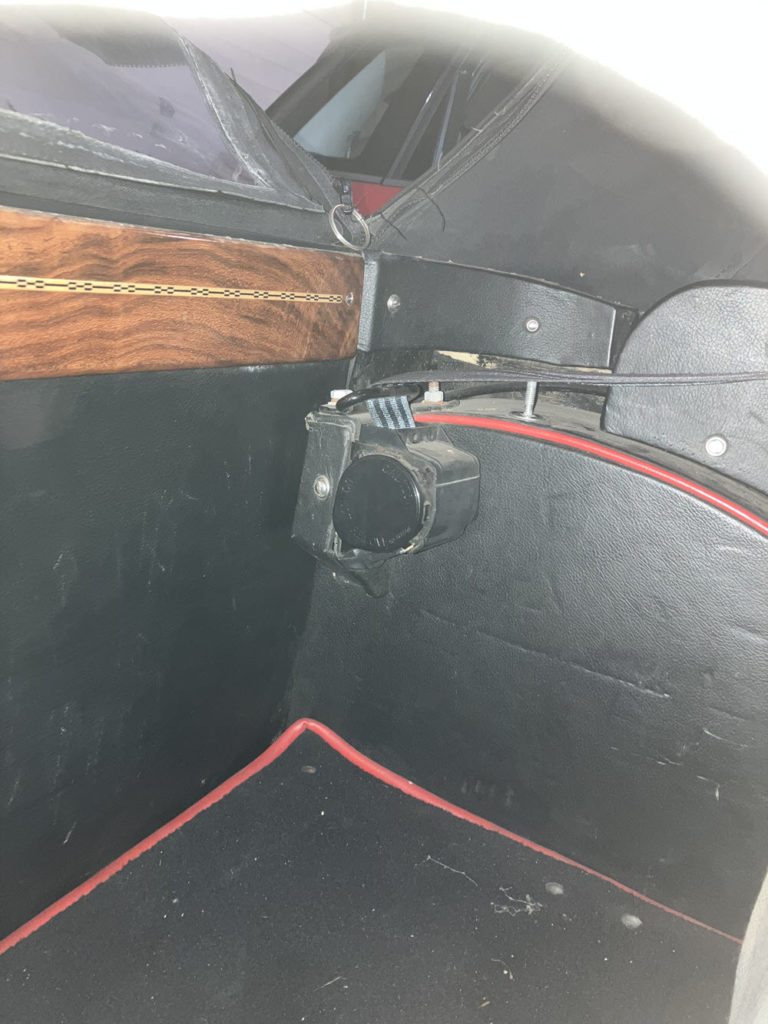
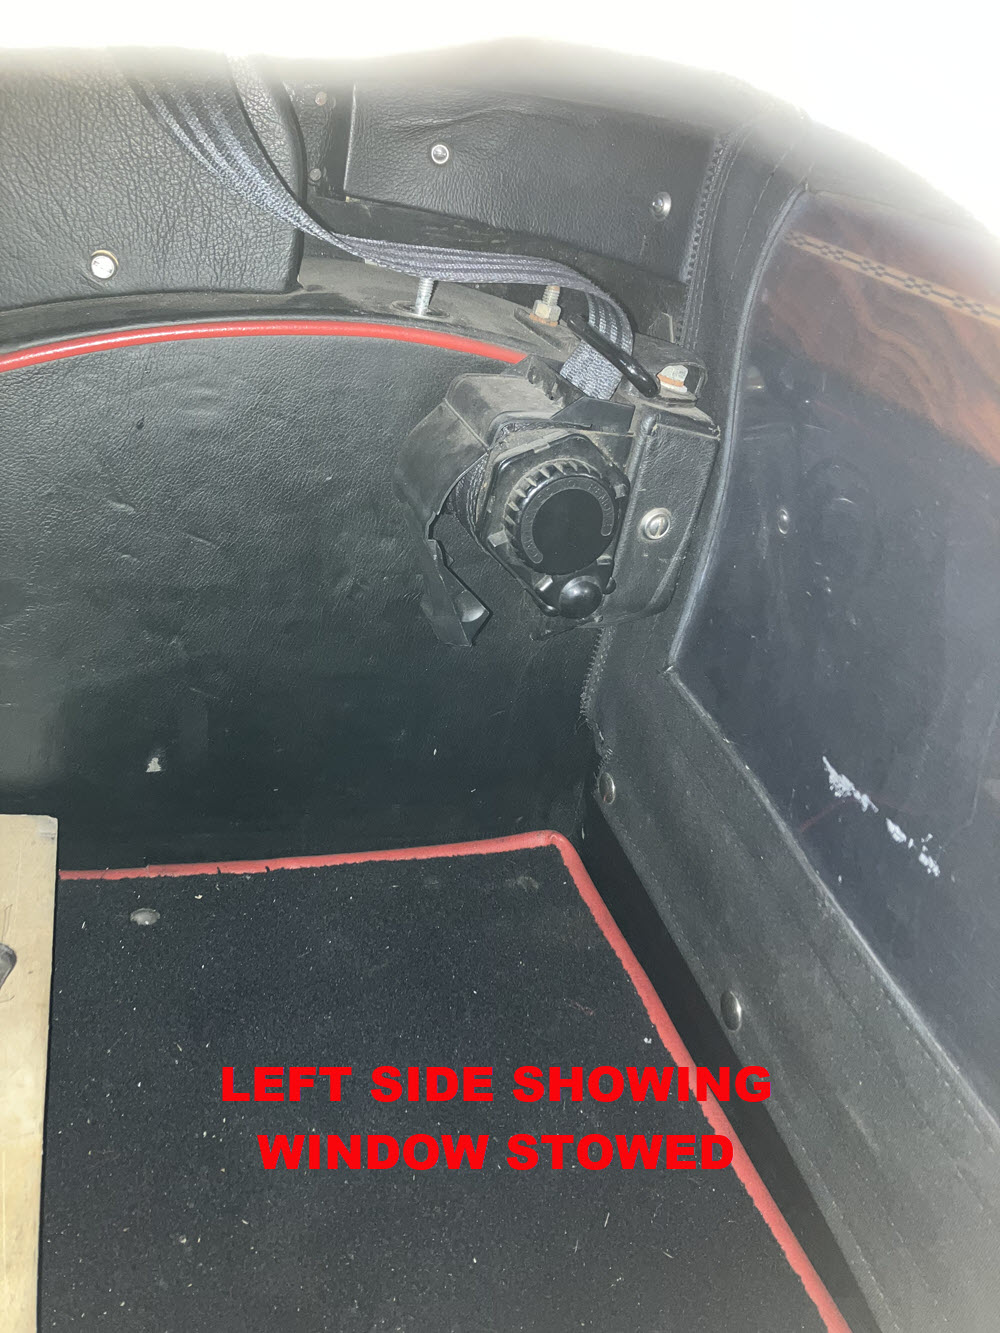
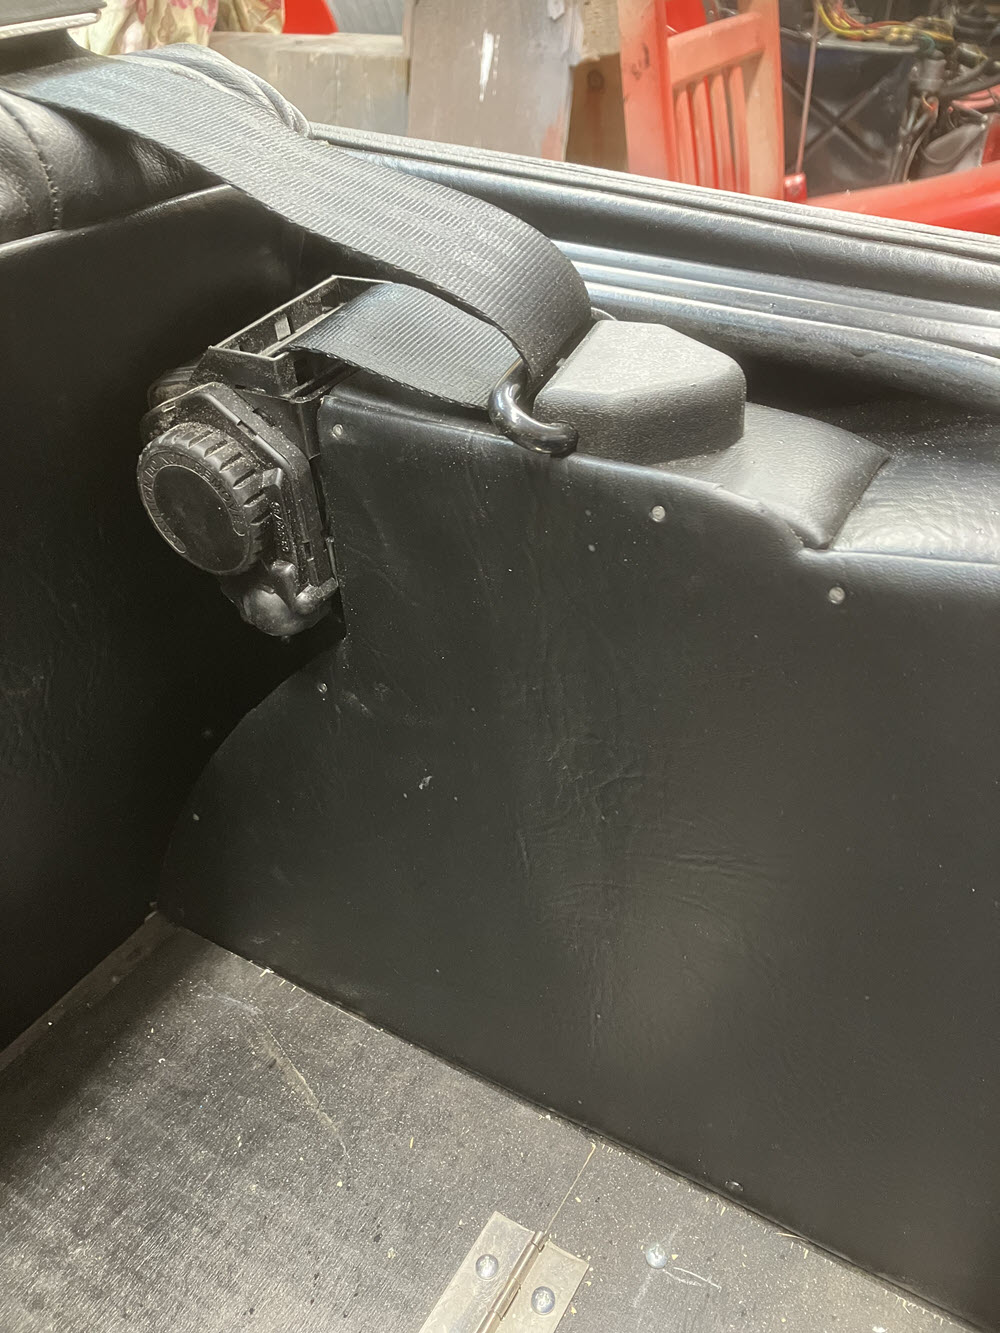
The top of the wheel arch is narrow on a DHC because of the intrusion by the hood structure. A bracket could be made at the front that would overhang the wheel arch enough to position the inertia reel sufficiently inboard to clear the obstruction. The belt would then travel back to the top of the wheel arch where a second bracket would be needed for the seat belt loop. I use ALL the package tray space when touring and therefore want the minimum intrusion.
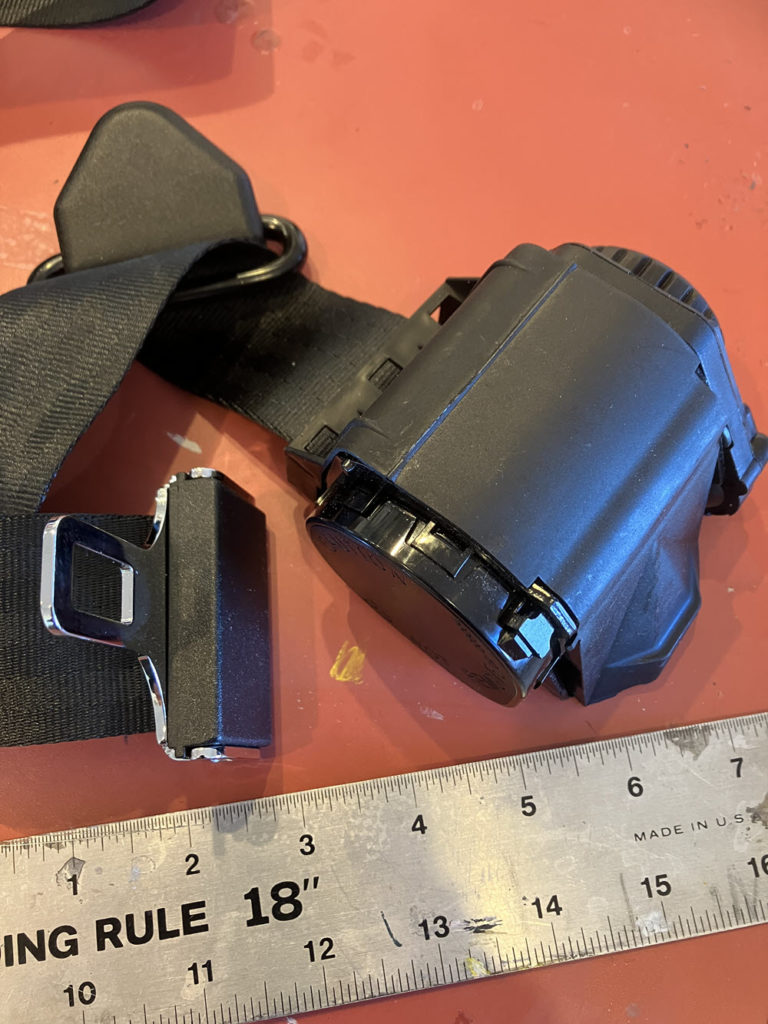
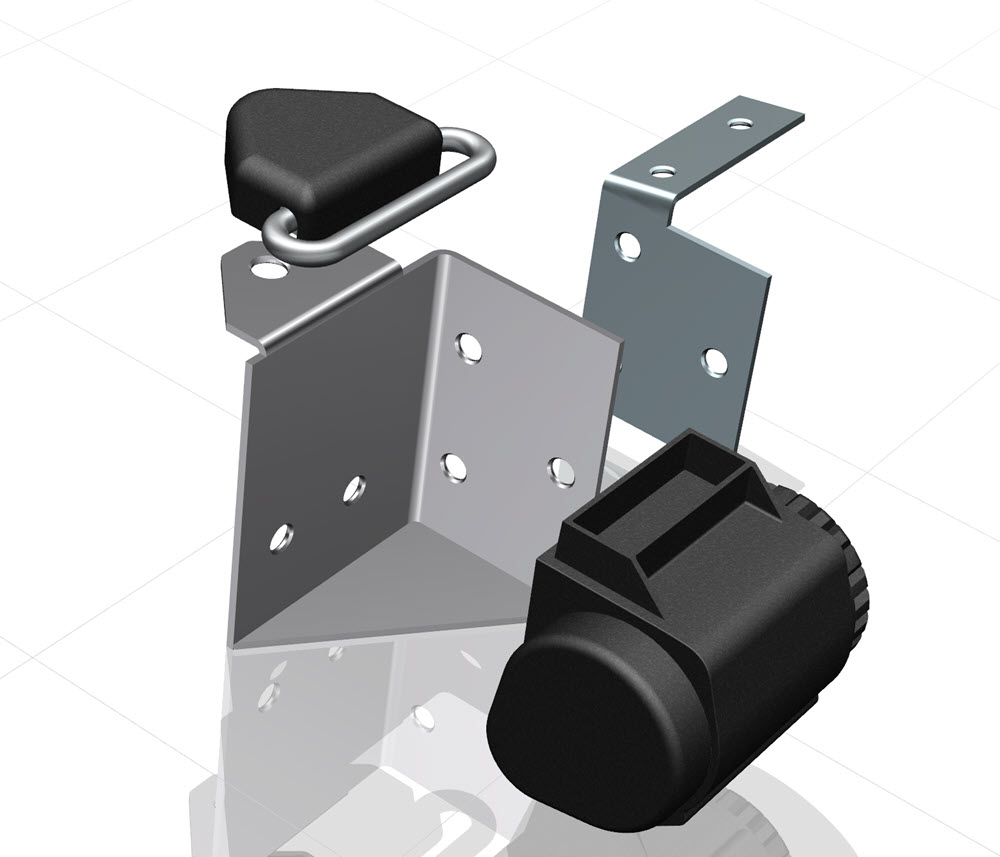
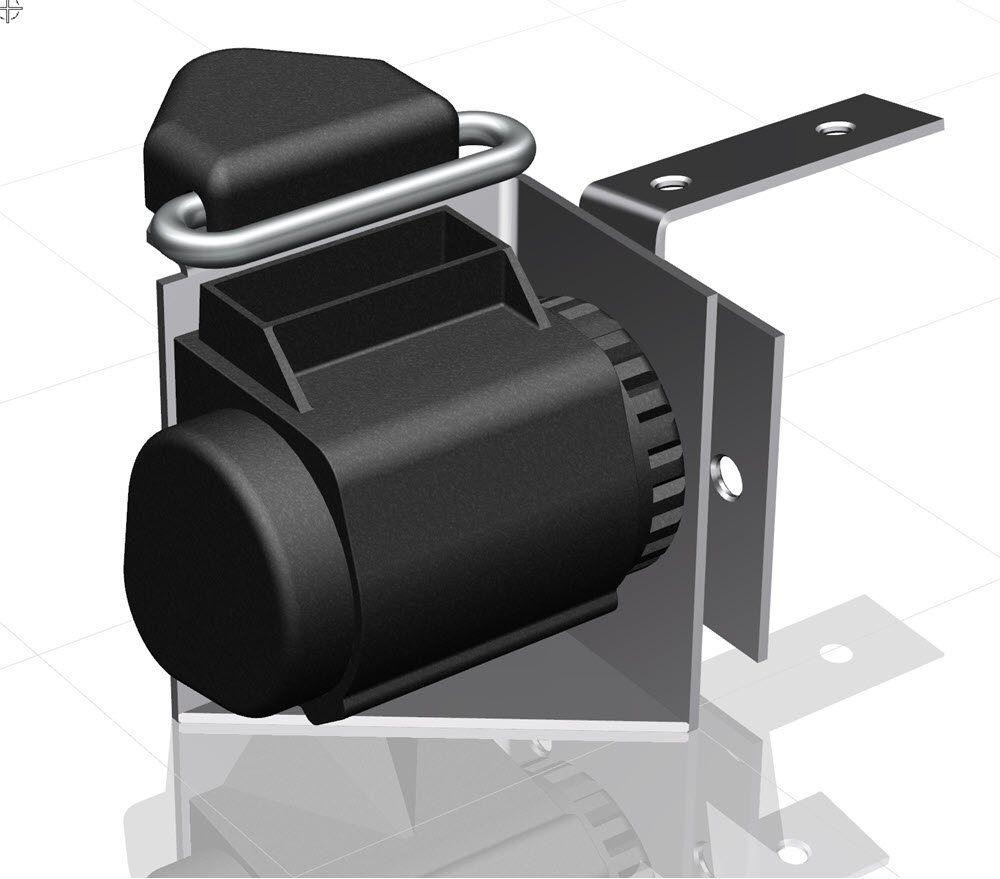
This is the harness assembly I use. I buy it online from Seatbelts Plus. The installation instructions say that the unit must be installed with the mounting surface verticle.
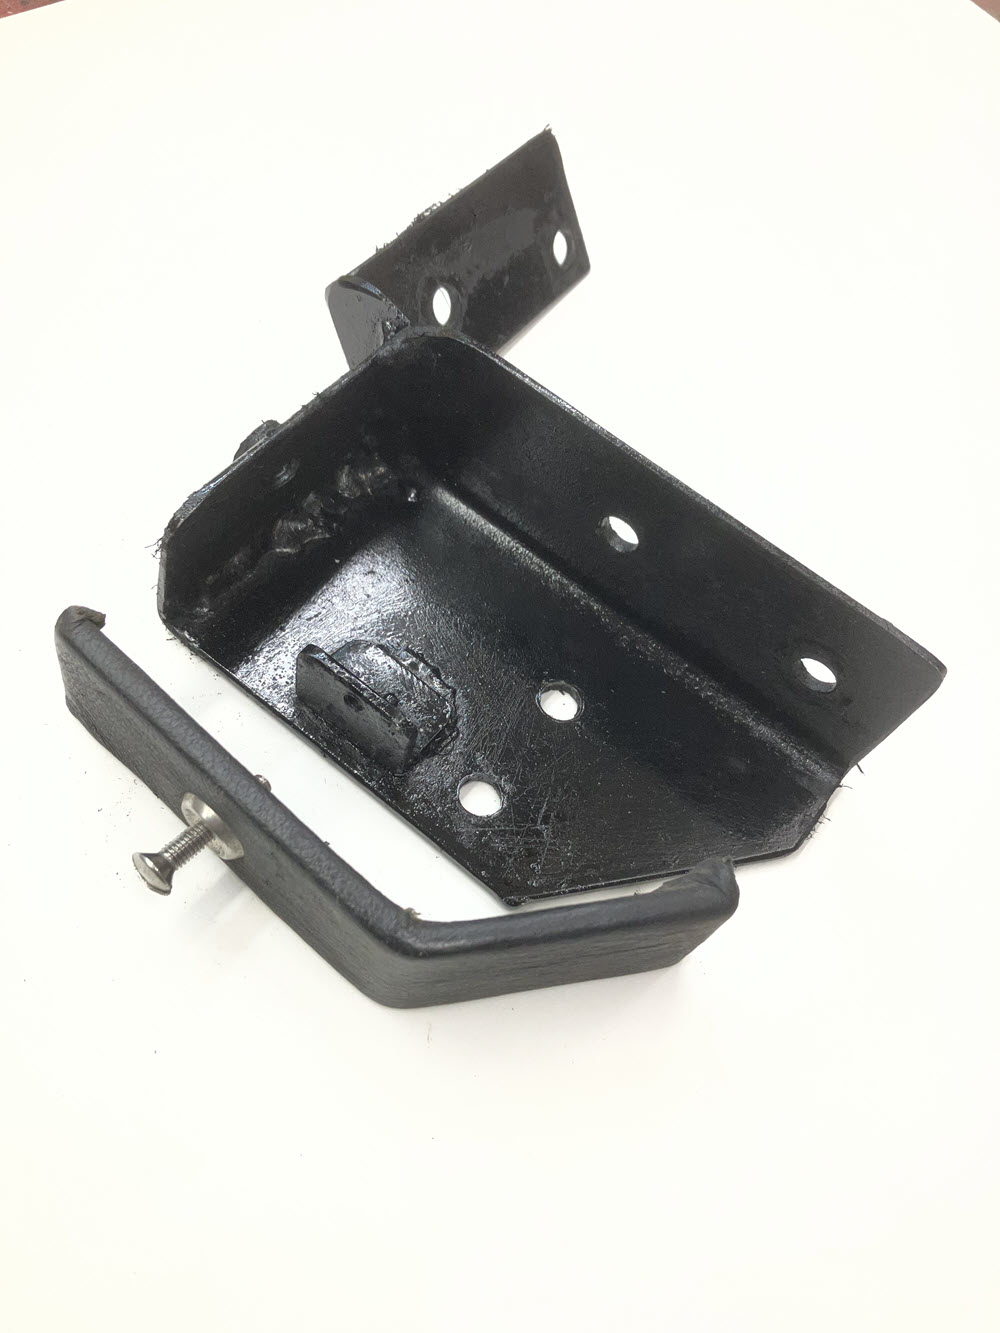
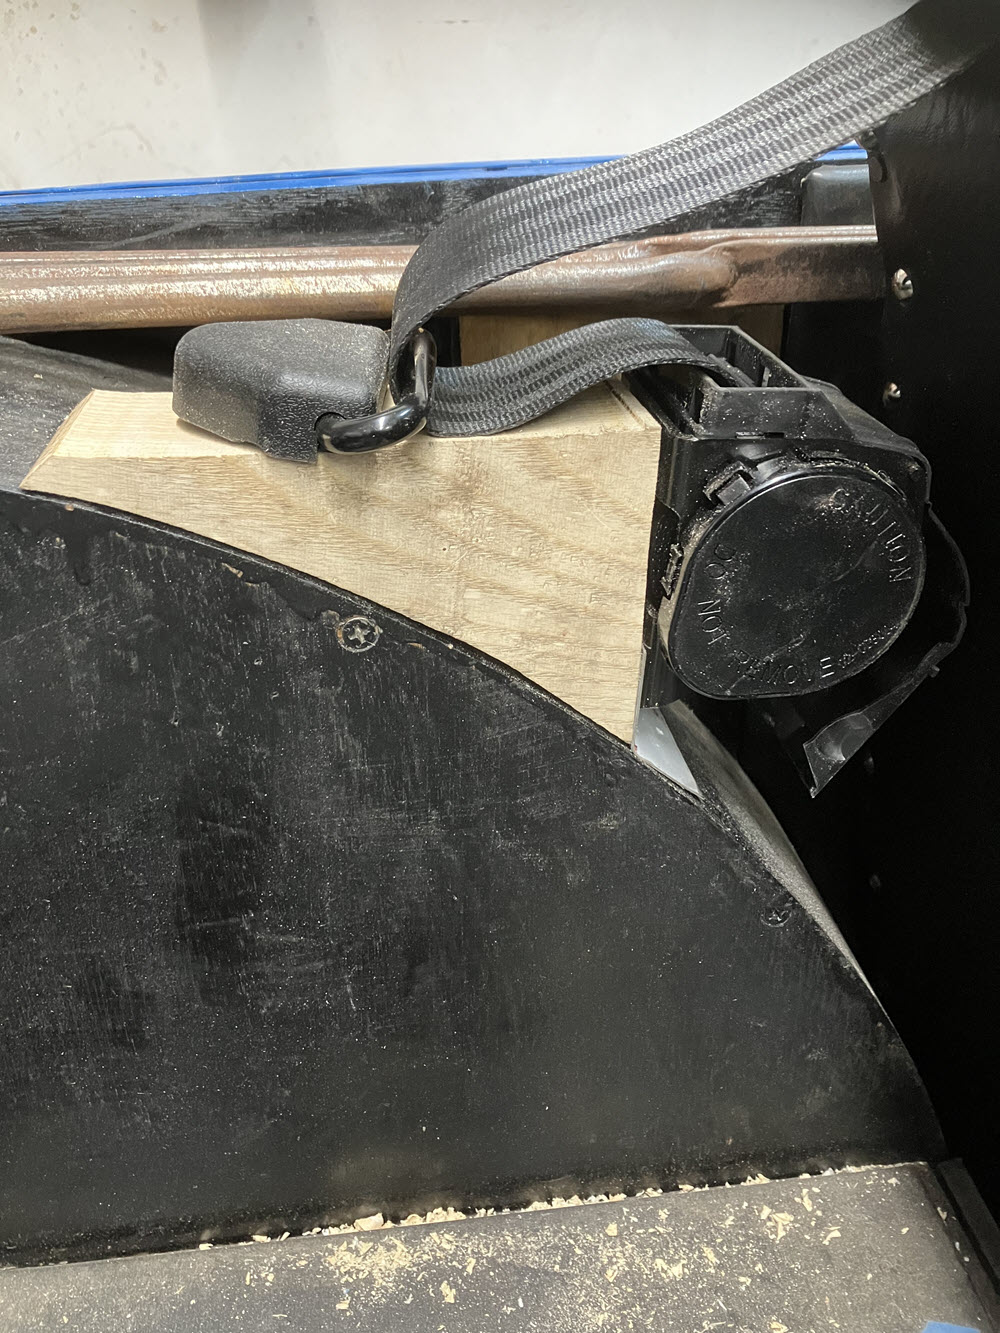
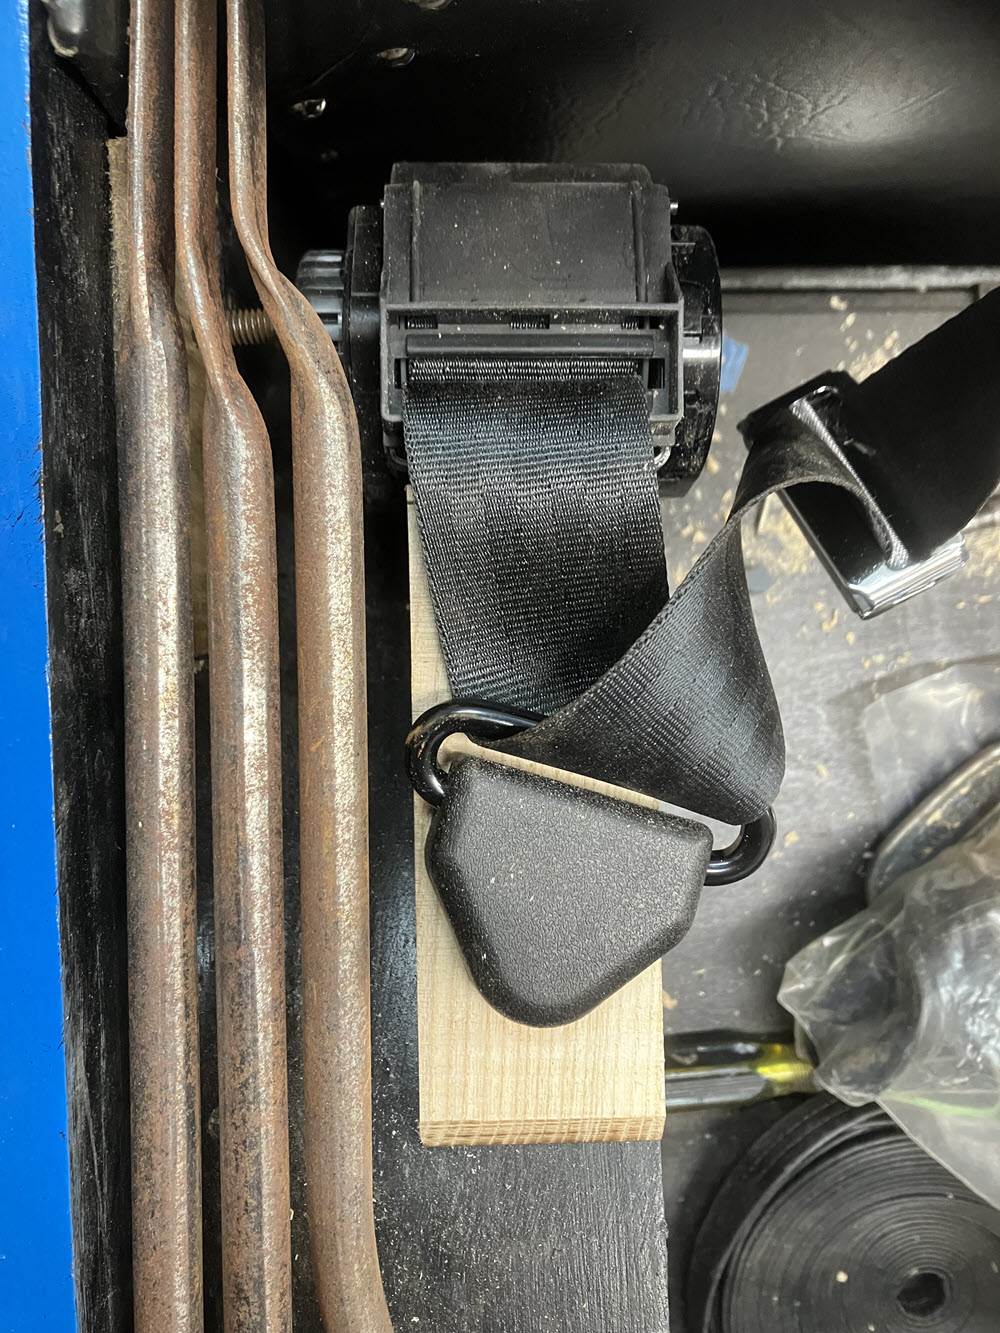
This is the bracket assembly I fabricated for Bene in 2013. In hindsight I can only assume that the original design was influenced by some scrap angle iron that was lying about the shop. It is cut, bent and then all the joints welded closed to make the bracket.

Two parts: The bracket that mounts the reel and harness loop and a steel strap on the inside of the wheel arch. Both parts are through bolted, sandwich like, through the ash and plywood of the wheel arch. The top part of the bracket has the flange portion cut away and it is slightly bent to conform to the angle of the wheel arch. I think that should there ever be a collision that results in these brackets ripping out I won’t have anything to worry about; ever.


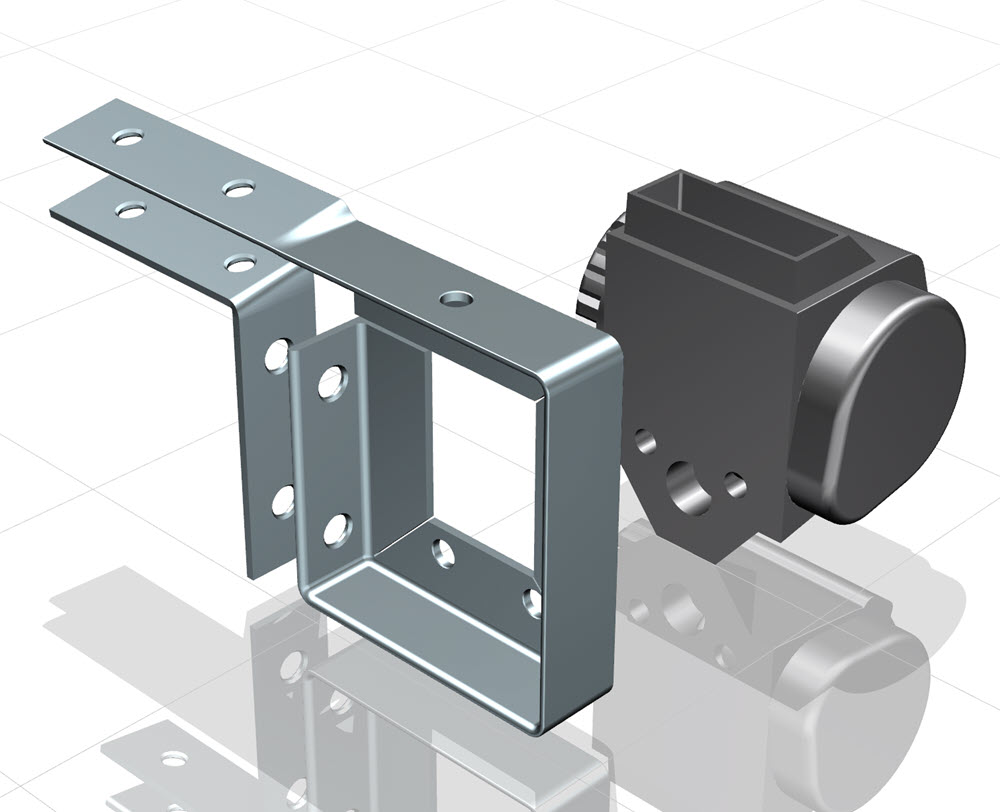
So looking at it now I am sure I could do something a bit tidier. For example:
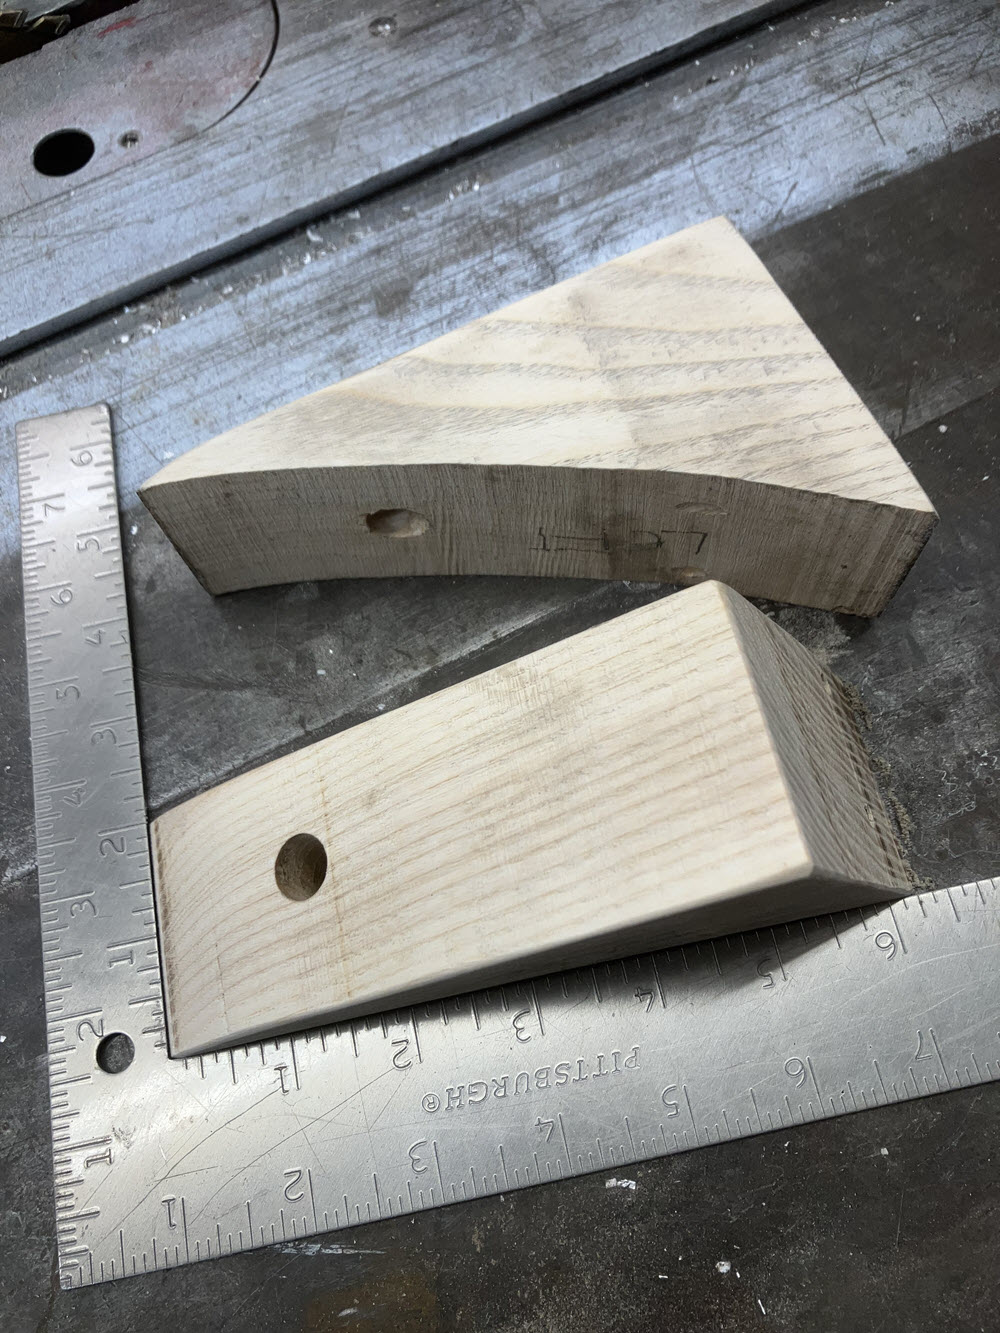
In this case I propose a 16ga sheet steel bracket either bent from a single sheet or with the gusset welded. Functionally it is the same as the existing unit; just looks a bit more ‘professional’ and may be a bit stiffer. I am sure other options will present themselves to you. Do let me know of your success.
Seatbelts: Low Body Roadsters with Bench Seats

Definitly the most challanging Morgan models to retrofit harness type seatbelts.
Seatbelts: Rear Seats of Four Passenger Moggies….
Lap belts are not ideal but I have yet to devise a satisfactory shoulder harness setup. Maybe next time. Update April 2026: The time did come… see next section.
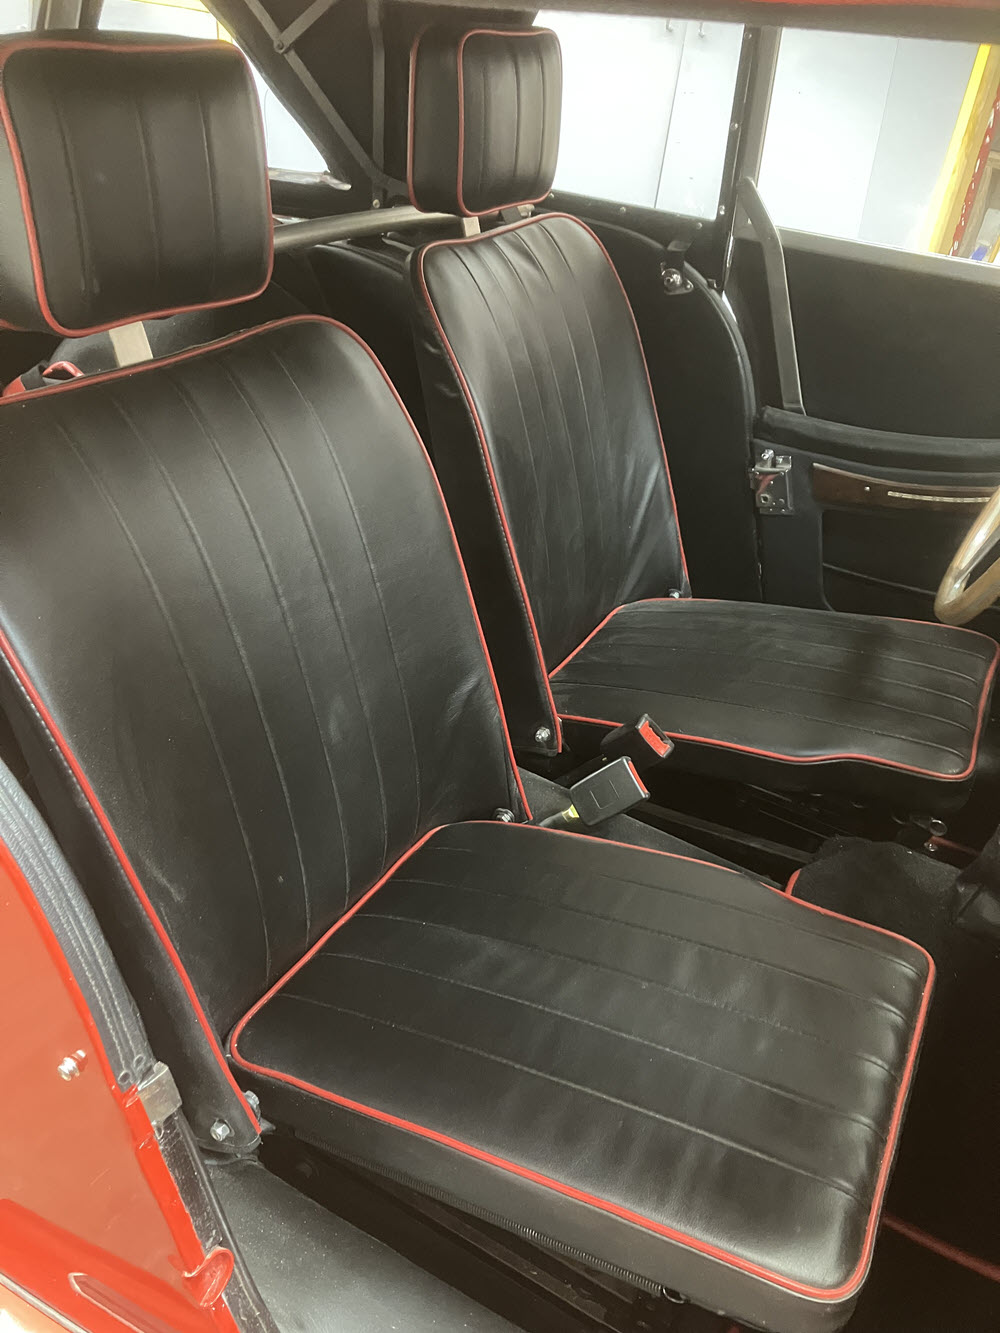
I have installed lap belts for the rear of at least four cars. I say they not ideal because they can cause spinal injuries in the event of a serious crash. But; they are certainly better than nothing.
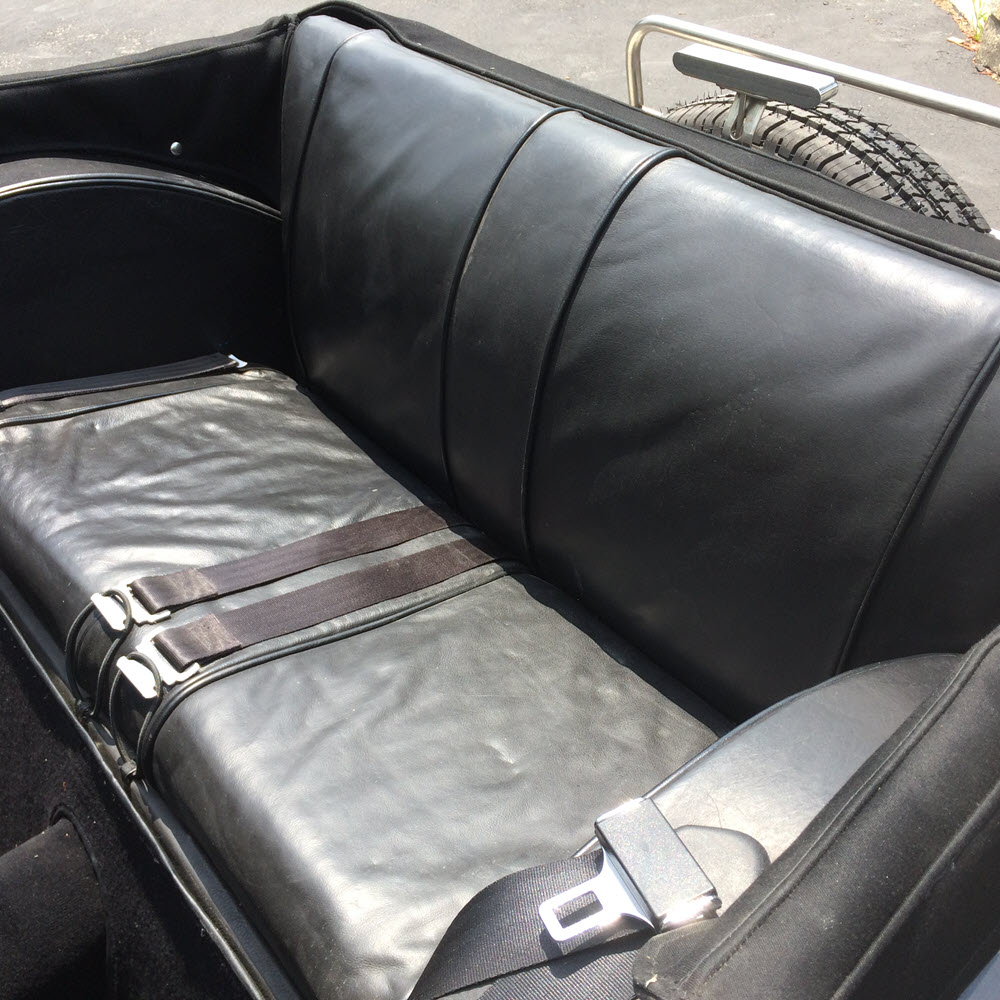
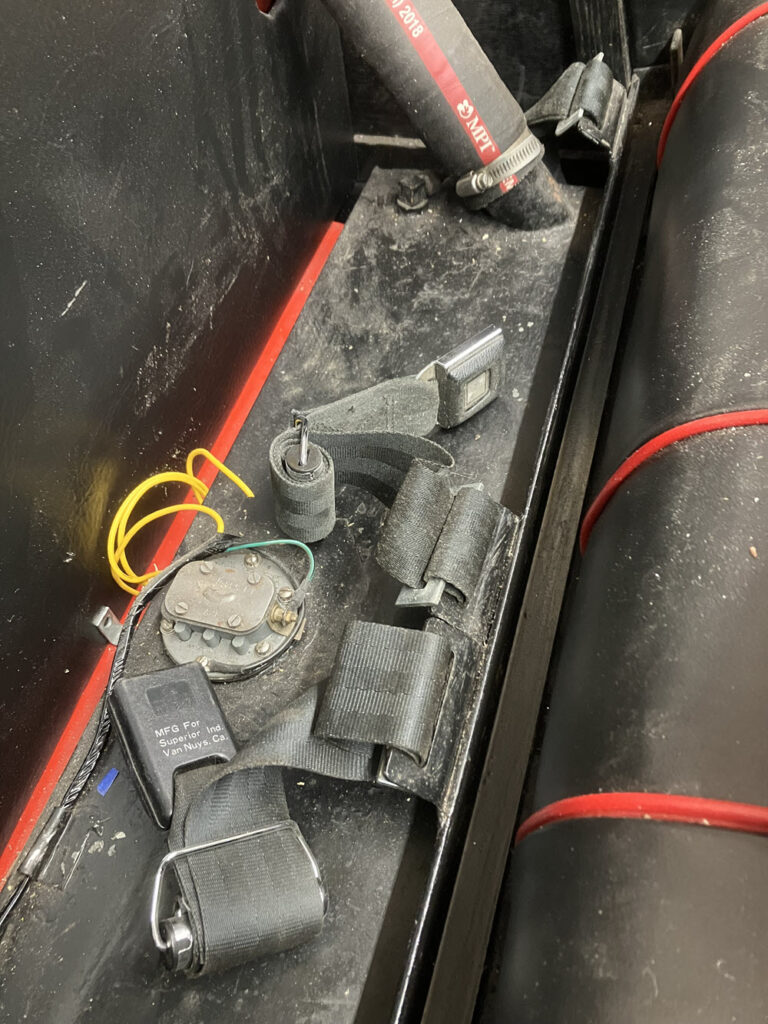
One example showing seatbelt ends held by elastic cord loops at front of seat (my prefered solution).

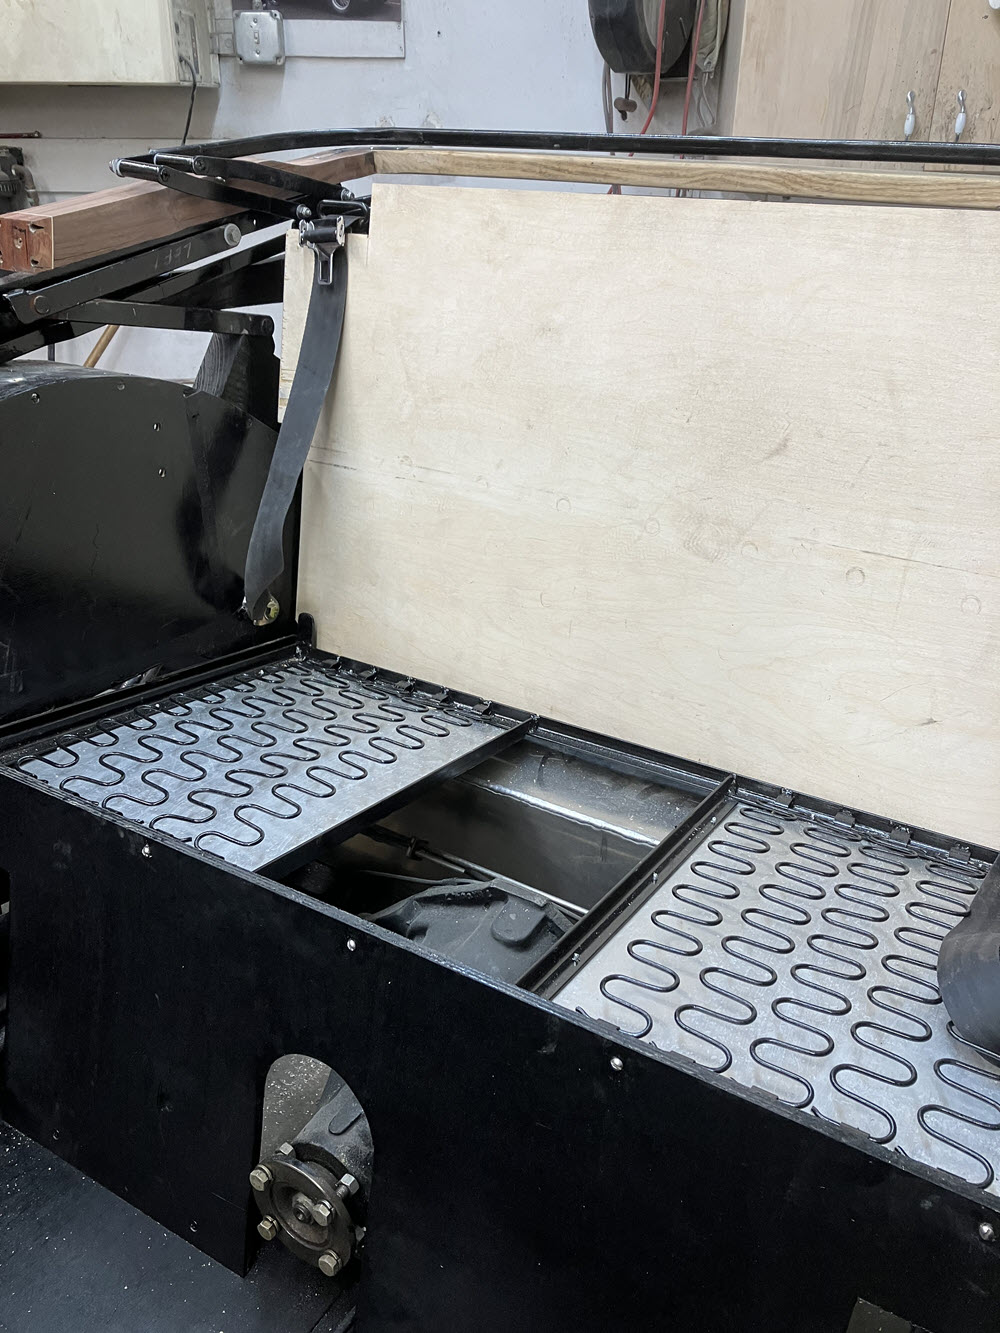
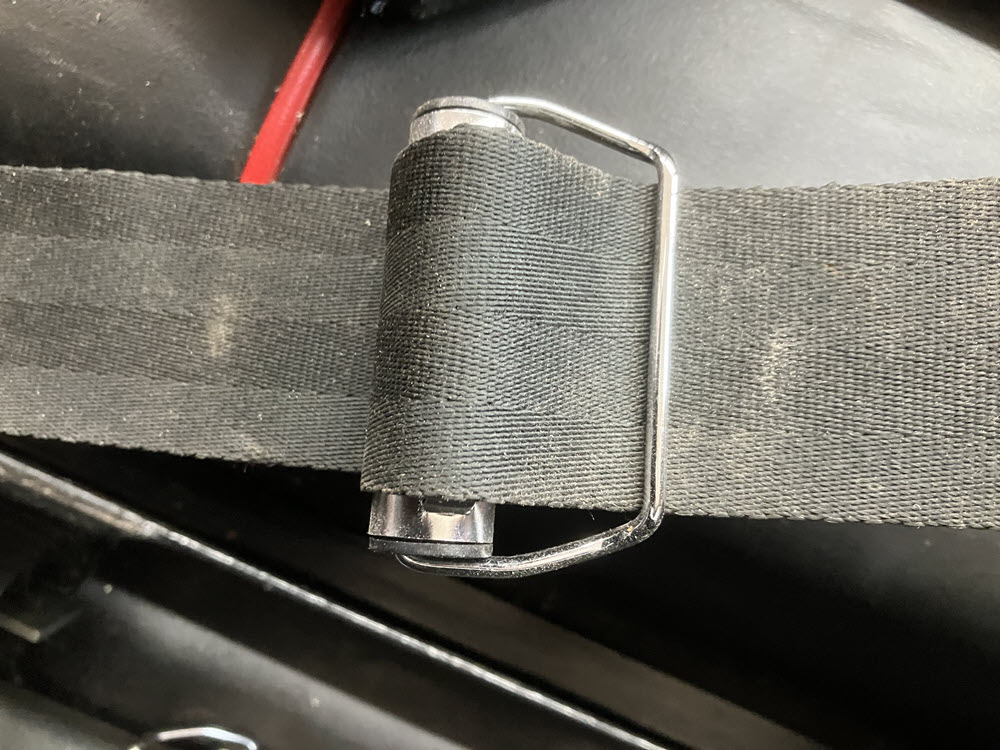
Here the seatbelts are coiled on retracting reels. These retractors are by Original Equipment Reproduction. Other brands are available
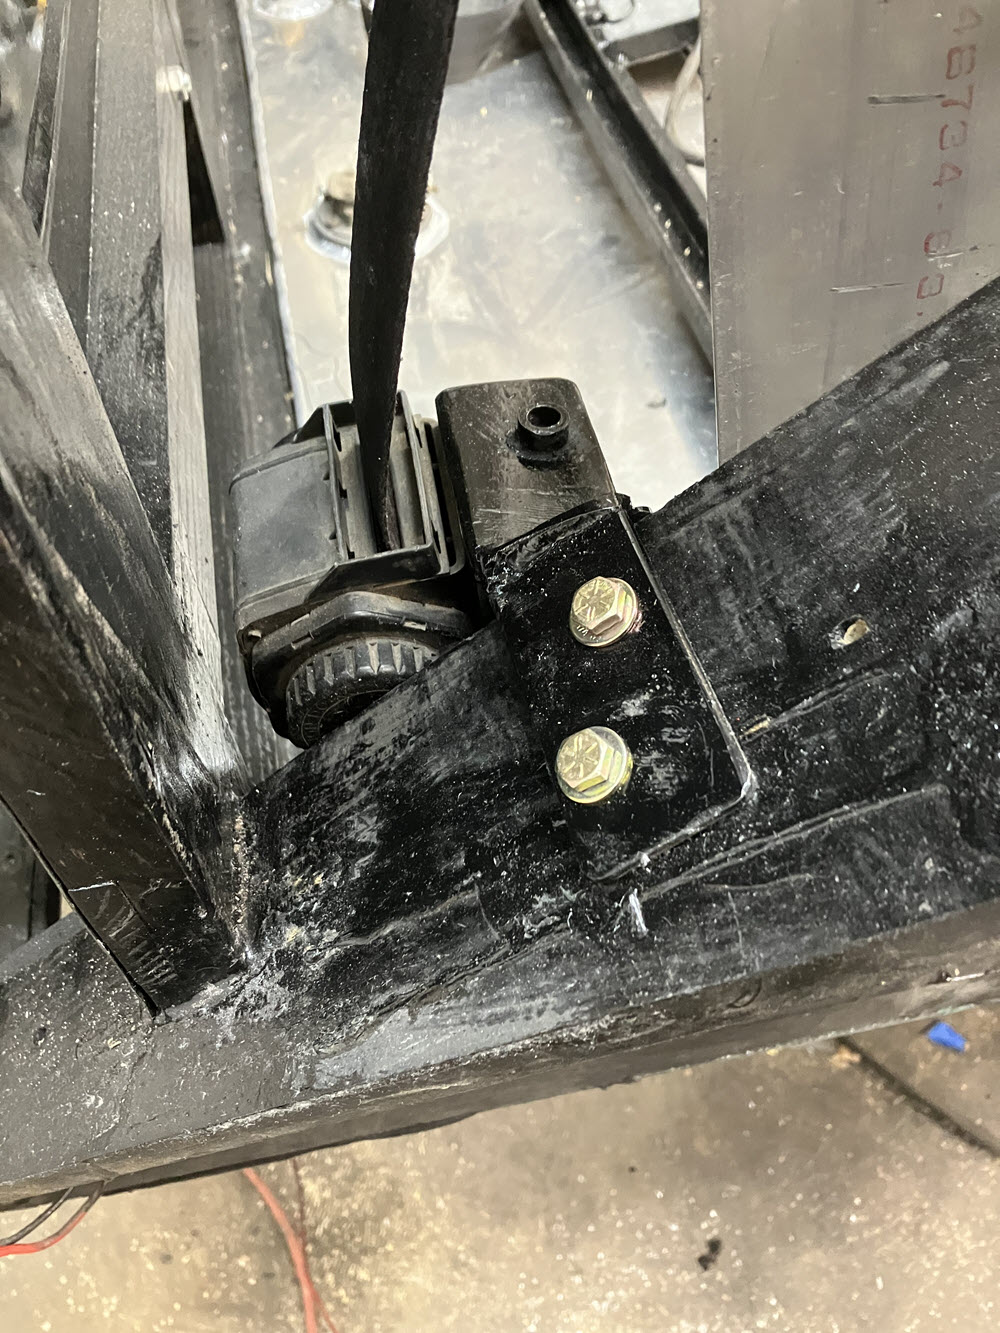
Brackets are welded to the rearmost angle iron forming the seat support. Obviously a task best done when the car is disassembled.
An alternative (note that I have not used this method) is to drill holes and mount the bracket using screws.
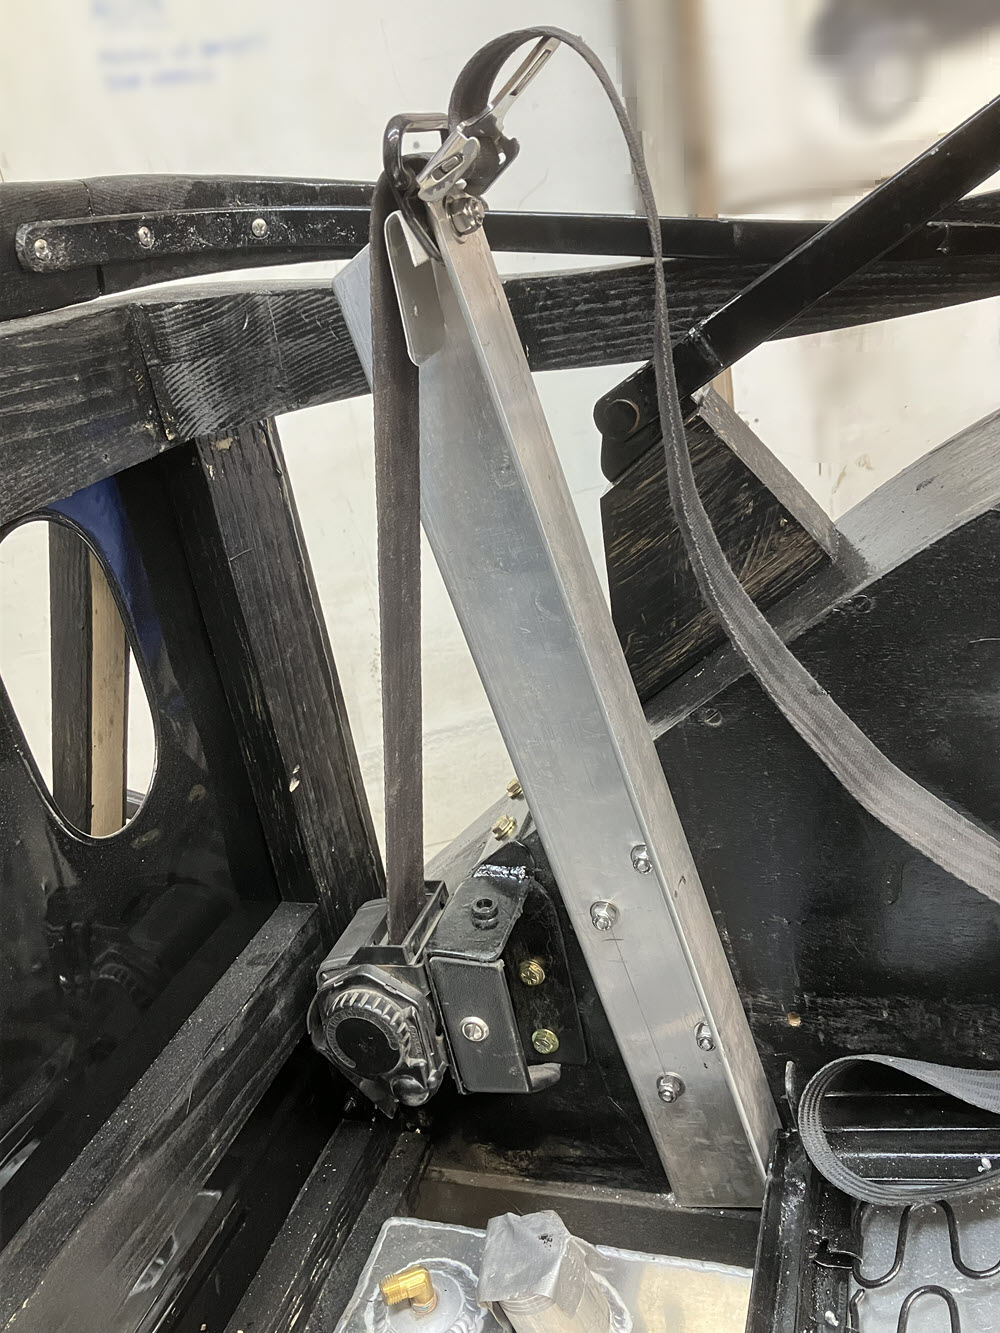
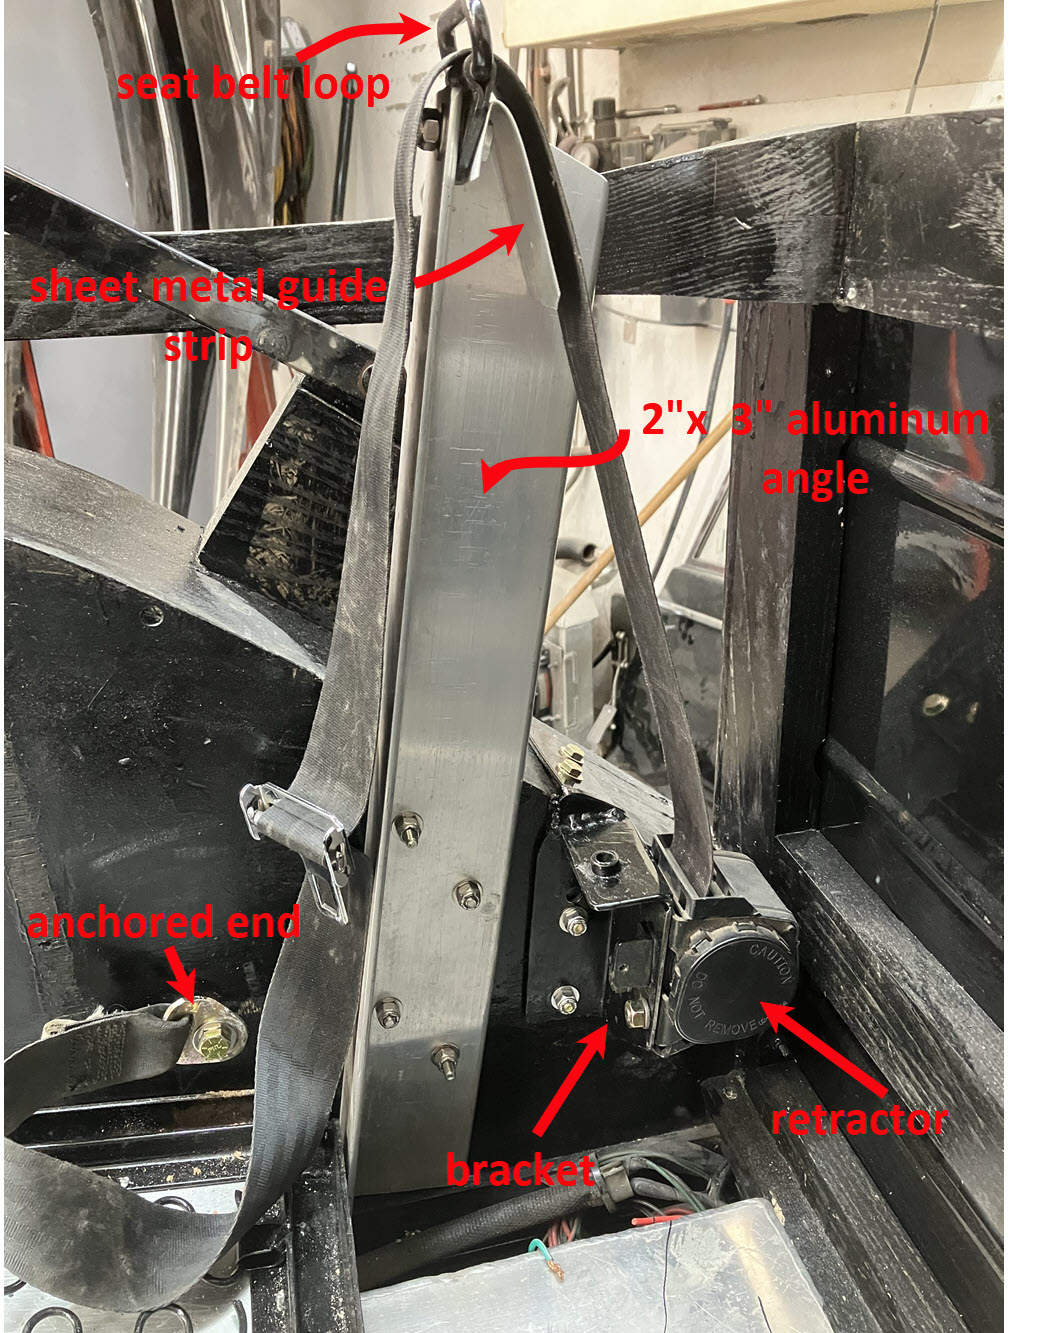
Shoulder Harness solution for the Rear Seat on 4 seaters
OK; I finally put some effort into solving this problem. The wood upright that locates the rear seatback is replaced with a legth of aluminum angle. The angle is 2″x 3″ and long enough to go from the bottom of the wheel arch to the top of the seat back. It is though-bolted to the wheel arch inner panel. A bracket similar to the one described previously in the DHC discussion is fabricated and bolted to both the wheel arch top and inner panel. The seat belt loop is bolted to the top of the aluminum angle. A strip of aluminum or stainless sheet metal is bent to provide a smooth transition for the belt going through the loop.