Making a firewall is not easy but it is a rather satisfying accomplishment. I have made six over the years so I am no expert. I have tried several different approaches and think I have made all the blunders likely for an amateur.

Click on any image to start slide show.

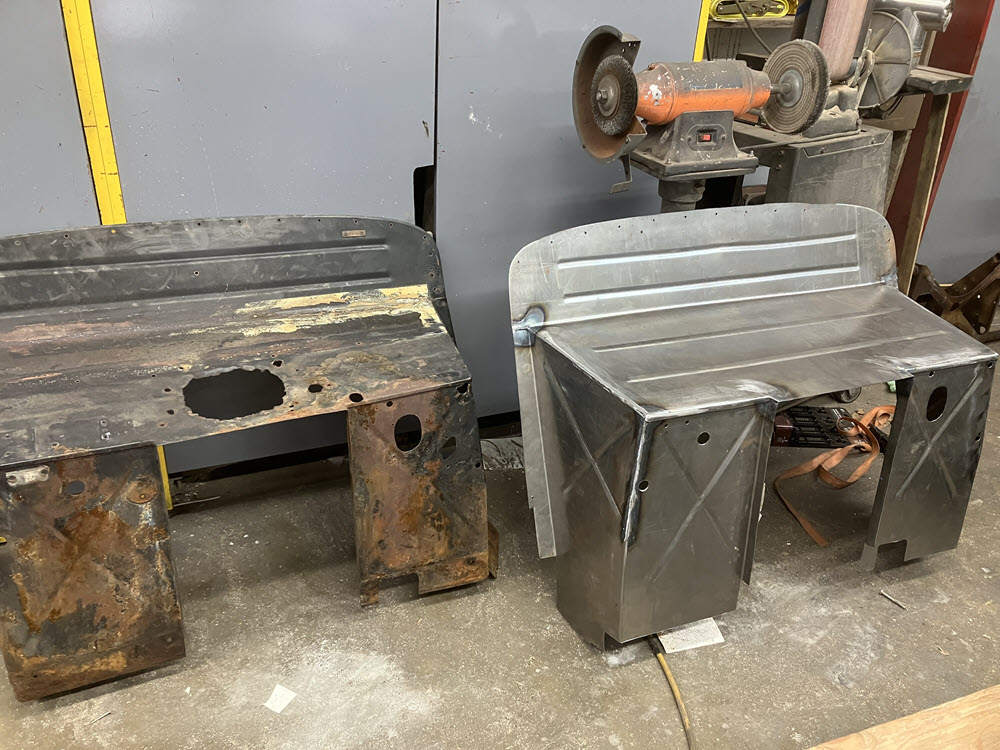
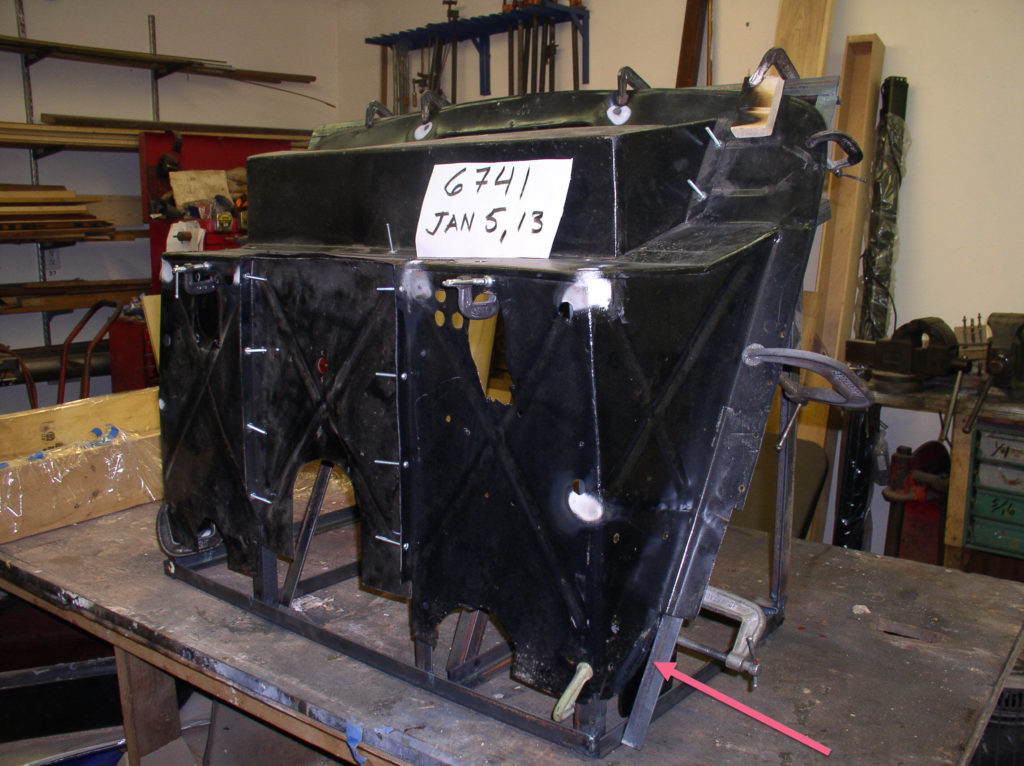
Update: Speaking of blunders… When I first wrote this in 2018 I had only made six firewalls of which only two were 4/4s. Now it is 2025. Over the years I’ve had to make a few more +4 (and one +8) firewalls. Now I have another 4/4 project in the shop. A close look at the original shows that it may not be three pieces the way I’ve made them previously. This example appears be one piece with many folds! If the lower front corners are welded I not able see the seam. Whether original or not it is doubtful that I can do the single sheet origamy method. Too many folds, too many places for tolerance to build and dimensions to haywire. Look closely at the unit you are copying. Good luck if you want to give the one piece version a try. I will stick to the three piece assembly method shown above.
You need a bead roller and the ability to weld. I have seen beads, those stiffening grooves, faked but it is a lot of work and the results dubious. Better to buy a bead roller from Eastwood or similar supplier. Welding you cannot fake. For the fixture MIG is fine. For the actual welds on the sheet metal I prefer Oxy/Acetylene. TIG would work nicely also but if you are a TIG welder you do not need my advice. You do not need a break (bender). I have never had one. My feeling is that a break large enough to do all the bending I do would take up too much shop space for the number of times it gets used.
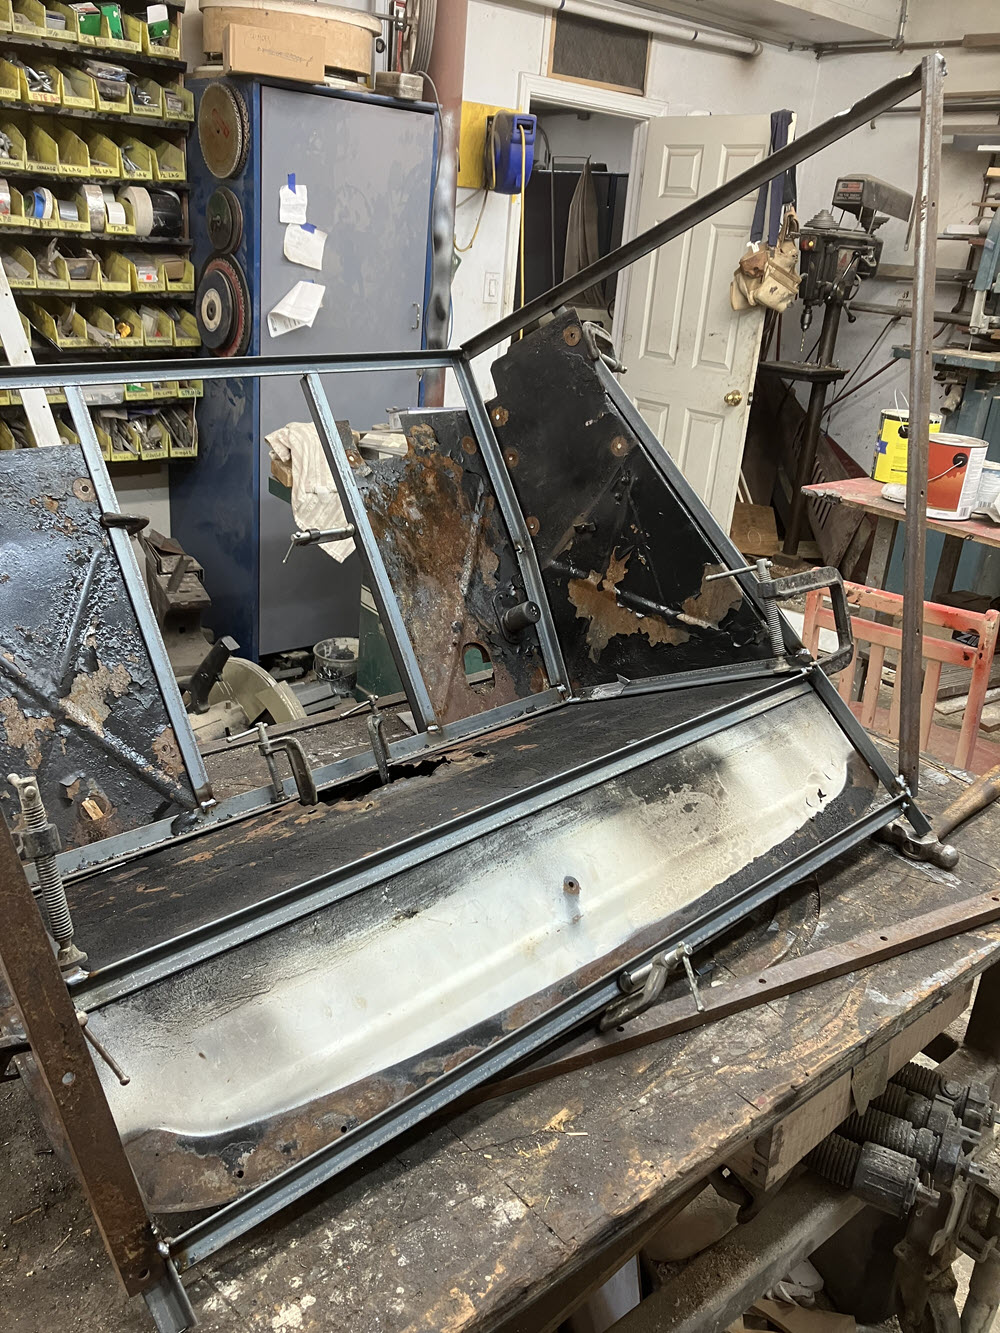
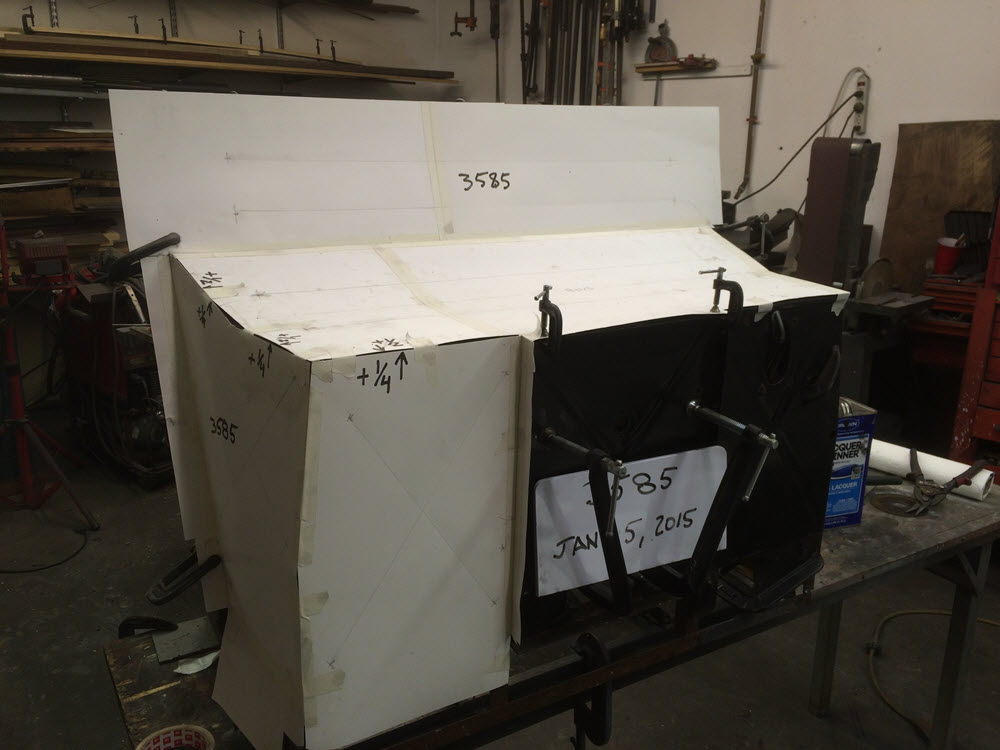
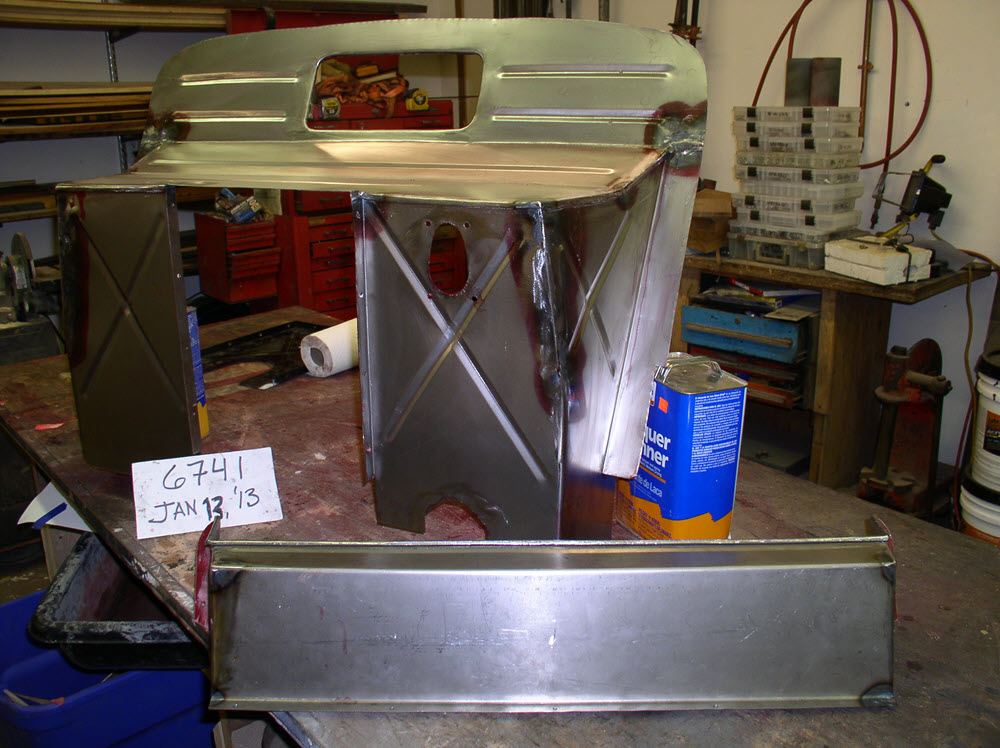
I start by making a fixture of angle iron inside of the original firewall.


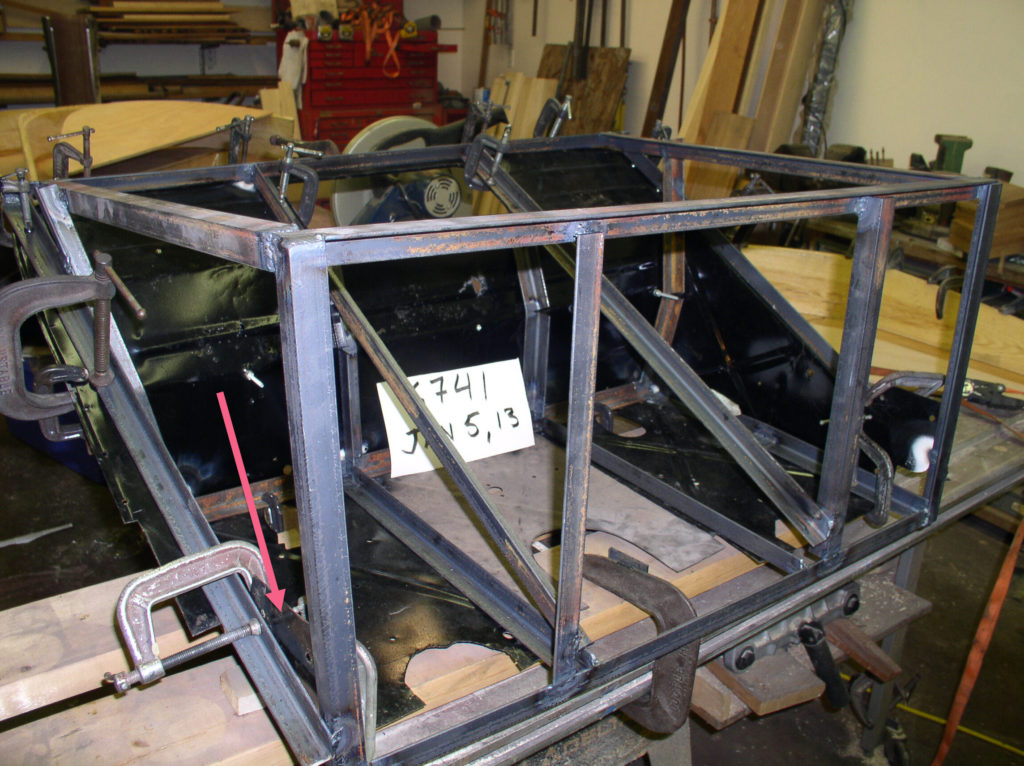

The fixture has to be fairly sturdy because you will be using it as an anvil when forming the hems. Tack weld it inside the original then remove it and fully weld it.
NOTE: Critical dimensions.
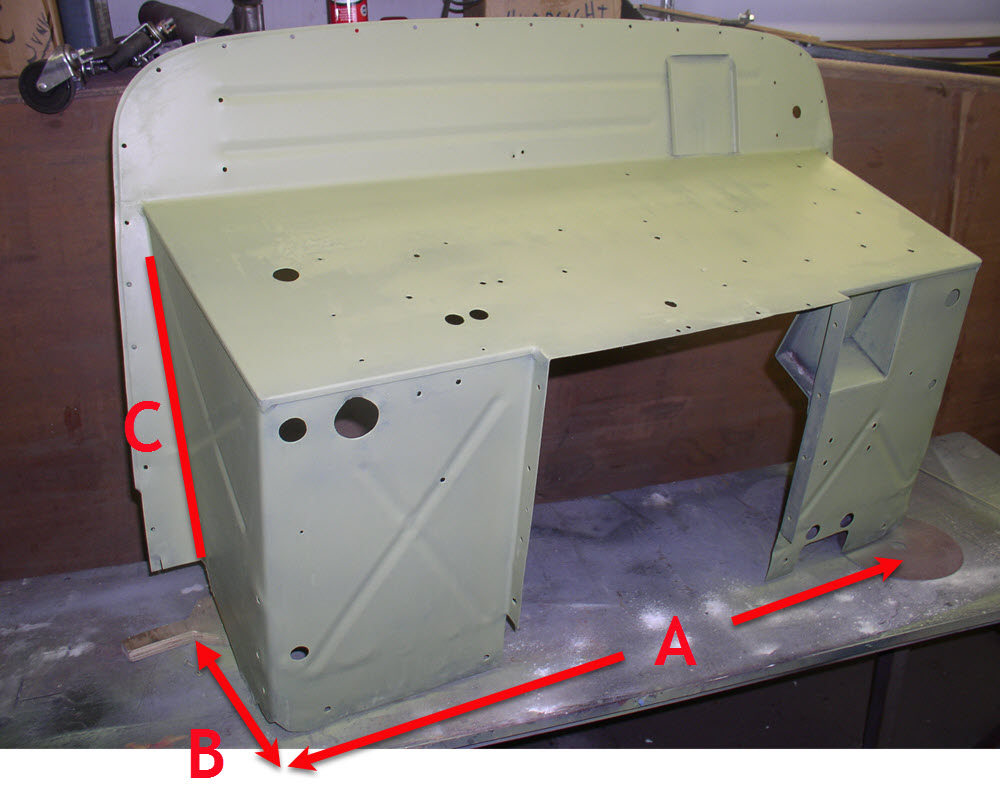
A: The lower front width must be smaller than the width of your chassis at the front crossmember. Too tight and it buckles.
B: The distance from the vertical face to the flange. This locates the body relative to everything else. Too long and the bonnet gap is big and the gap between the rear fender and the rear of the wing is too large.
C: Angle.
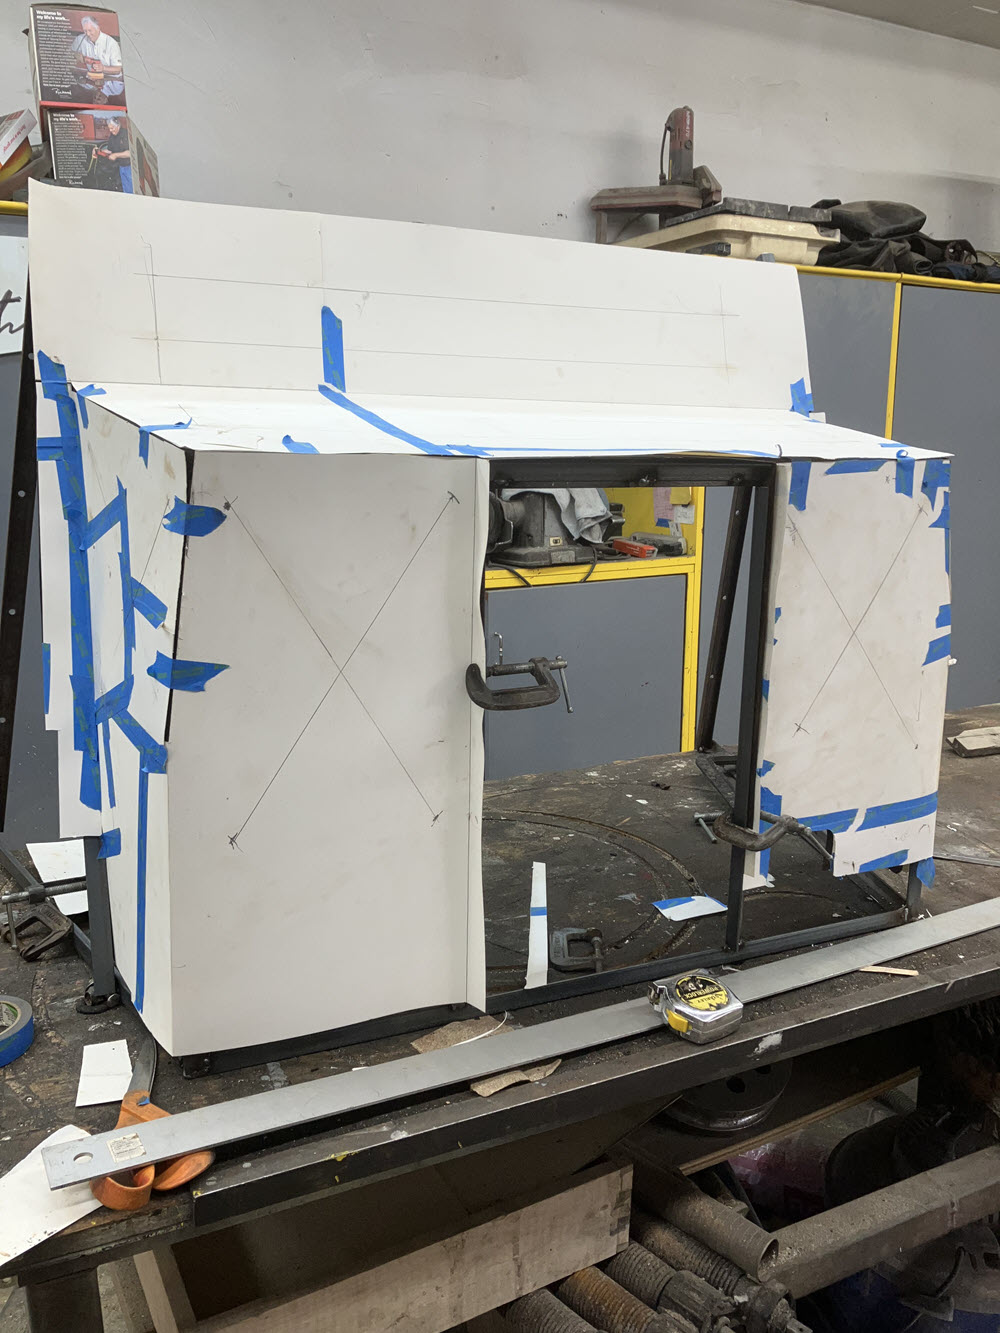
Next step is to make patterns. (I usually make patterns. When I don’t make patterns I make scrap.)You can include the hem allowance on the pattern or add it when laying out the steel. I prefer the latter.

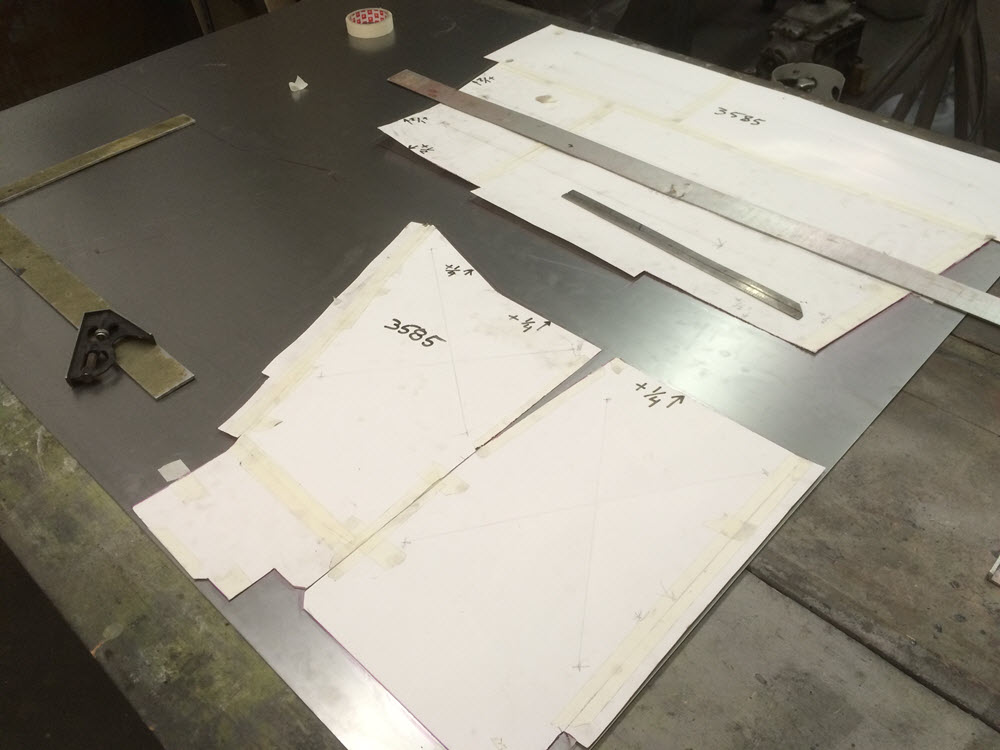
Cut the steel. don’t forget the hem allowance at the top of both side panels (+4 and +8) and double the allowance on the shelf piece.
Roll the beads


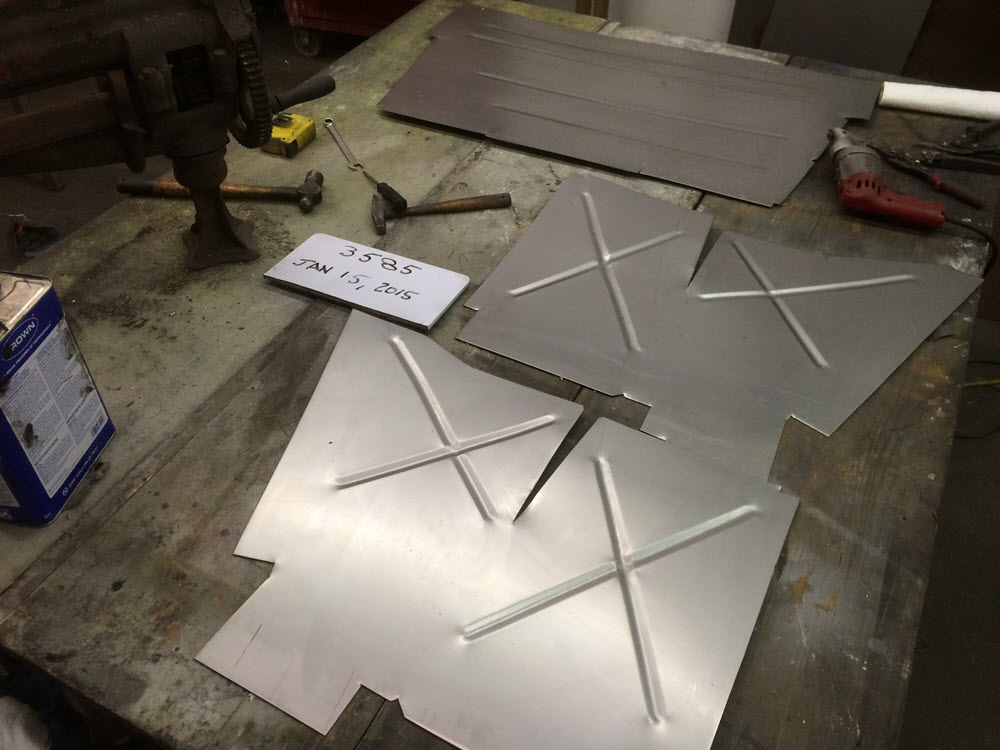
Make the bends


If you have a break fine. If not, do as I do; clamp a large angle iron on the edge of the workbench and clamp the work between another heavy angle and the bench. On small runs a body hammer works fine. On larger runs a length of hardwood and big hammer is better. Note how the steel is preloaded a bit by leaning on it while hammering the break.
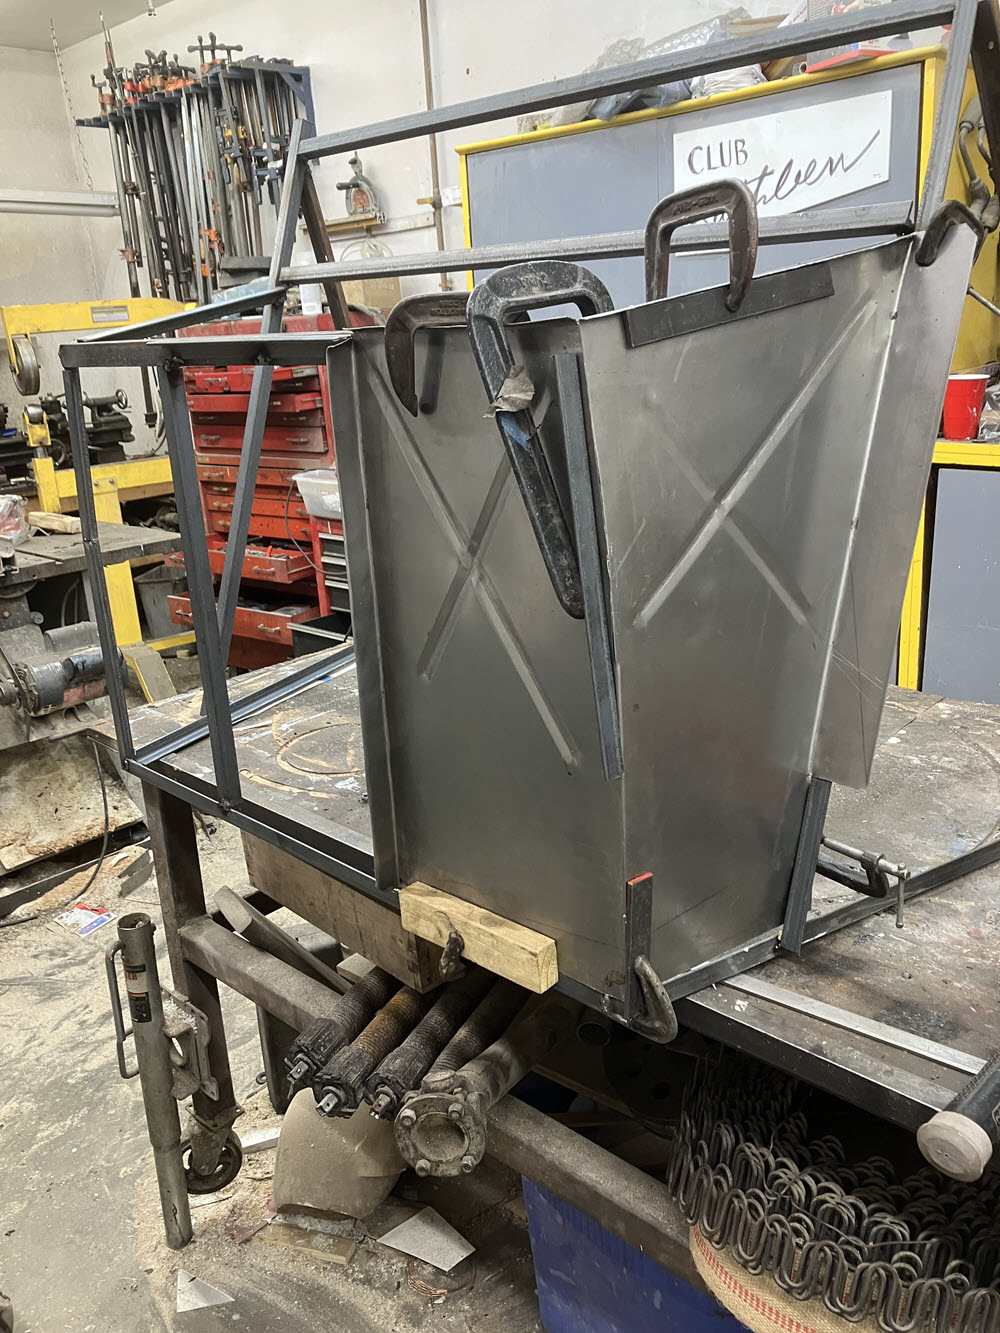
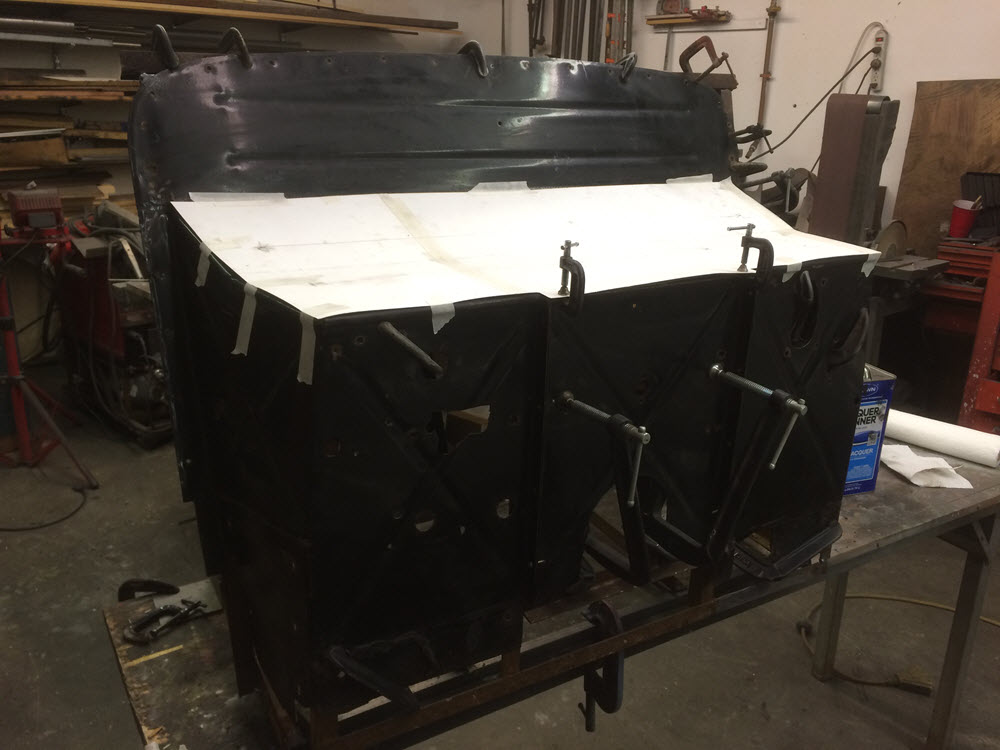
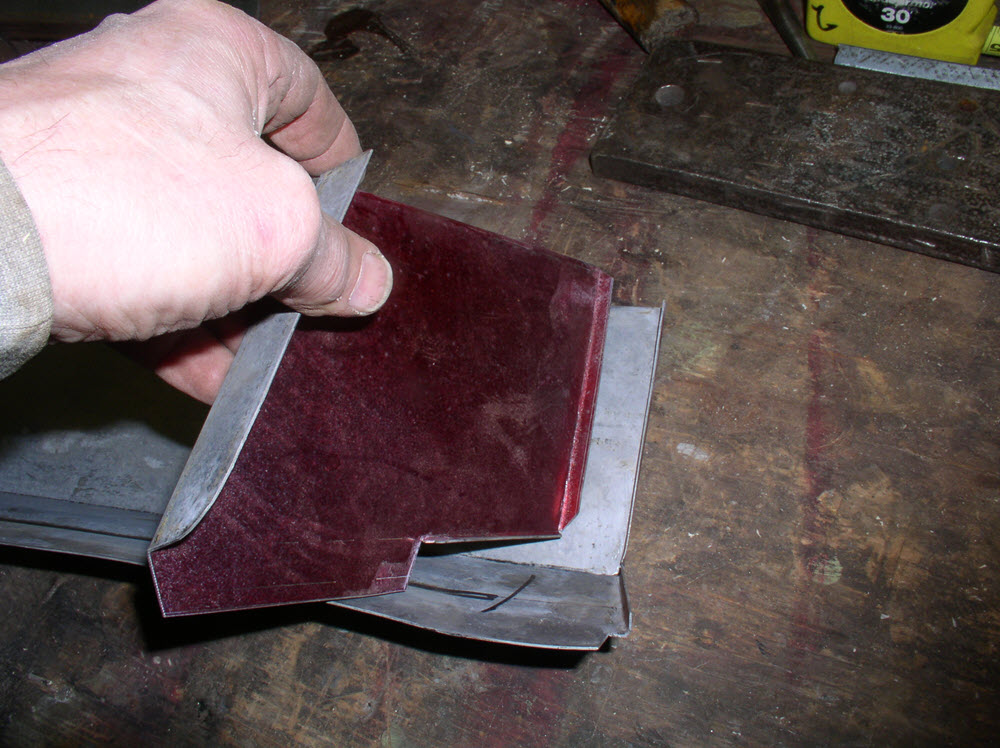
Fit the side pieces to the fixture with the center panel firmly clamped. Weld the seam. I prefer Oxy/Act for this task. Clamp two pieces of angle iron on either side of the seam about an inch away. These help reduce warping. Beginning at the center of the seam make small quick tack welds about 1″ apart up and down. Finish the weld with rod beginning at the top and let gravity help run the bead. Note: the red coloring is layout dye I got for free and tried for a while. Hate it!


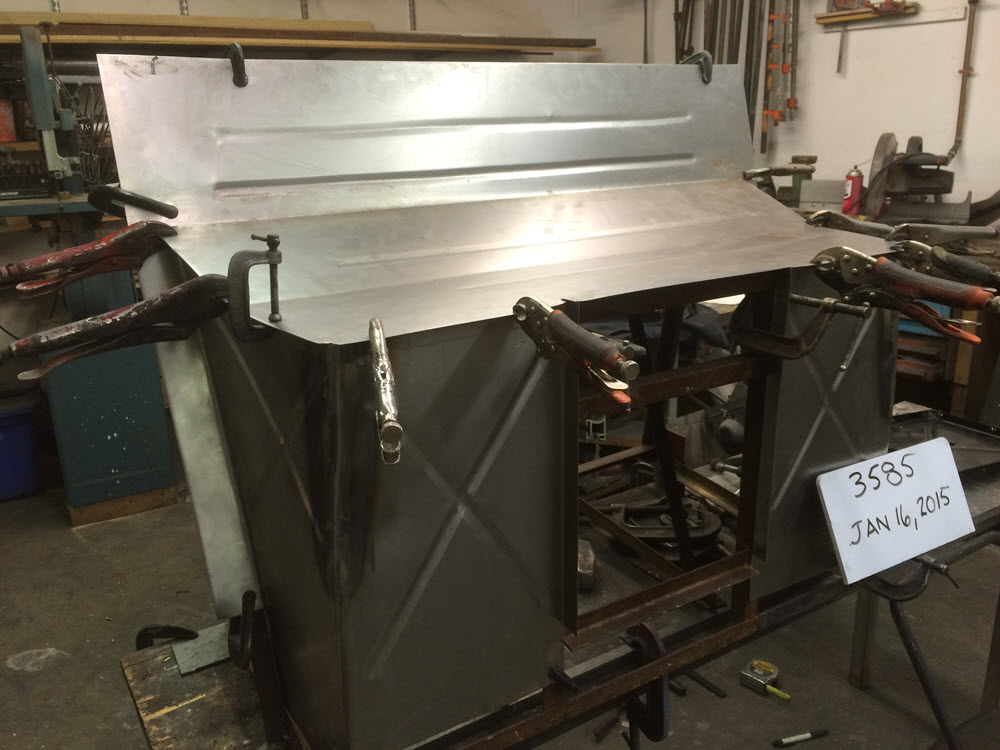
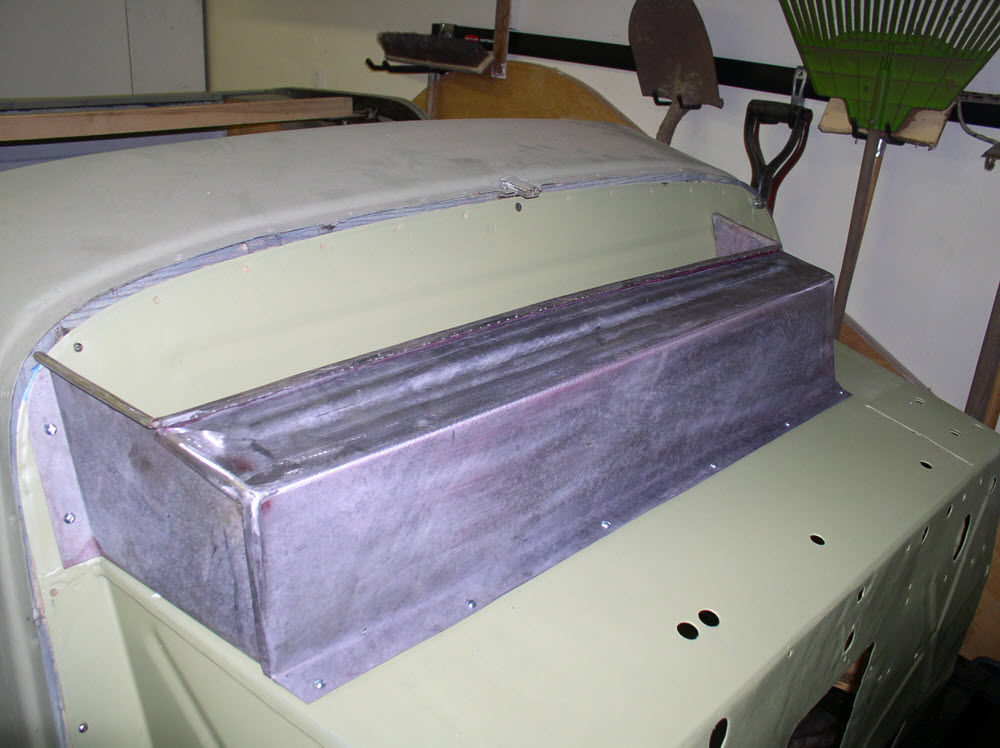
Fit the remaining pieces to the fixture.A: Weld the seam at each side where the shelf meets the side flange. B: Weld the center opening flange on the side panels to the shelf. C: I find a small tack weld at the corner where the shelf meets the welded seam of the side panel helpful.

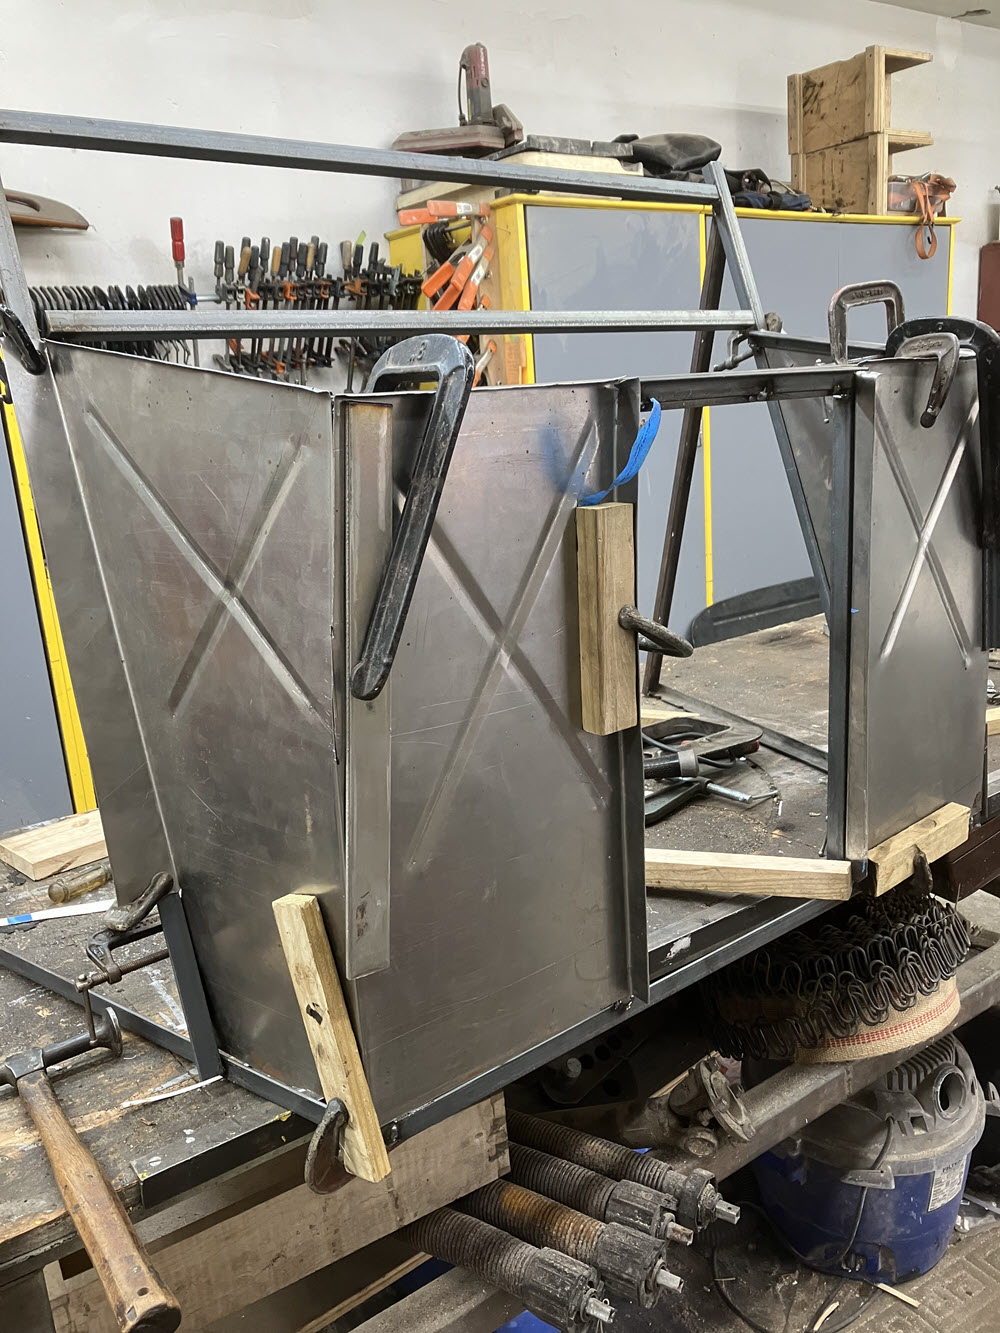
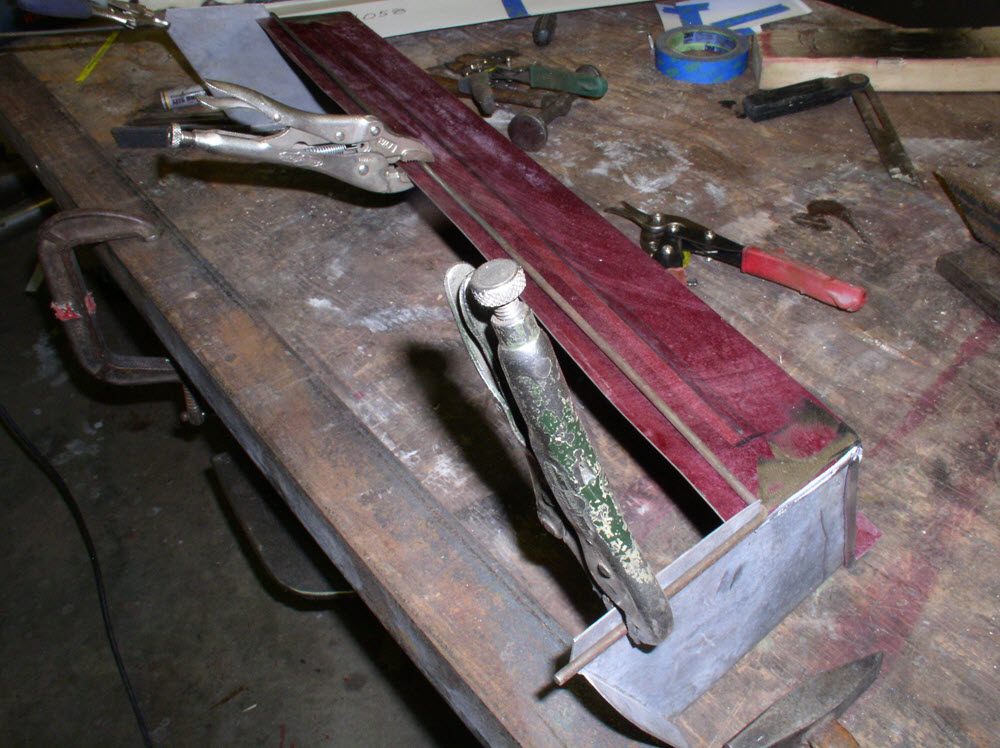
Make the hems.
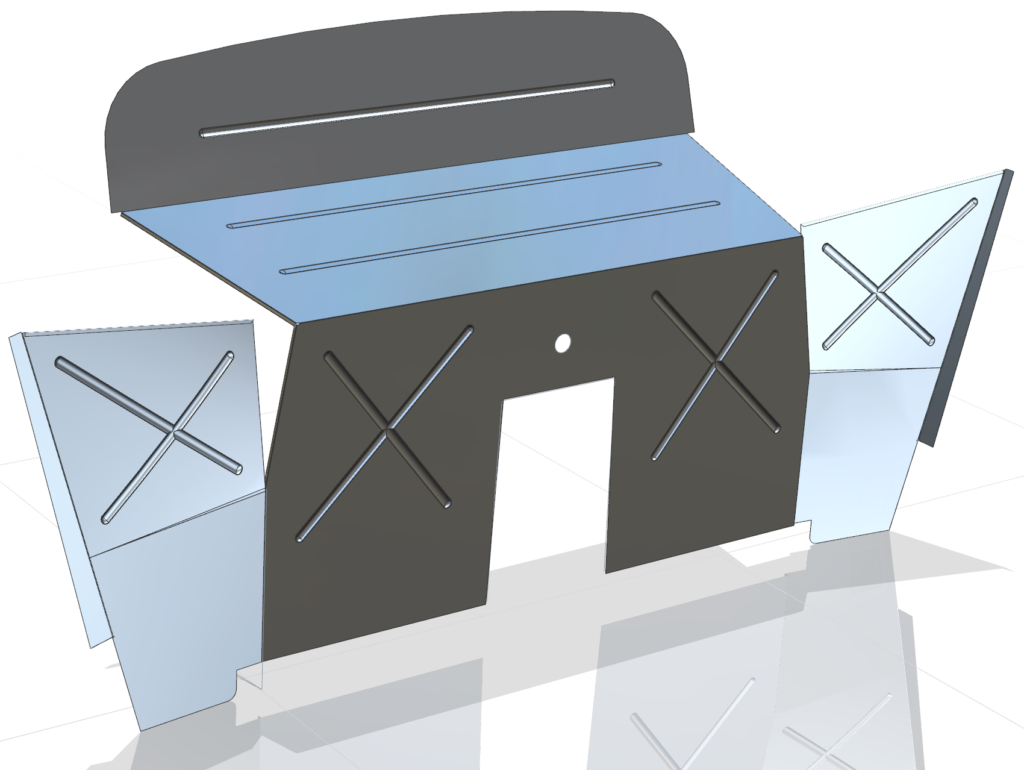
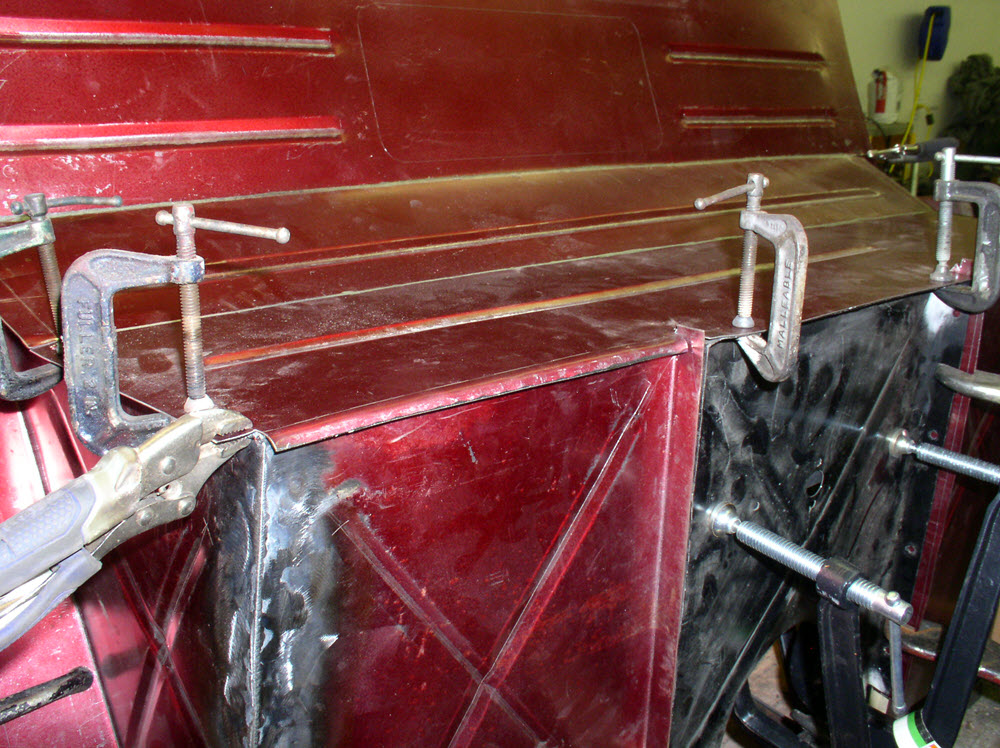
Hems on firewalls are double folds. One part begins with a 90 degree flange. The second part overlaps the first and is then folded over the first flange. After closing the first fold both parts are flattened.

The factory makes a small 1/8″- 3/16″ flange on the top of the side pieces. I find the small flange hard to work with the tools I have available (pliers) so my hem allowance is a bit larger at 1/4″”. The allowance on the shelf is twice that plus a “little” to allow for the rollover. You can see my + notes on the patterns in the photos. Best try a sample piece and see what works best for you. Start by folding the top shelf hem allowance over the side shelf flange using duck-bill (aka glazer’s) pliers. Once the hem is at 90 degrees use the body hammer to close it another 45 degrees or so. Finish closing it with pliers and then a hammer backed up by a steel dolly. After the first part of the hem is closed flatten the hem by hammering down against the side pieces. This is where the sturdy fixture comes in. The fixture acts as the anvil as you beat the hem flat.

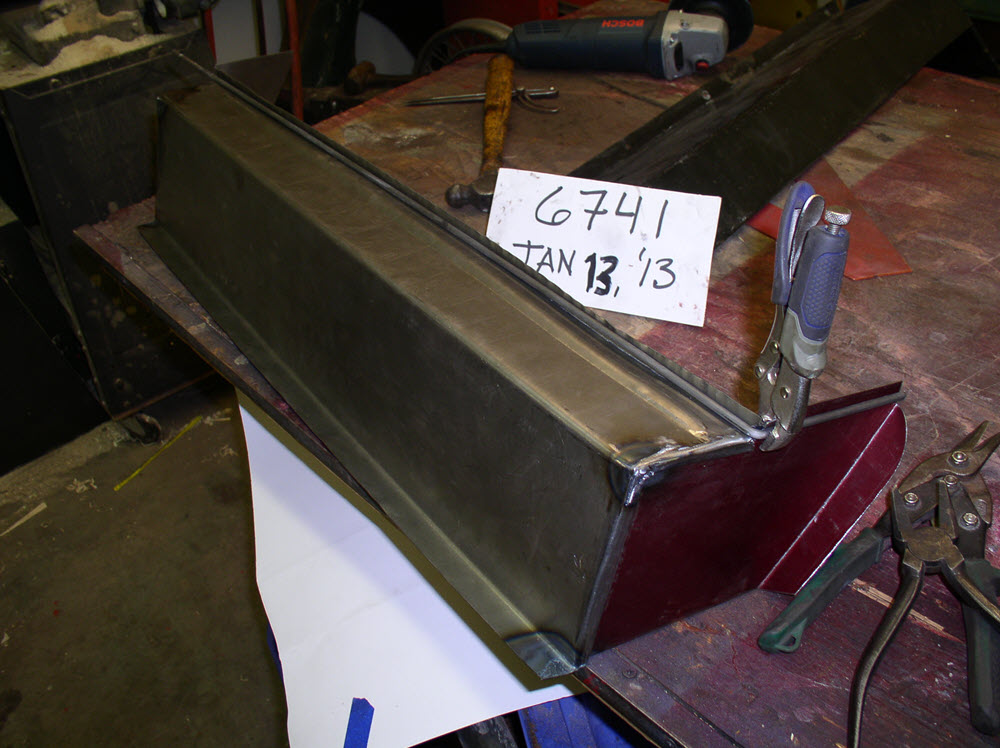
Finish by making the final weld at the corners where the hems meet front-to-side and side-to-back flange
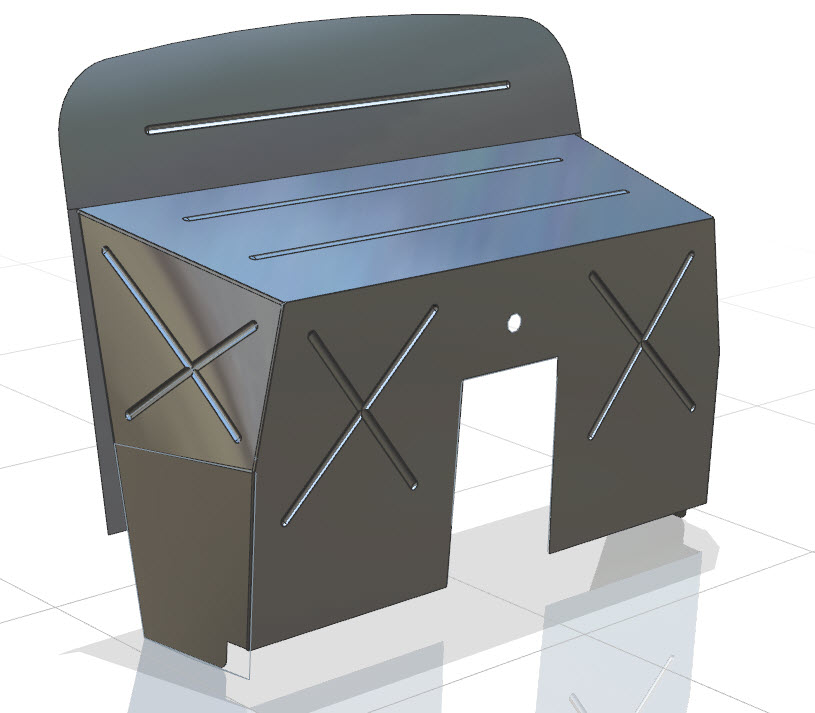
Different models have different details on the firewall. The DHC has a wire hemmed opening that I start with a hole saw and complete with electric shears. +8s have a box supporting the steering. Whatever the detail the best approach is to copy the factory methodology for making it. In most cases that can be done with basic hand tools.

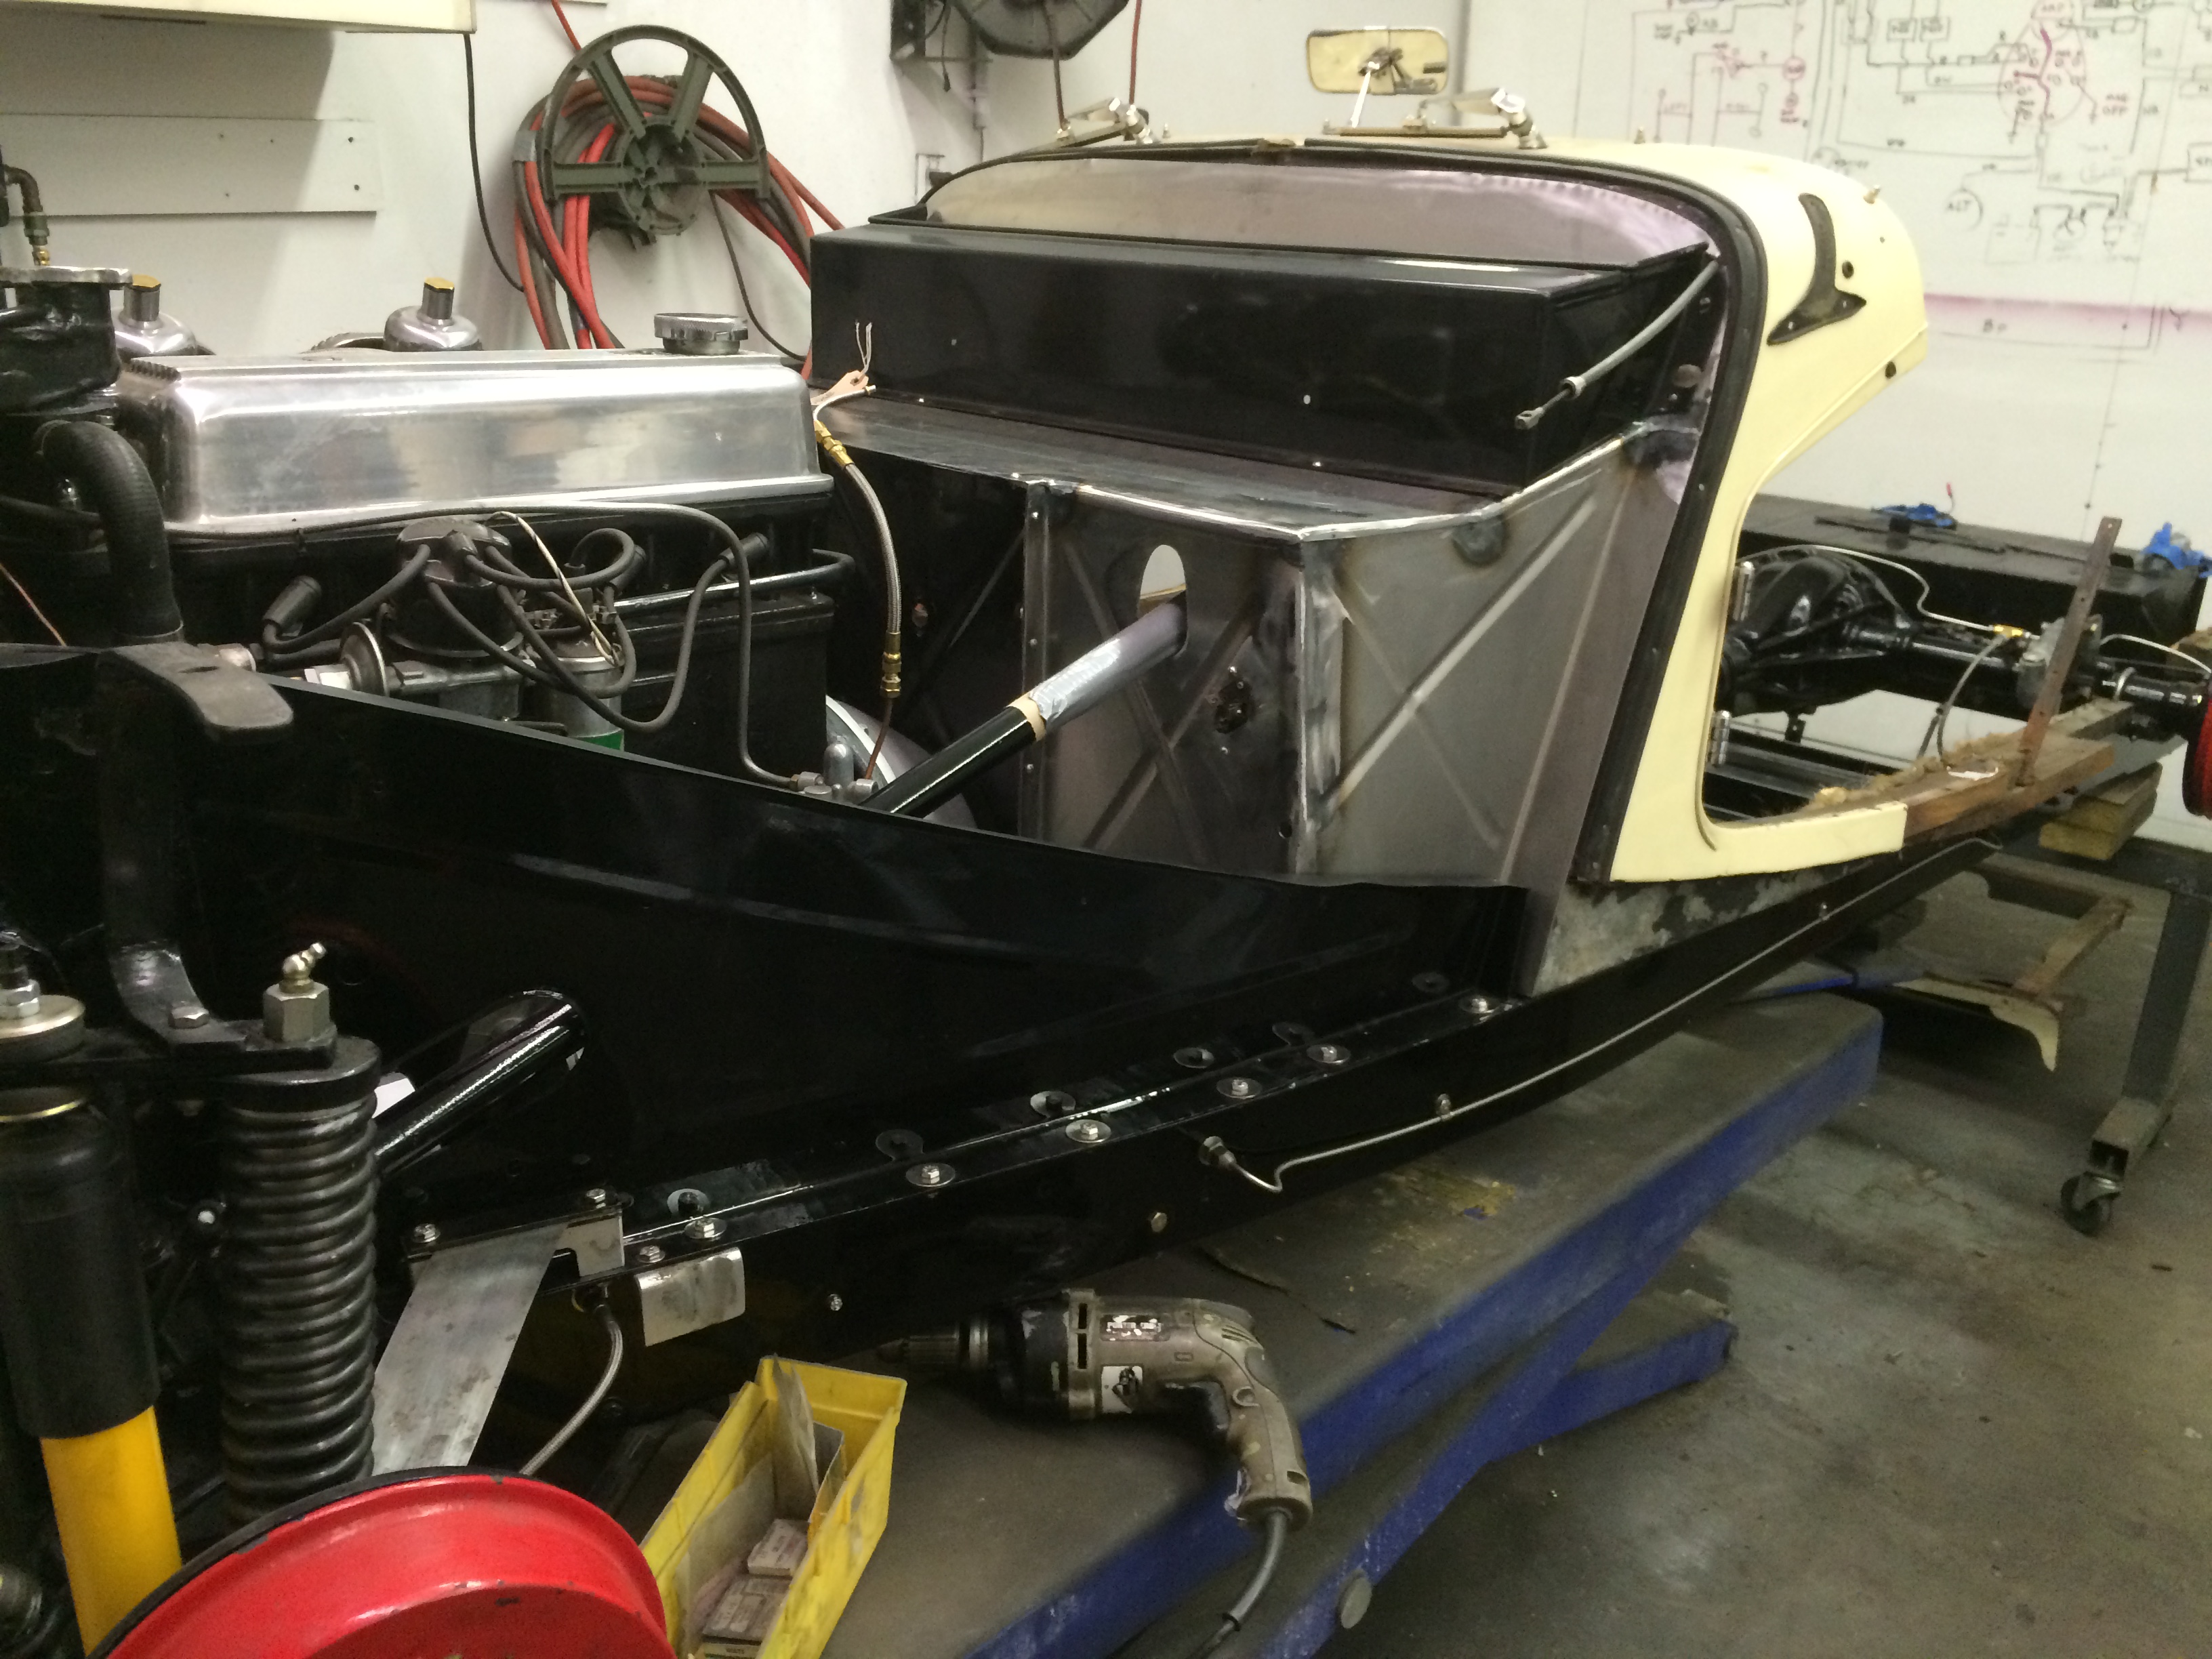
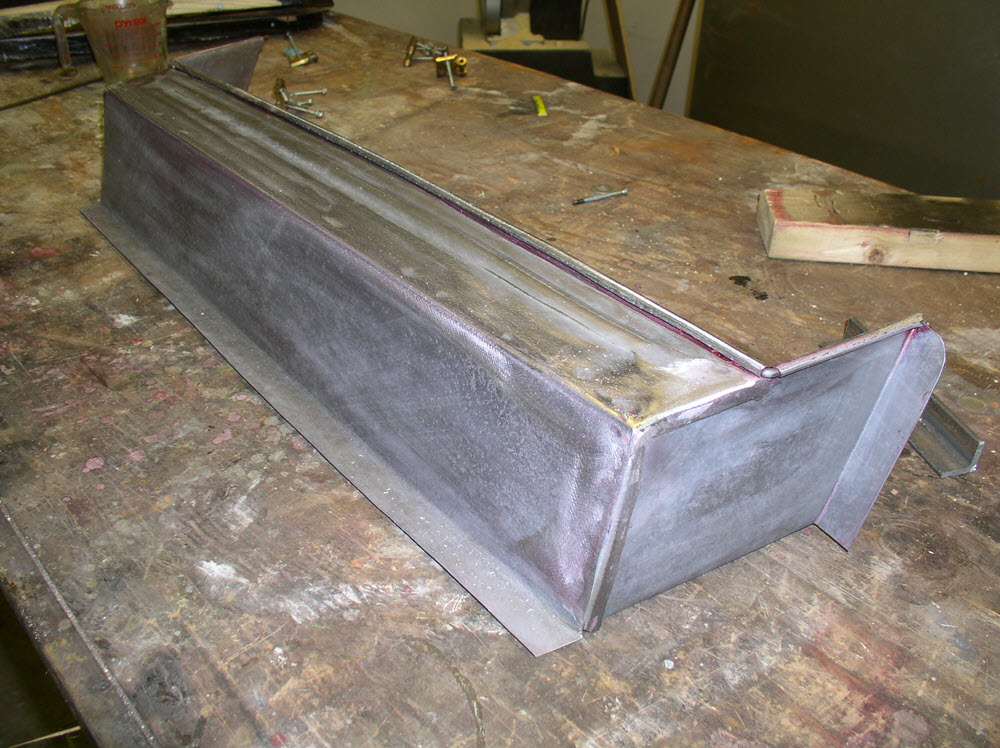
Trial fit it into the car. Trim the mounting flange as required.Grab a beer; you deserve it.
Next: TOOLBOXES
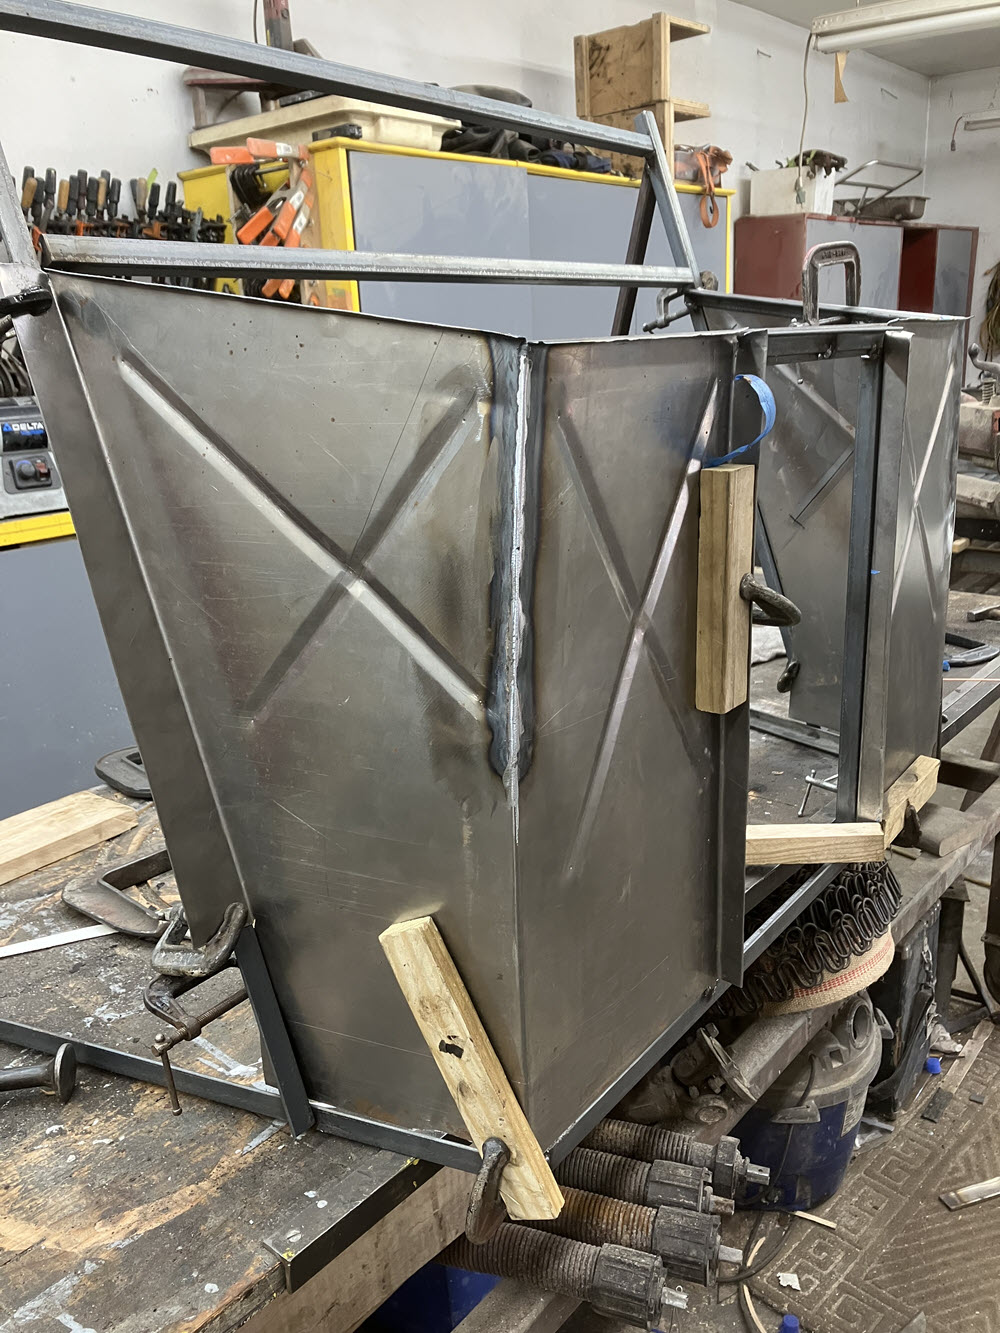
You would think that the smaller part would be easier. Well it is, certainly, but that is different from being easy. The bad news is that the toolbox, like the firewall, needs some welding and a bead roller. Aside from careful fitting the hardest part is holding the pieces together while forming the hems.
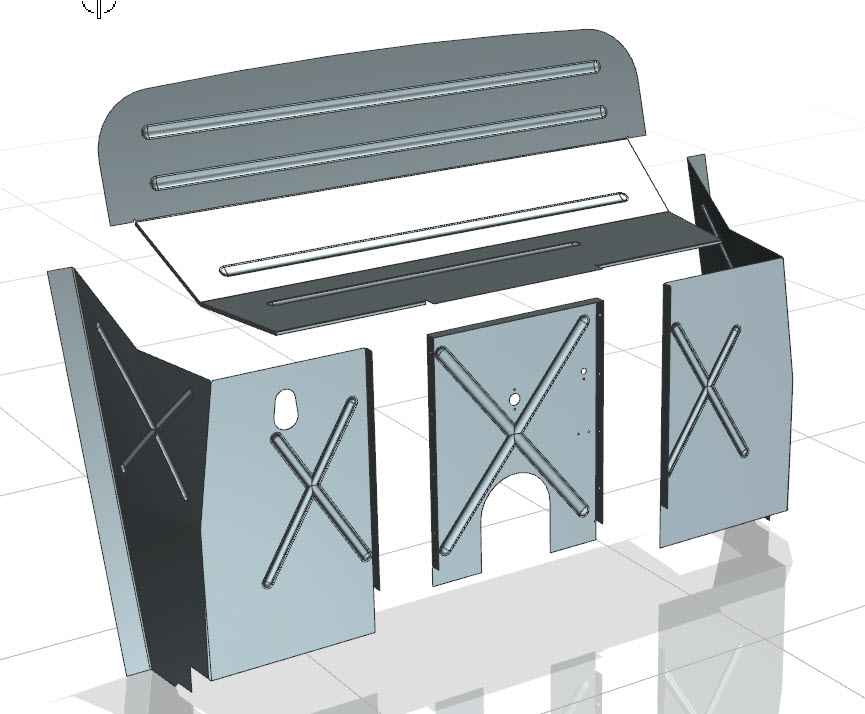
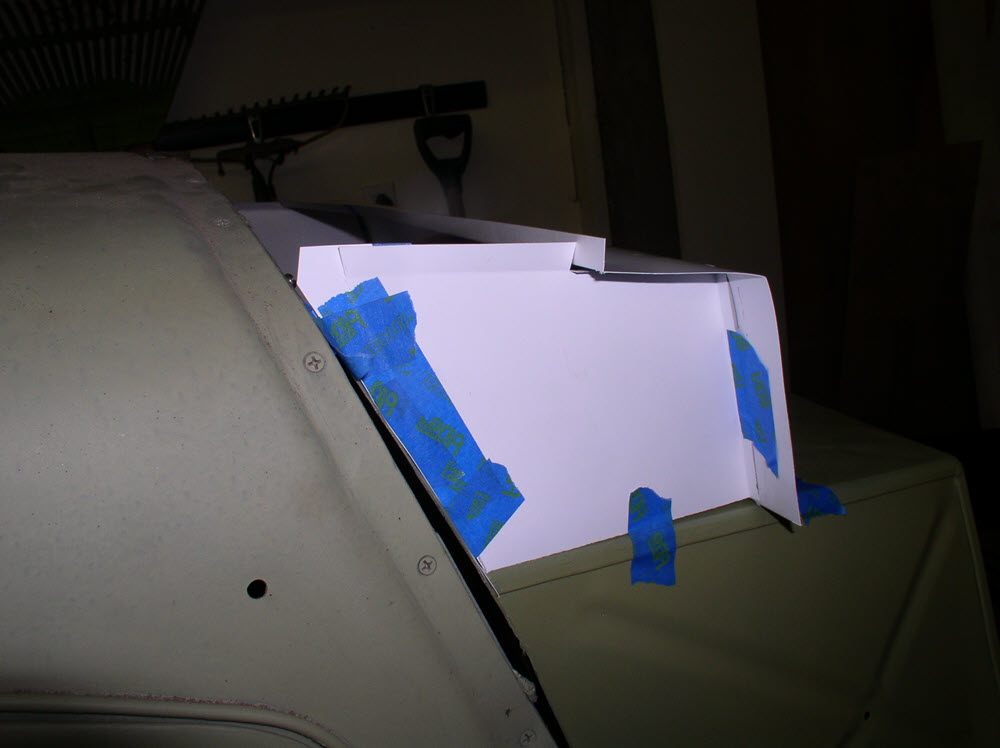
Make the patterns.
Layout and cut the steel. Don’t forget the hem allowances.

Make the bead.

Make the bends.


Clamp the bits together and make the hems joining the sides to the front. Holding the sides in place and having them stay there while you hammer the hem is a chore. I cheat and make a tack weld or two to act as fixturing. Why not make an angle iron fixture similar to the firewall fixture? Well; you can but I don’t because the parts are small and years might pass before I might make another toolbox.
Make the wire. Wrap the hem allowance around the wire. I find it easier to complete the sides before starting the long hem along the top. See the section in this website for Making Wire Hems if you need more coaching.

Weld the corners.
Grab another beer.
A few more firewall projects: