Ron Garner ©2014
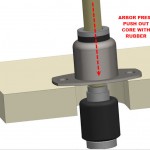
For many years I’ve been using a urethane molding compound to repair +4 transmission mounts.  I put the old mount in an arbor press with the mounting flange down and push the core and old rubber out. The ram for pushing is a round bar slightly larger in diameter than the hole in the mount. The bottom washer gets pushed off in the process. After cleaning all the parts I reassemble them without any rubber, peen the bottom washer back on, and mount them in a simple fixture.

The molding compound I use is from Aeromarine Supply. I am sure there are other sources (some are listed below) but this is the only brand I have any experience with. The urethane comes in two one quart containers. I have learned that it pays to follow the manufacturer’s instructions rigorously. Mixing very small batches is also risky so I never attempt less than about one half of a drinking cup (8 oz). Many of these home-made transmission mounts have found there way into Morgans and I have had no reports of any failures. However, while it made sense to mold mounts when there was no alternative, new, two hole, transmission mounts are now available from Melvyn Rutter,
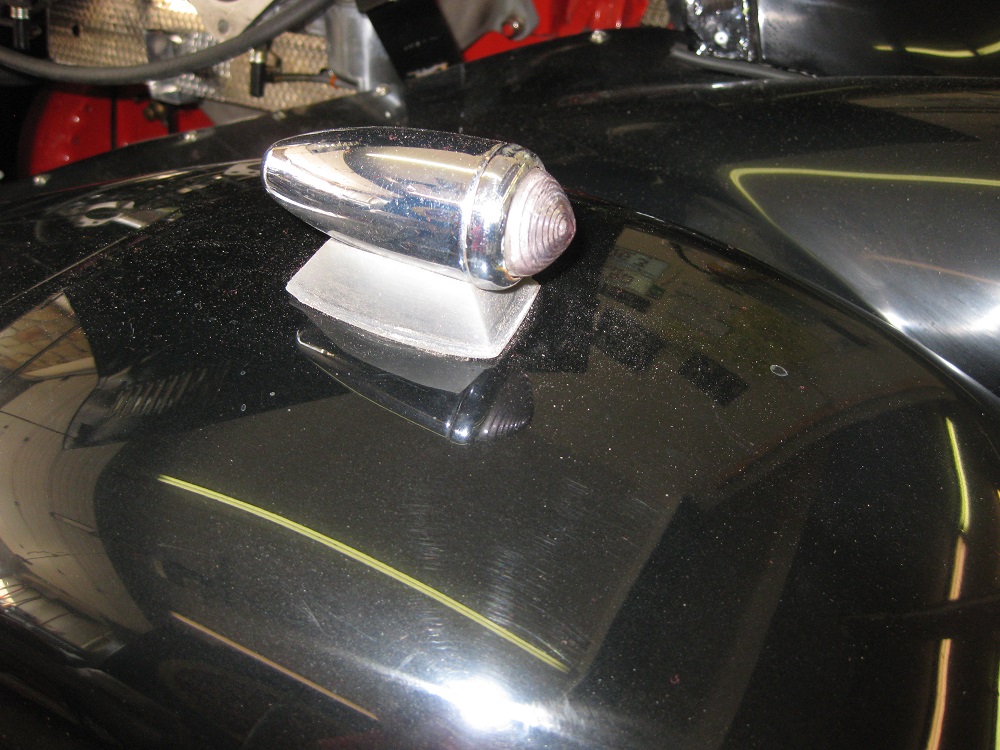
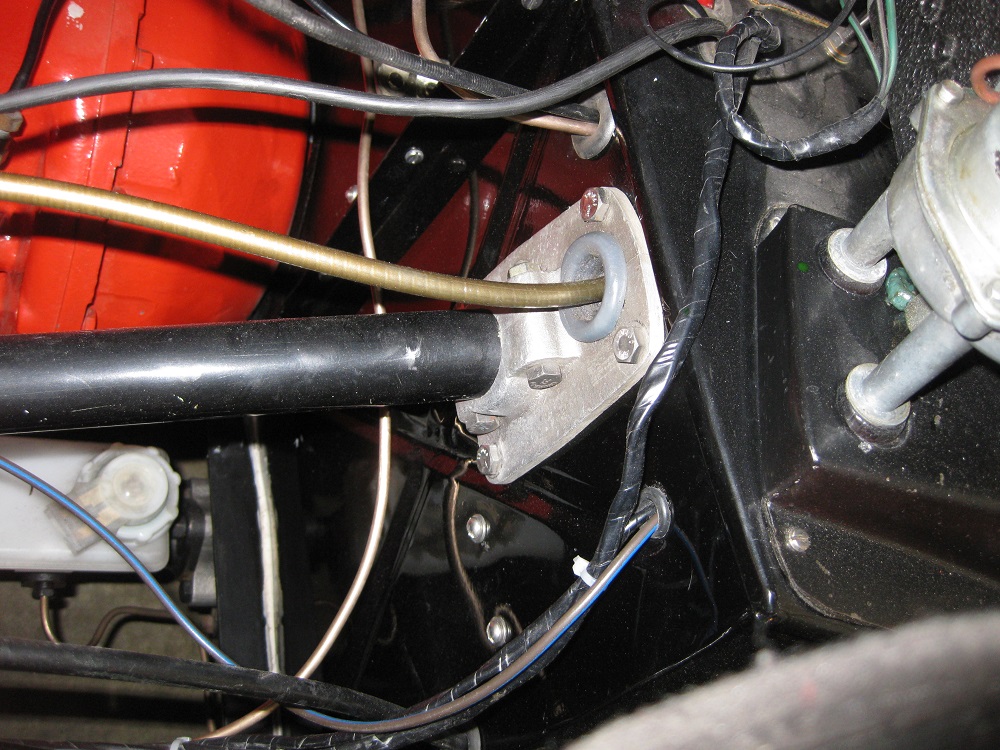
So now the question: After rebuilding a half dozen transmission mounts a year ago, what do I do with almost a half gallon of left over urethane molding compound that approaching its “use by” date. Old chemicals are not reliable; they do not always fully harden; ugh! Messy. I decided to make a pattern to mold the rubber base for Lucas bullet winglights. The worst that can happen is that my copy will be no better than the reproductions I’ve been using. After molding twenty light bases I still had gobs of urethane left so I also made grommets for where the +4 tachometer cable goes through the steering column bracket (store bought ones never seem to fit right), and a lifetime supply of axel rebound rubbers. The urethane hardened OK but the color, which was a solid black when I made the last transmission mounts and when I poured it into the mold changed to various shades of gray. I can only assume that the color change is somehow associated with the fact that the material sat on the shelf for a year.
Each of these projects required a different mold making approach. The winglight bases needed a male pattern and cavity molds, the grommet was best done with a turned multi-part wood mold and the rebound rubber was just blocks of wood clamped to a table. Whatever the part you are making, the mold is a hole with the right shape that you can pour stuff into and then get it out after it cures. The following shows the several methods I used to make the holes.
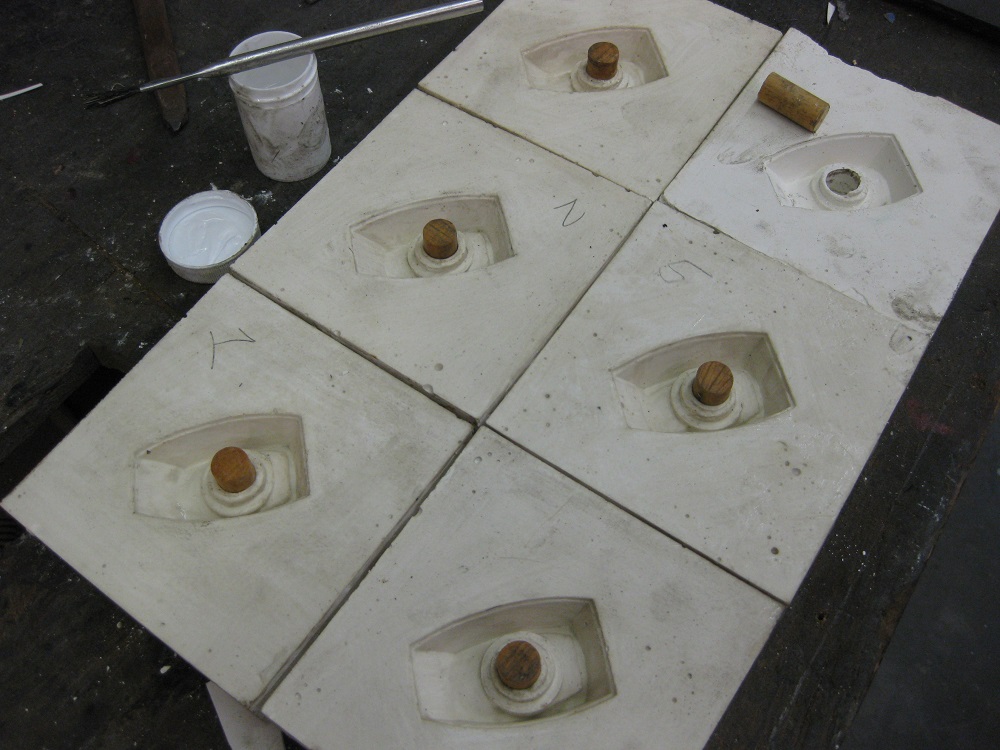
Winglight bases. Wood pattern for cast plaster “one-time” mold. A pattern allows you to make multiple molds and cast several parts at one time.
Rough cut a block of hardwood, (maple is pictured but mahogany is the traditional pattern material).
Drill holes for the cores (internal features, in this case the boss on the underside of the light).
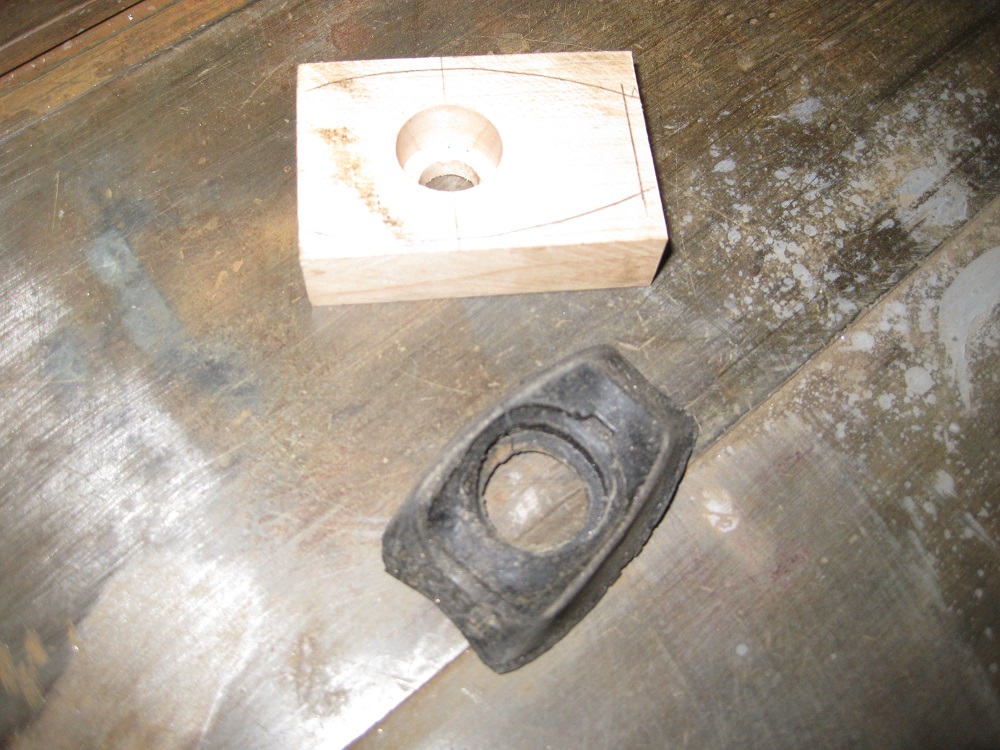
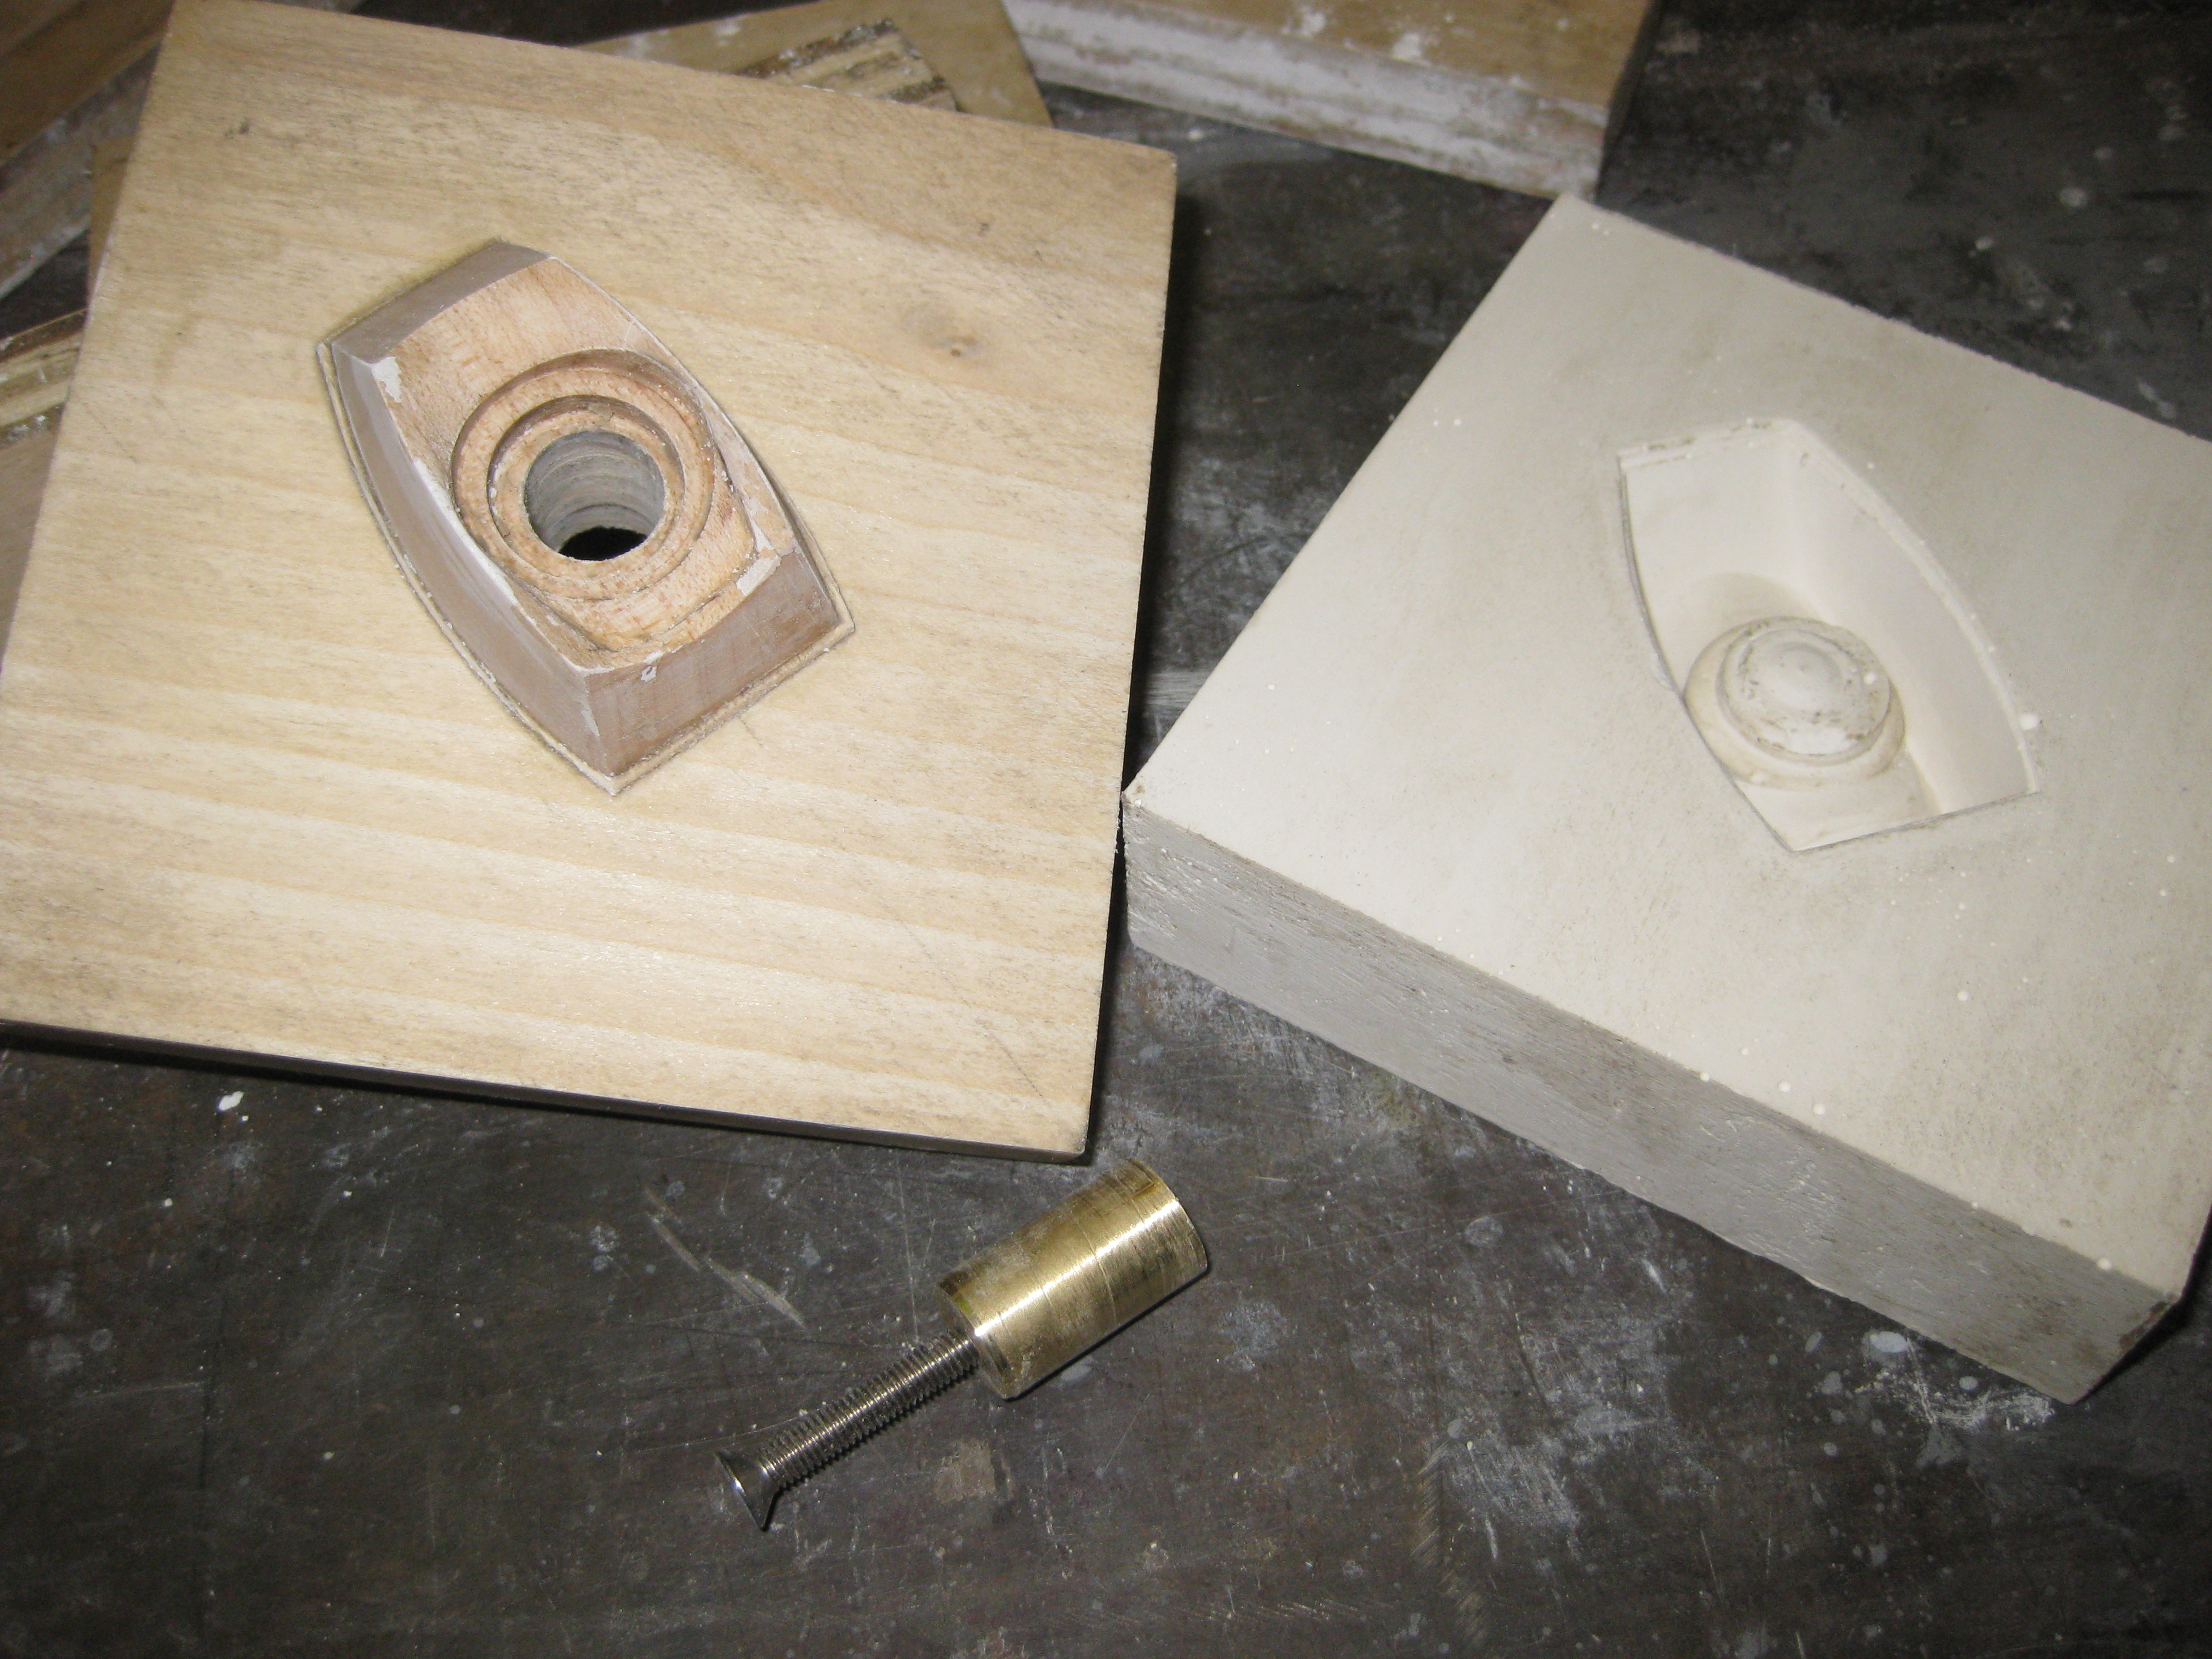
Saw and then sand the outside of the pattern to match the sample. The urethane compound does not shrink appreciably so no shrink allowance is necessary on a part this small. Since the plan is for a “one-time” use draft (taper to allow the part to be removed from the mold) can be omitted also. If necessary the mold can be broken to extract the molded part. Note: For the winglight base, I used a 1/2″ dowel as a core to make the through hole for the mounting stem. The core plug is easily removed from the mold.
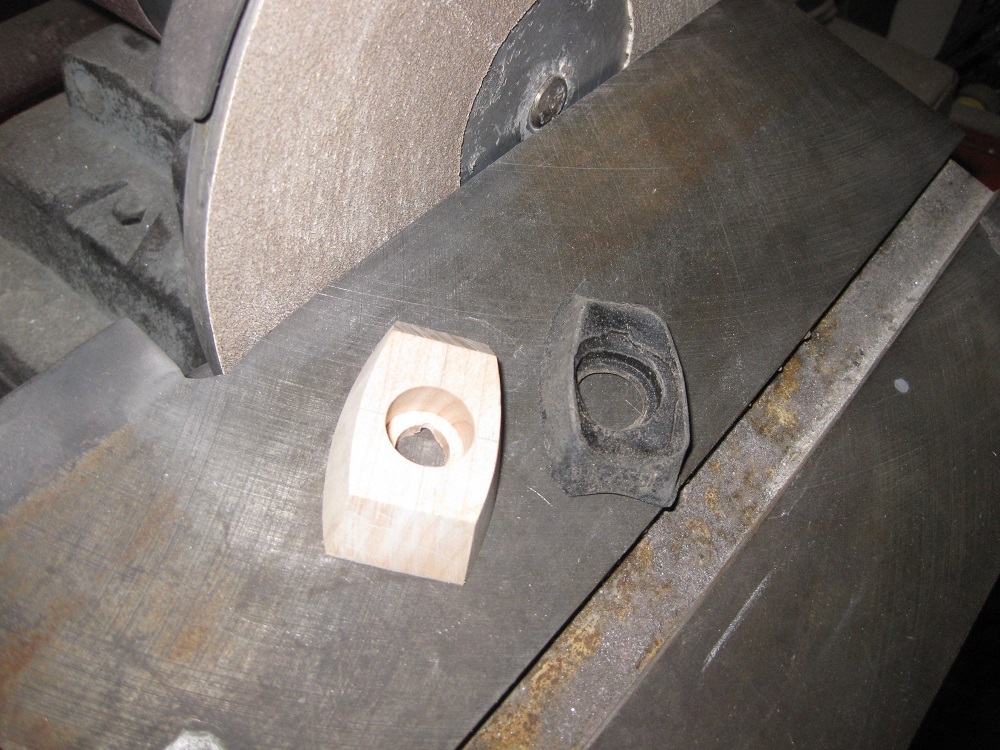
Carve the remaining internal details into the pattern.
Mount the pattern on something and build a box around it. Coat everything with butcher’s wax or something similar so the plaster does not stick to the pattern.
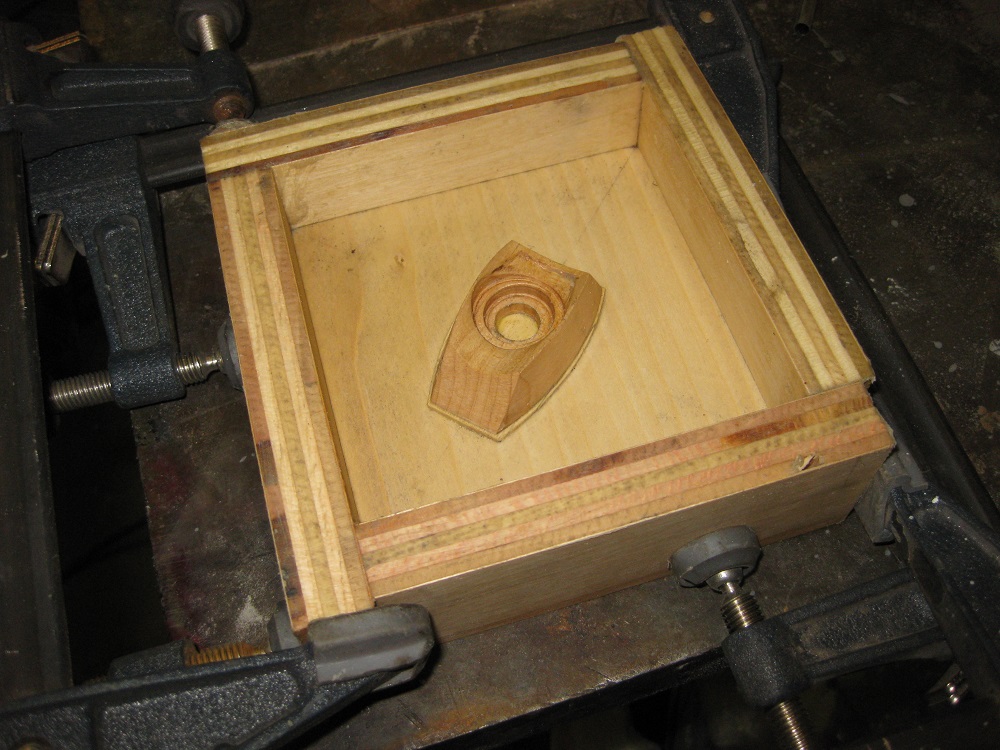
Drill the mold base and make a core pin. Plaster is very brittle and will not come out of a deep straight sided hole. A core pin in the pattern can be tapped/pushed to aid getting the plaster off the pattern.
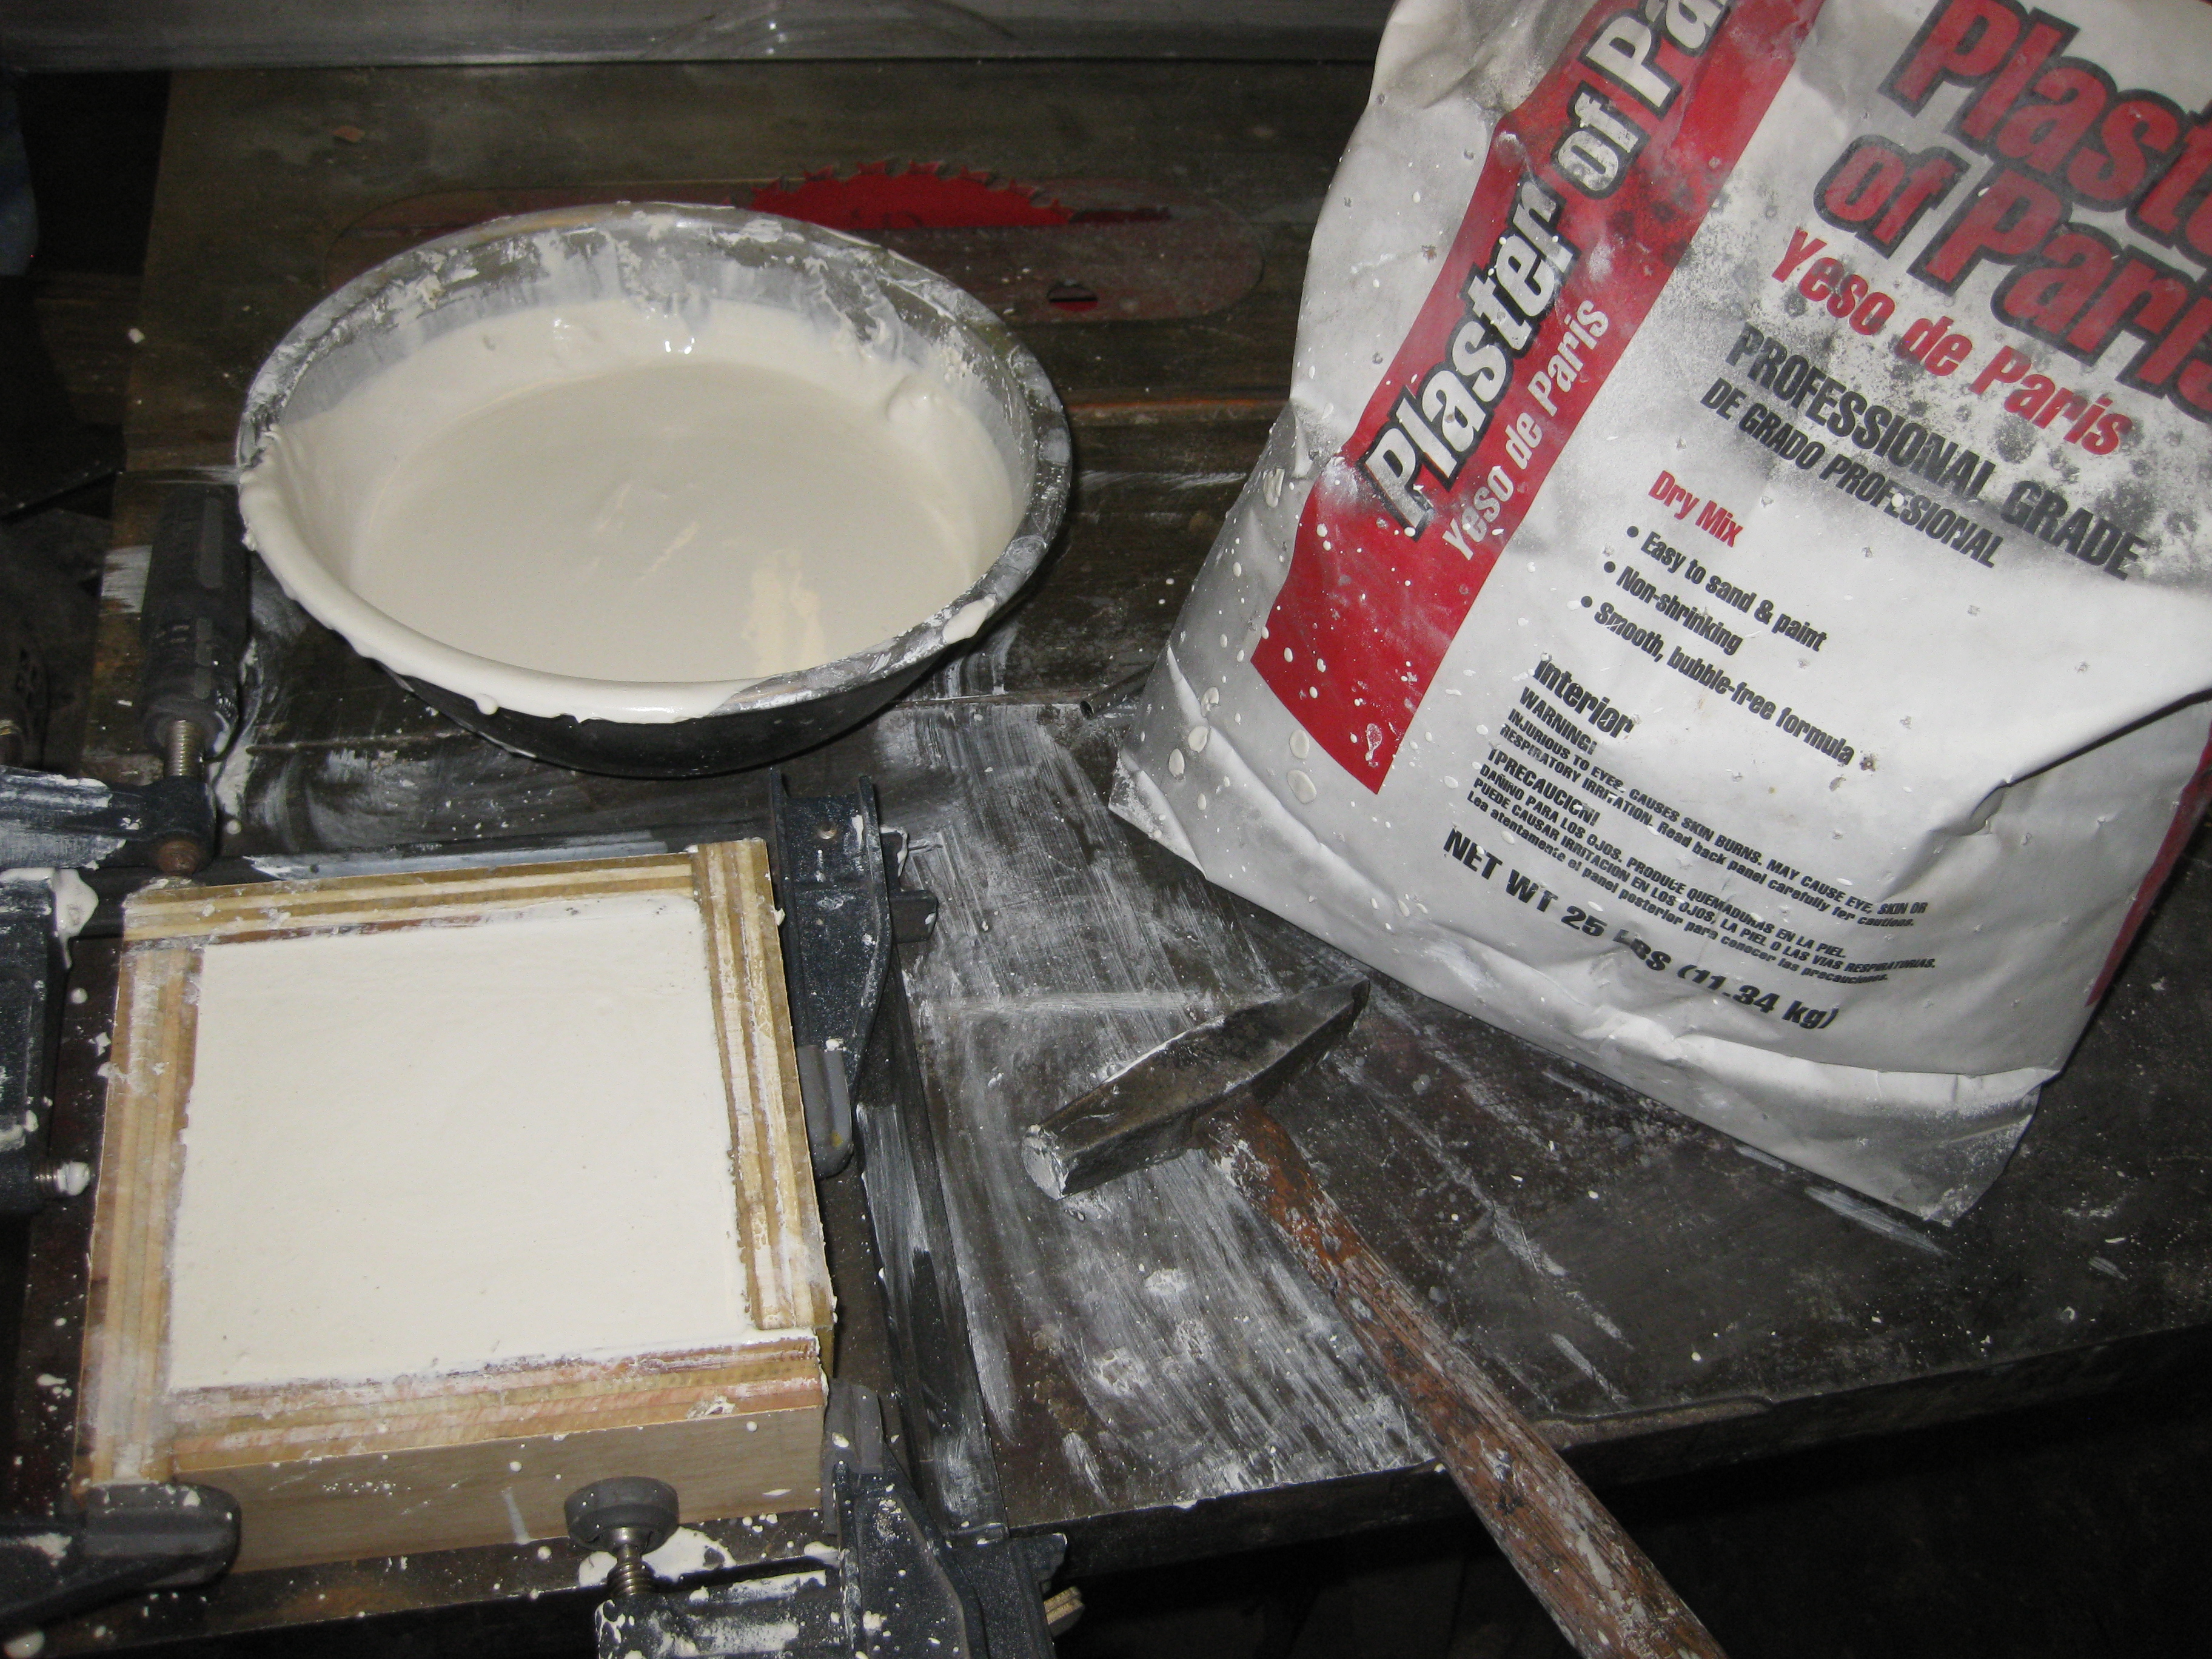
Mix and pour Plaster of Paris into the form. Note: mixing and pouring plaster is a bit of an art. There is a precise ratio of water and plaster that produces the strongest, least porous mix. Start by sifting dry plaster through your fingers into a container of cold water. Continue adding plaster until “islands” form. Fill in the remaining puddles until there is no clear water. Don’t touch it! Let it stand for a few minutes to allow the water to be completely absorbed, then use your (gloved) hand to stir the mix with a lifting motion from below the surface. This is to encourage air bubbles to rise. The more you stir the faster the plaster will set. When it is creamy like melted ice cream, fling dabs of plaster onto the pattern in the mold with your fingers. Throwing the first layer of plaster assures no bubbles will be on the surface. After the pattern is covered fill the mold with the remaining plaster. Never discard plaster (dry, wet or used) in a sink. Nothing will clog a sink faster.
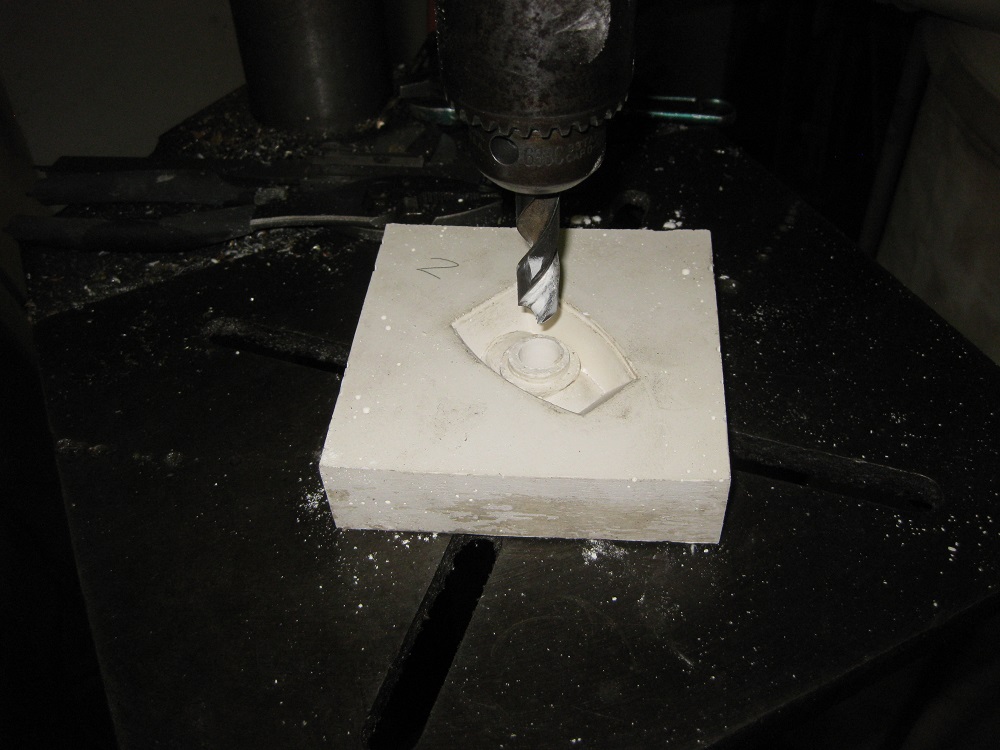
Each mold gets drilled for a core pin.
After thorough drying, coat the molds with the mold release recommended by the urethane manufacturer.
Mix the urethane according to the manufactures instructions. Work quickly, if it is mixed right it will start to set in a few minutes.

Wait 24 hours and pull your part out of the mold.
Grommet, built-up mold cut from solid stock. Making the mold directly limits the number of parts that can be made in a single pour but often gives better results with parts that have complex features or undercuts.
Measure and layout the part on the blocks that will be the mold. The mold can be wood, metal or plastic depending on complexity of the part and the availability of tools to work the chosen material. Pay particular attention to undercut regions and be sure you know how you will pull the mold apart to get the molded part out.
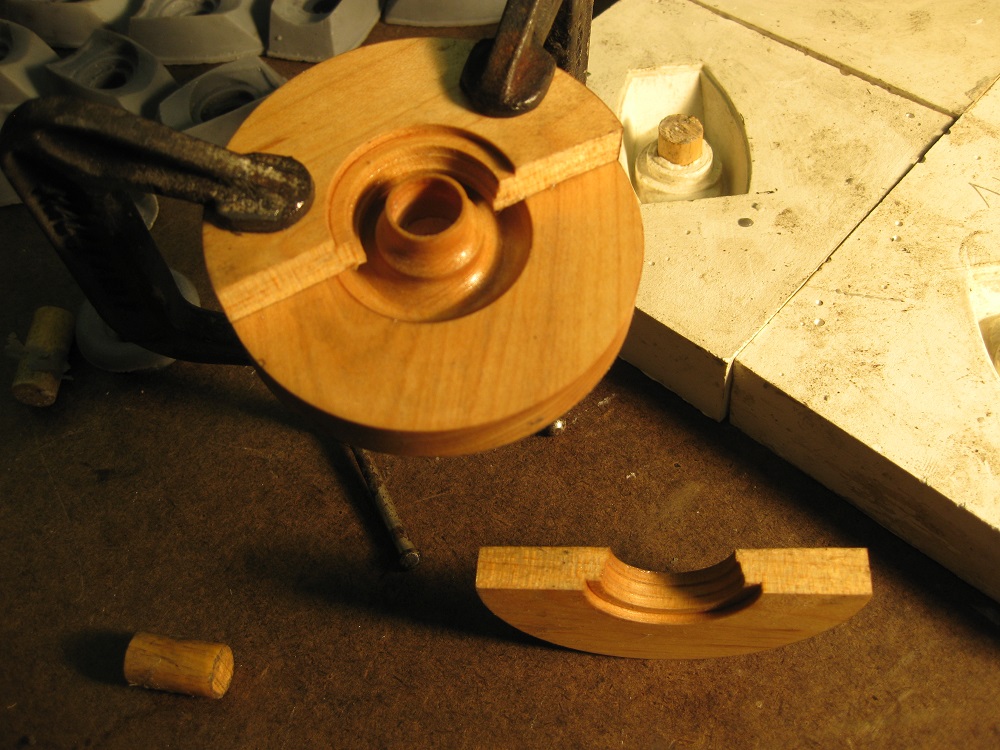
Apply mold release, assemble the mold and fill with urethane (or whatever compound you choose).
Wait 24 hours, disassemble the mold to get the part out and repeat.
Axel Rebound Rubbers. Nothing could be easier. Four pieces of wood covered in package sealing tape, clamped to a piece of plywood (be sure to make everything level). 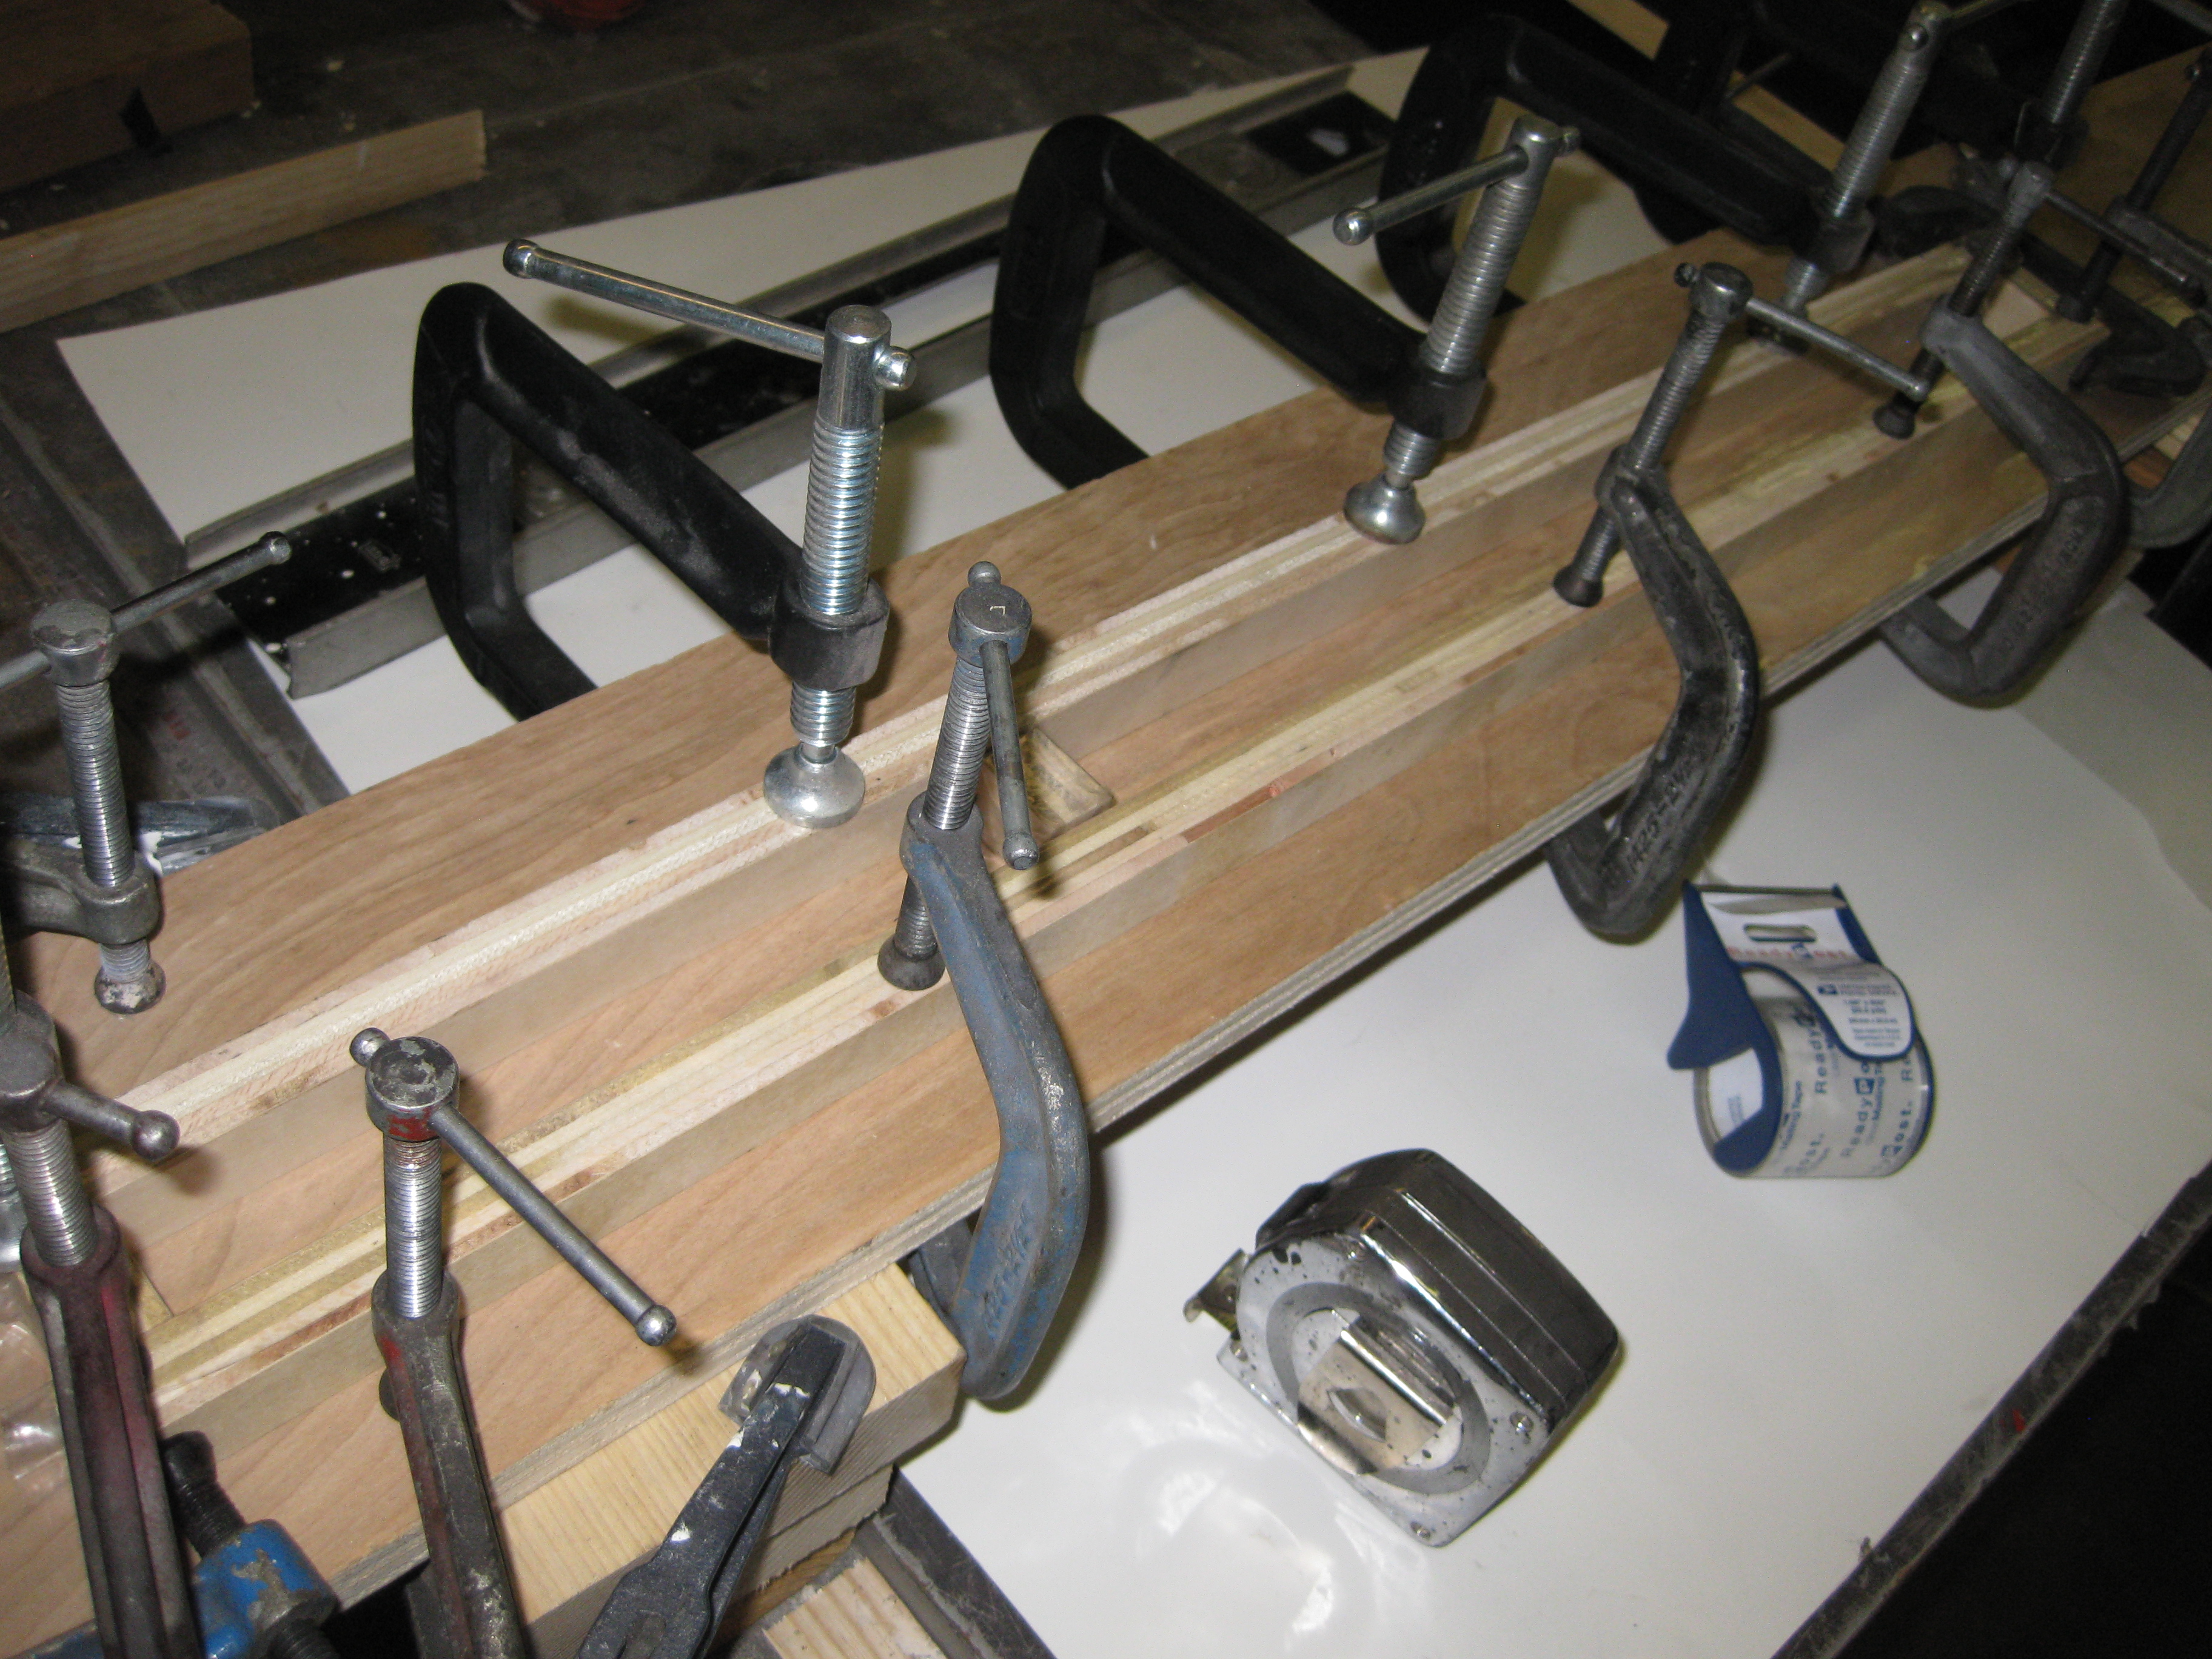
Using packaging tape on all the contact surfaces eliminates the need for mold release. Rebound rubbers are just rectangular blocks so I made one long mold and used a band saw to cut the rubber to finished length. Aside from that, the process is the same as the preceding examples. Stir the mix more than you think necessary and work quickly. Note the red cups. I was determined to use up the last of the out-of-date material so whatever remained after filling the rebound rubber mold I poured 1/4″ deep into the cups. 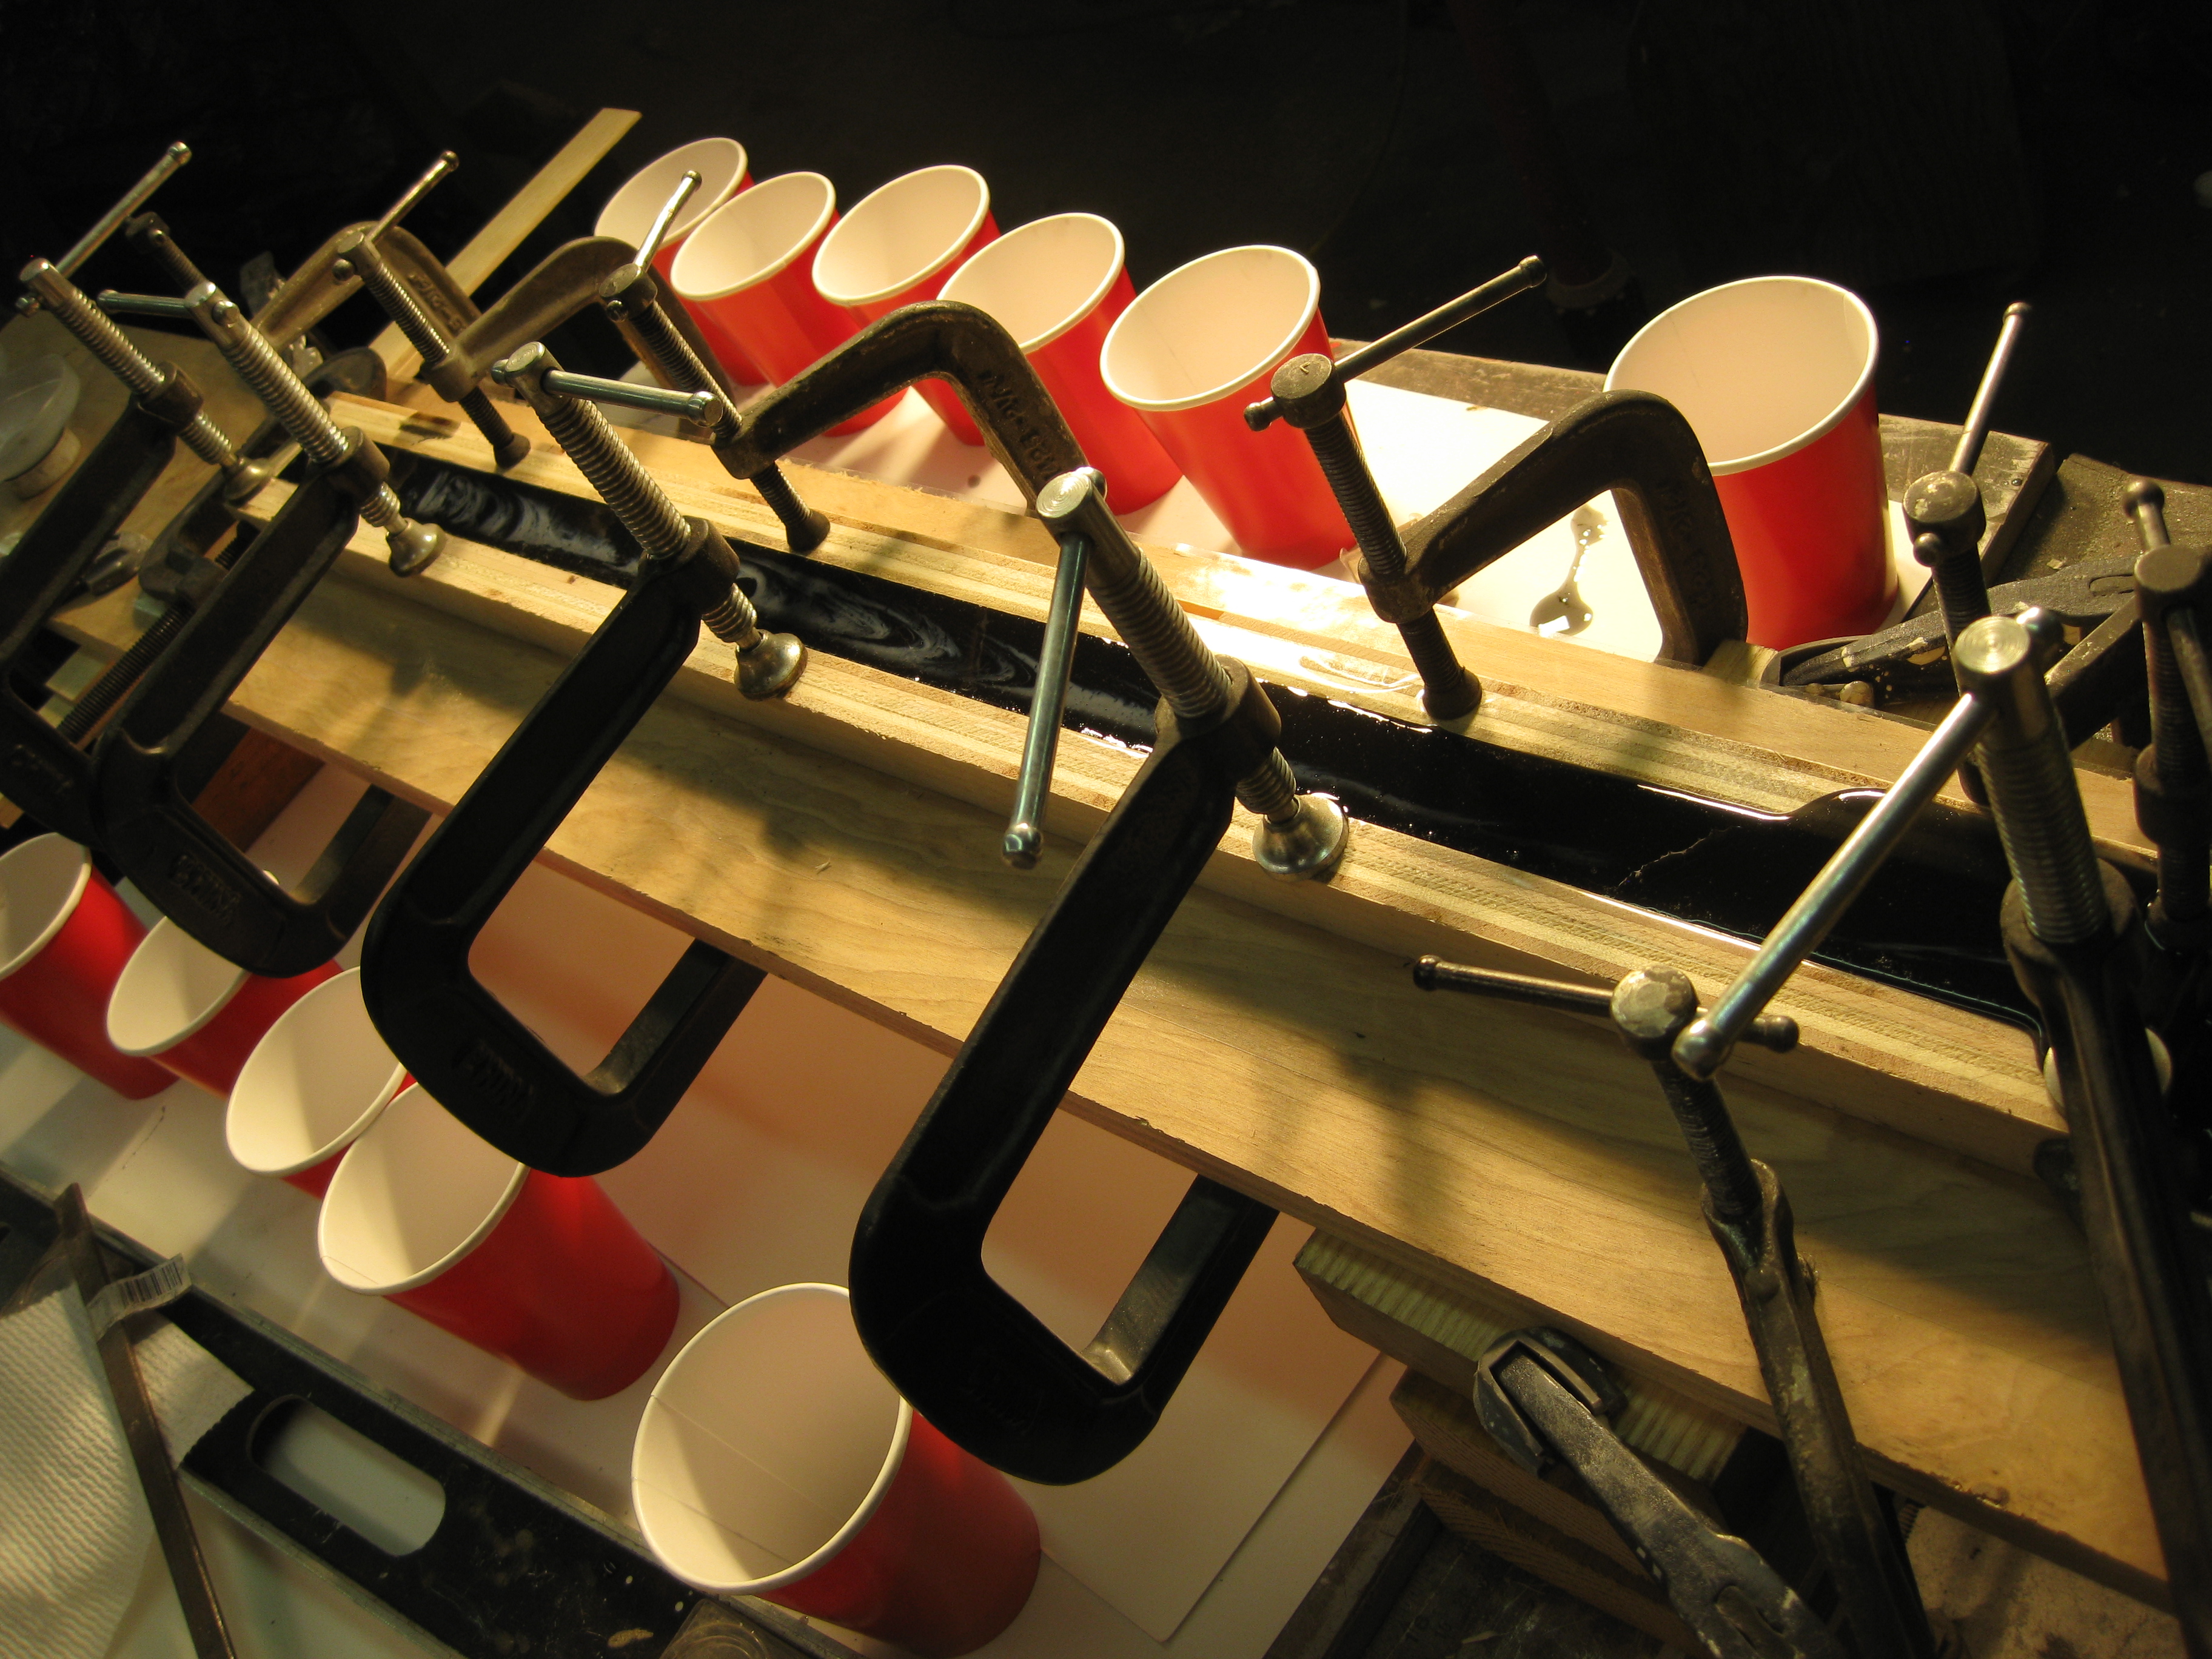
There are always uses for round rubber pads so it is better than just throwing the surplus out.
SOURCES: (These are the only ones I have experience with; there are many more).
Reynolds Advanced Materials http://www.reynoldsam.com/
AeroMarine Products http://www.aeromarineproducts.com/