All rights reserved; not to be copied or published without permission. Originally published 2013, refreshed 2025
Before commencing any work, be certain that the car is safely supported on stands, is in gear and the handbrake is set.
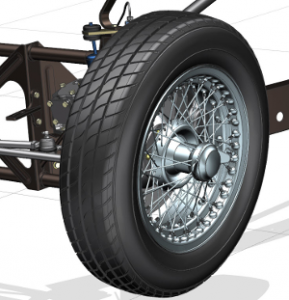
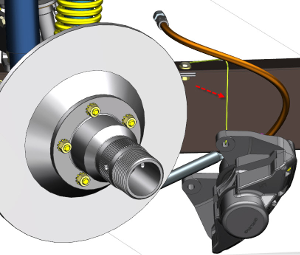
1. Remove knock-off and road wheel.
2. Remove Caliper assembly
a. Remove safety wire (1).
b. Remove two mounting screws (2).
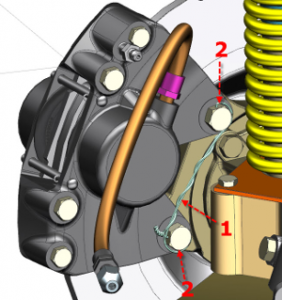
c. Bend a Stiff Wire into a hook shape and hang the caliper from the chassis.
NOTE: Do not stress the brake hose.
Note: Removing hubs is optional and not necessarily required for kingpin/bushing replacement
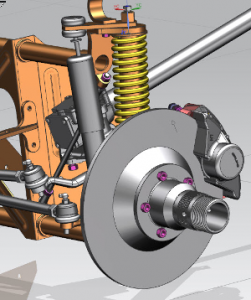
3. Remove Hub
a. Use long screwdriver to unbend cotter pin.
b. Use socket wrench to remove castle nut (different size spindles are common)
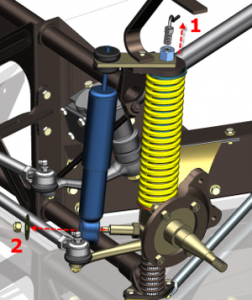
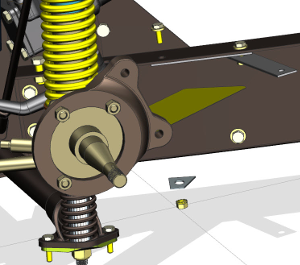
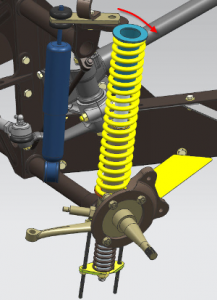
4. Unscrew oiler flare-nut (1)
5. Unscrew mounting nut (2) from tube-shock and pull it clear of stud.
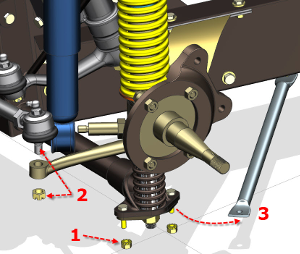
6. Remove nuts (1) from kingpin lower plate and rotate the diagonal strut (3) out of the way.
7. Remove the ball joint (2) from the spindle.
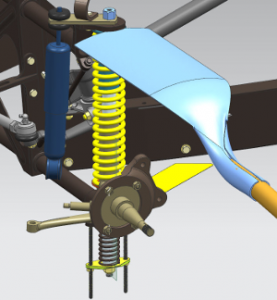
8. Remove one screw from the damper blade mounting plates and turn the lower plate outboard to free the blade.
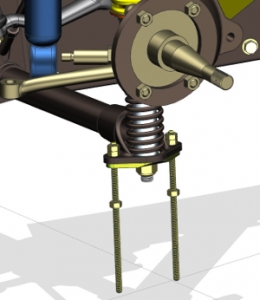
9. Replace the two screws in the kingpin mounting plate with ¼”-20 (or equivalent) threaded rods.
a. Use two nuts, tightened against each other, on the top of each rod.
b. Thread one nut on each rod and locate it about 2” from the kingpin plate.
10. Use ½” BSF wrench or socket to unscrew the oiler bolt.
DO NOT REMOVE THE OILER BOLT
a. The kingpin, kingpin plate, rebound spring and spindle will descend under the load from the main spring.
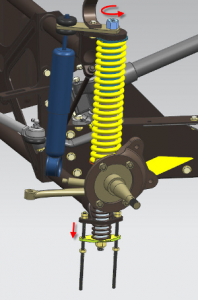
Compressed springs are dangerous. Keep all your body parts out of the line of impact!
11. Use a ratcheting wrench or open end wrench to unscrew the ¼”-20 nuts on the threaded rods (evenly) until the spindle rests on the lower cross-tube casting.
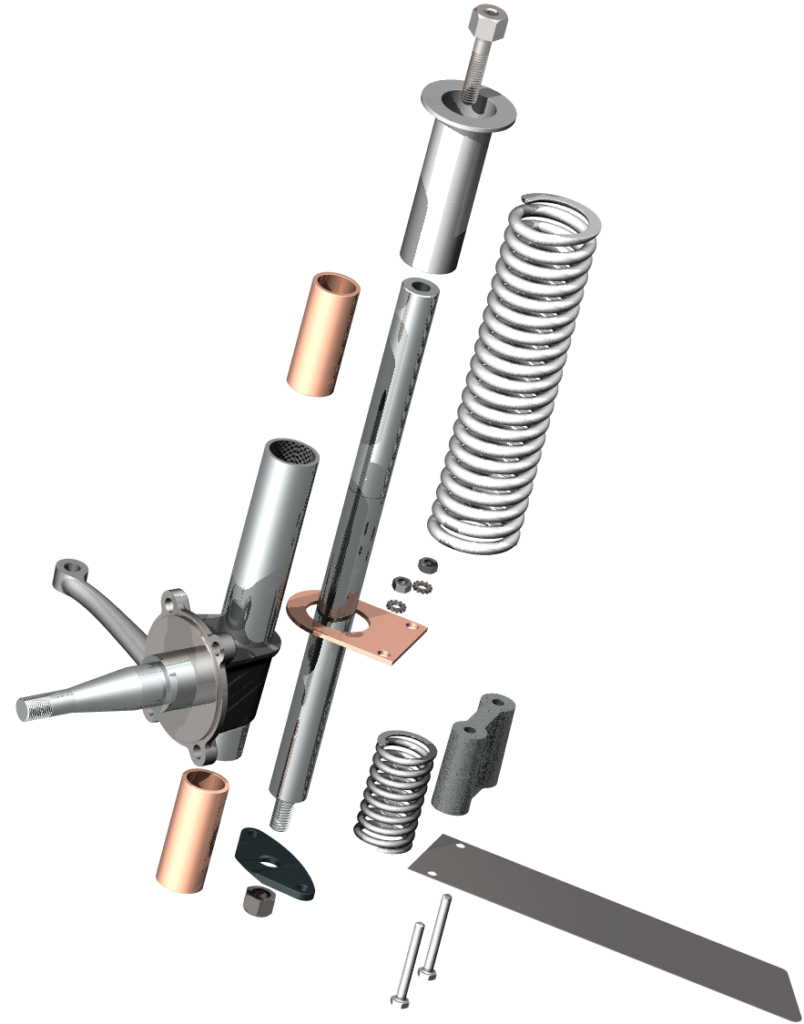
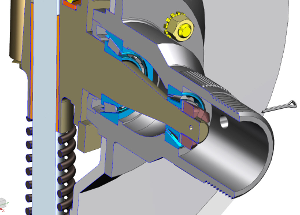
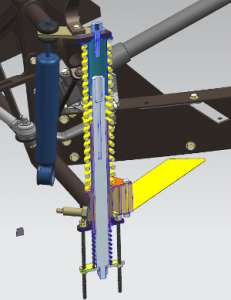
This is a section through the assembly. It shows the relative position of the kingpin and oiler bolt when the spindle is bearing on the lower cross-tube.
12. Remove the oiler bolt and grasp the upper part of the mainspring firmly with BOTH hands and pull it outboard.
It will extend sharply as it clears the crosshead but holding it firmly will prevent it from jumping from the spindle.
a. With the mainspring clear of the crosshead all the remaining parts are loose and can be disassembled.
CAUTION: Compressed springs are dangerous. Keep all your body parts out of the line of impact!
To reassemble:
13. Compress the mainspring back into position in the crosshead and immediately insert the oiler bolt through the top casting of the crosshead.
Note: Mainsprings on some models can be compressed by hand.
When the mainspring cannot be compressed by hand it is best to have a helper compress the spring using a garden spade while you use two hands or a mallet to coax the spring into position.

Reminder: Compressed springs are dangerous. Keep all your body parts out of the line of impact!
14. Compress no more than necessary to push the spring into position and replace the oiler bolt.
15. With the oiler bolt in place tighten the ¼”-20 nuts on the threaded rods evenly. Stop when the kingpin lifts the oiler bolt about ¼”.
16. Push the spring or lift the spindle to align the kingpin with the oiler bolt and screw it in.
17. Assemble all the remaining parts in reverse order of disassembly.
Work carefully. Serious injury can occur should the car not be safely supported and/or the mainspring is handled carelessly. I recommend letting an experienced professional perform this service. This paper is intended for informational purposes only.
I describe one way to accomplish the task, not the only way. Use at your own discretion. You assume all risks.