I know there is a machine out there that does this without blisters and cramps but I don’t have it. Every Morgan has some wire hems somewhere. At the very least the spare tire cutout and the panel over the dashboard are wire hemmed. Rolling wire is not rocket science but it is a chore.
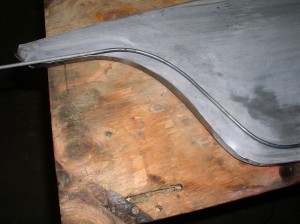
The first step is to trim the new panel to the right size. Scribe a line on the panel to represent the place where the roll will begin. This is the tangent point of the wire. Most of the wire used on a Morgan is 3/16” diameter steel. The amount of material required to make the wrap is three times the wire diameter (9/16”; a little less than the C=πD formula you learned in elementary school). For most applications the three times diameter works out fine because it is not necessary to completely close the wrap. In the singular case of three-wheeler skirt panels use the full 3.14 times the diameter to make a tight, closed wrap.
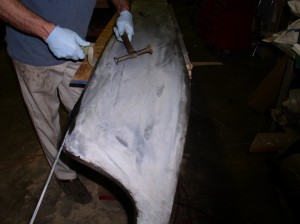
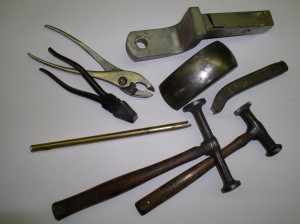
Start by slightly bending along the entire length of the scribe line. I use a pair of duck-bill pliers (aka glazer’s pliers) for most runs and switch to regular pliers for tight turns. On both pliers I ground one side to a chisel point to prevent it from denting the standing side when the wrap goes over 90°. The pliers do a good job but the gripping and re-gripping is fatiguing. Another tool I use is 5/8” diameter brass rod about a foot long. I cut a 5/8” deep slot in one end with a Sawzall (thicker blade than a hack-saw = wider kerf). This is my interpretation of a tool shown in the Best of Clarrie (MTWC). It can be used in the same way as the pliers to lift the flange bit by bit and for really long runs the panel gets clamped to the bench and I hold the tool with both hands and draw it the length of the panel.
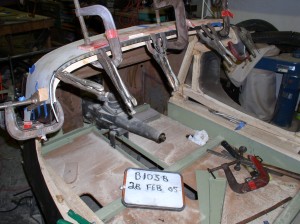
I increase the angle a bit with each pass taking about six passes to get to 90°. Prebend the wire to match the panel shape and clamp it into position using vise-grips or small C-clamps. Pliers can grip the wire and flange together and continue the wrap to about 180°. Often it is easier to use a steel dolly to back up the wire and a hammer to move the wrap beyond 90°.
This is particularly true on bends where the metal has to be either stretched or compressed. Final closure is always with a hammer and a cold-chisel. For best effect the chisel point is ground to the same diameter as the wrapped steel so that the point can push the edge of the hem under the wire to close it.
There is a bit of “feel” required to get a good job. The best advice I can give is to bend gently. You are stretching the steel as you bend (you will compress it when you close over the wire) so bend in small angles over the entire panel length and repeat until you have a 90° standing flange.
Contrary to instinct a narrow tool is better than a wide one. The duck-bill pliers are less than one inch across and the conventional pliers about 3/8” wide. One last tip: prep and paint the metal and rod before closing. I slop some Rust-O-Leum brand paint in and complete the job while it is wet. It is a bit messy but the paint doesn’t chip and there is less inclination for rust to start. Wipe off any smears with lacquer thinner.


