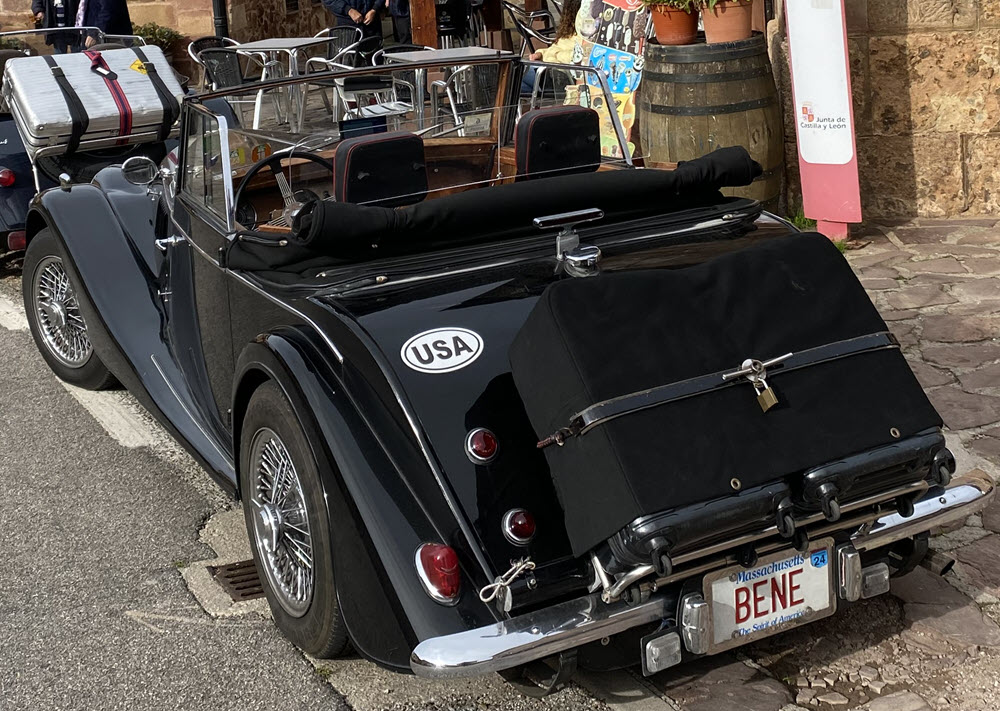
Oh my gosh; I wrote this in 2015 before our first trip to Europe. It is now 2025 and BENE has been back and forth across the Atlantic eight times and got stuck in Italy long enough to earn citizenship (the Covid years). The experiences gained from each tour motivated many new changes. I added comments and new pictures as seemed relevant.

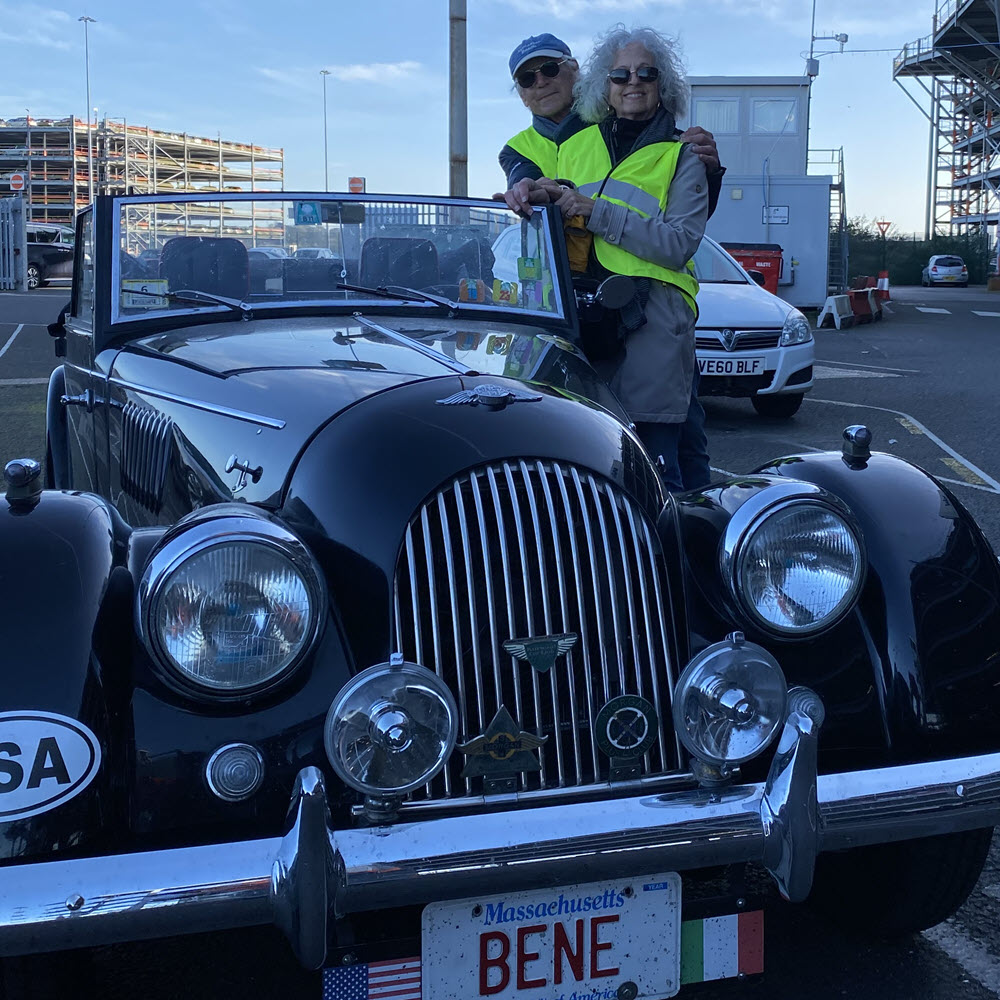
I acquired my 1967 +4 DHC from Morgan West in 2009. It was not the top priority in the shop and so was not completed until 2014 when it was sent back to California for Barbara Willburn to make the top and attend Mog West. My vision for the car was that it would be used for touring and towing my three wheeler on a trailer. Reliability was the overriding concern. Since that first California tour it has taken us on many outings including a 1000 mile round trip to Gettysburg for the DC group’s MOG 45. All in all it is certainly not perfect but has performed well. This year Kathi and I decided we wanted to visit Italy. One of my current projects is a 1964 +4 four seater. This was to be the “Italian Job” but the DHC has behaved so well that the four-seater got bumped and I am waiting for the truck to collect the DHC as I type this.
I took some liberties (yes, heresy) with originality building the car and again in preparing it for the Italian adventure. At first the only mechanical change was a gear reduction starter but the following documents some of the other changes. Time will tell what works and what doesn’t.
SEATING:

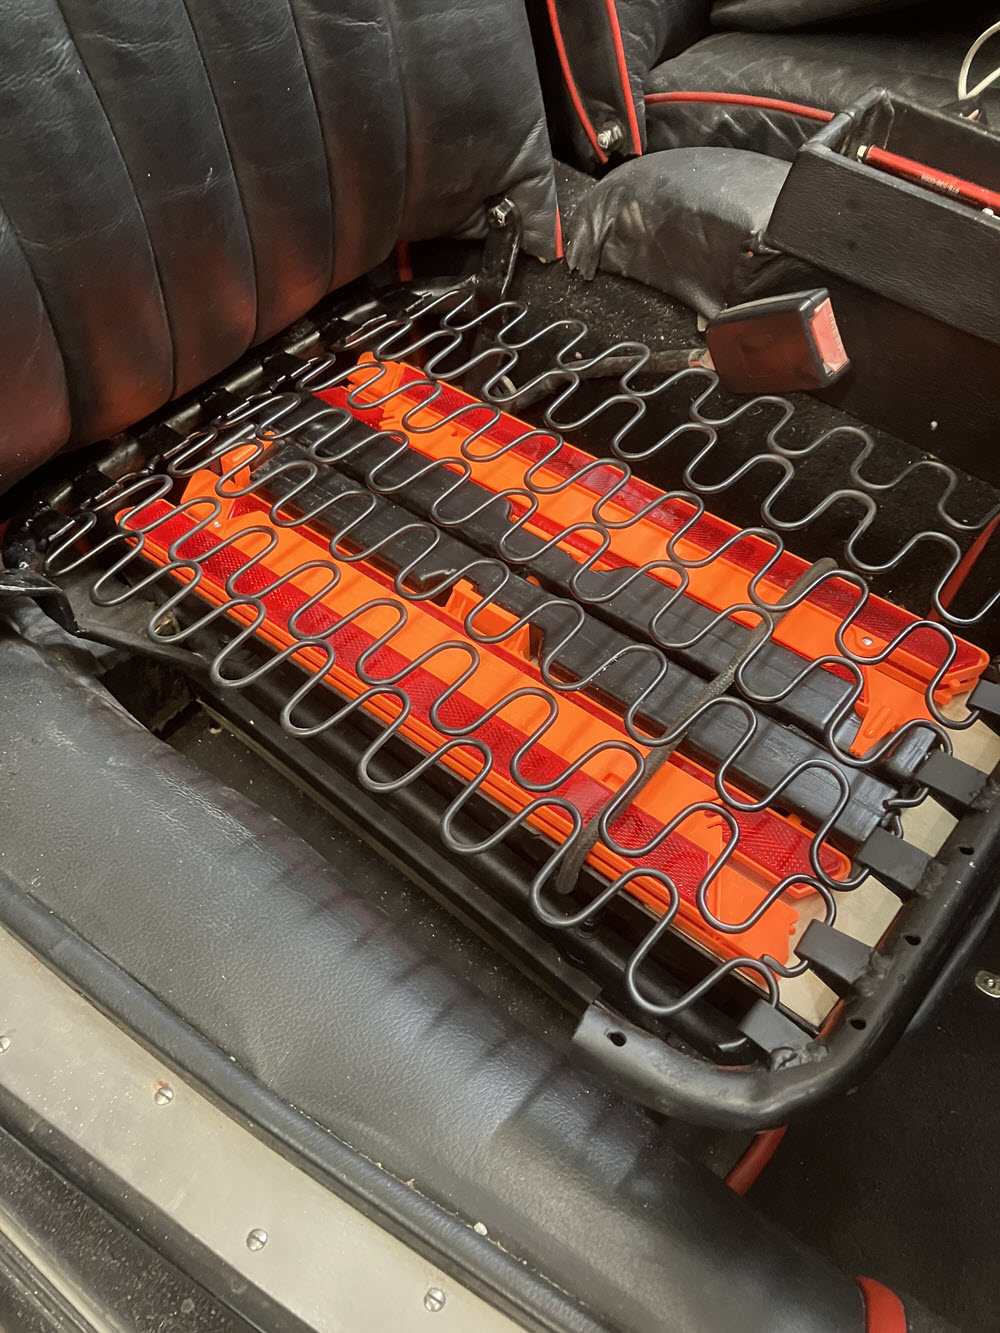
The adjustable seats worked fine but even with foam stuffed under them they just did not have the support I need for long hauls. I changed to upholstery type springs, added headrests and for 2023 tour added acrylic wind shieds behind the headrests. I added a description of the seat mods to this website under the “How I Do It…” heading.
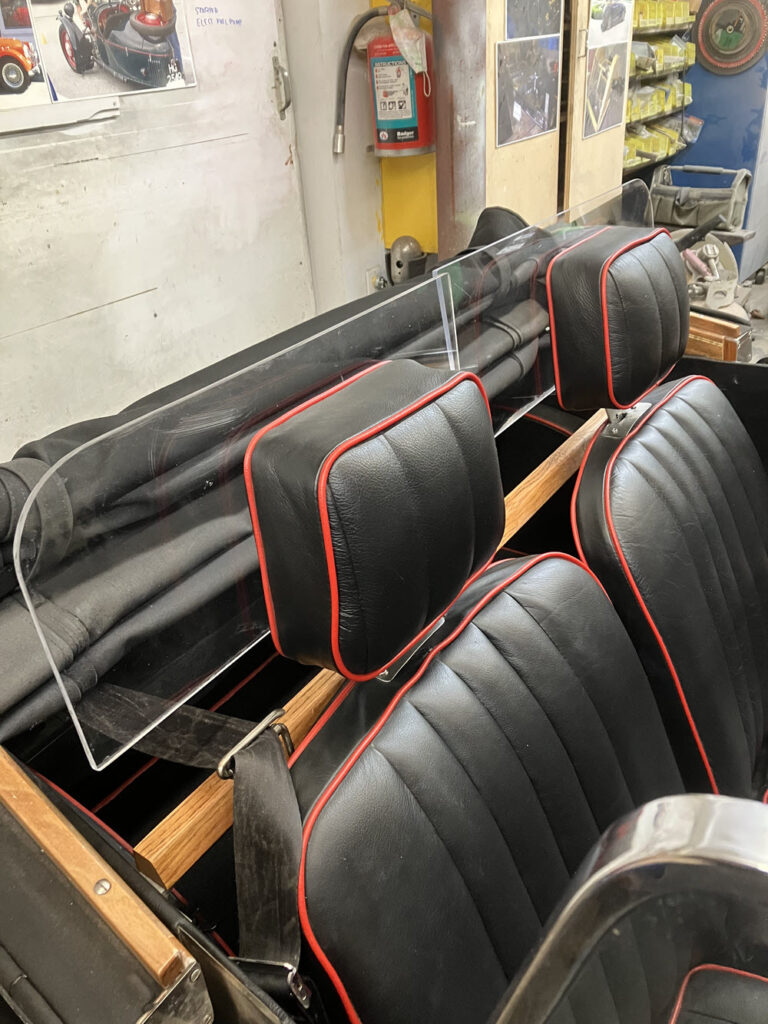
Here is a shot of the acrylic wind breaks fitted to the head rests. They are attached with thumb screws for easy removal (but we have never removed them. It’s just more comfortable driving without wind beating you from behind.)
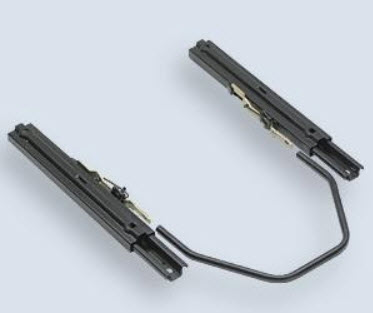
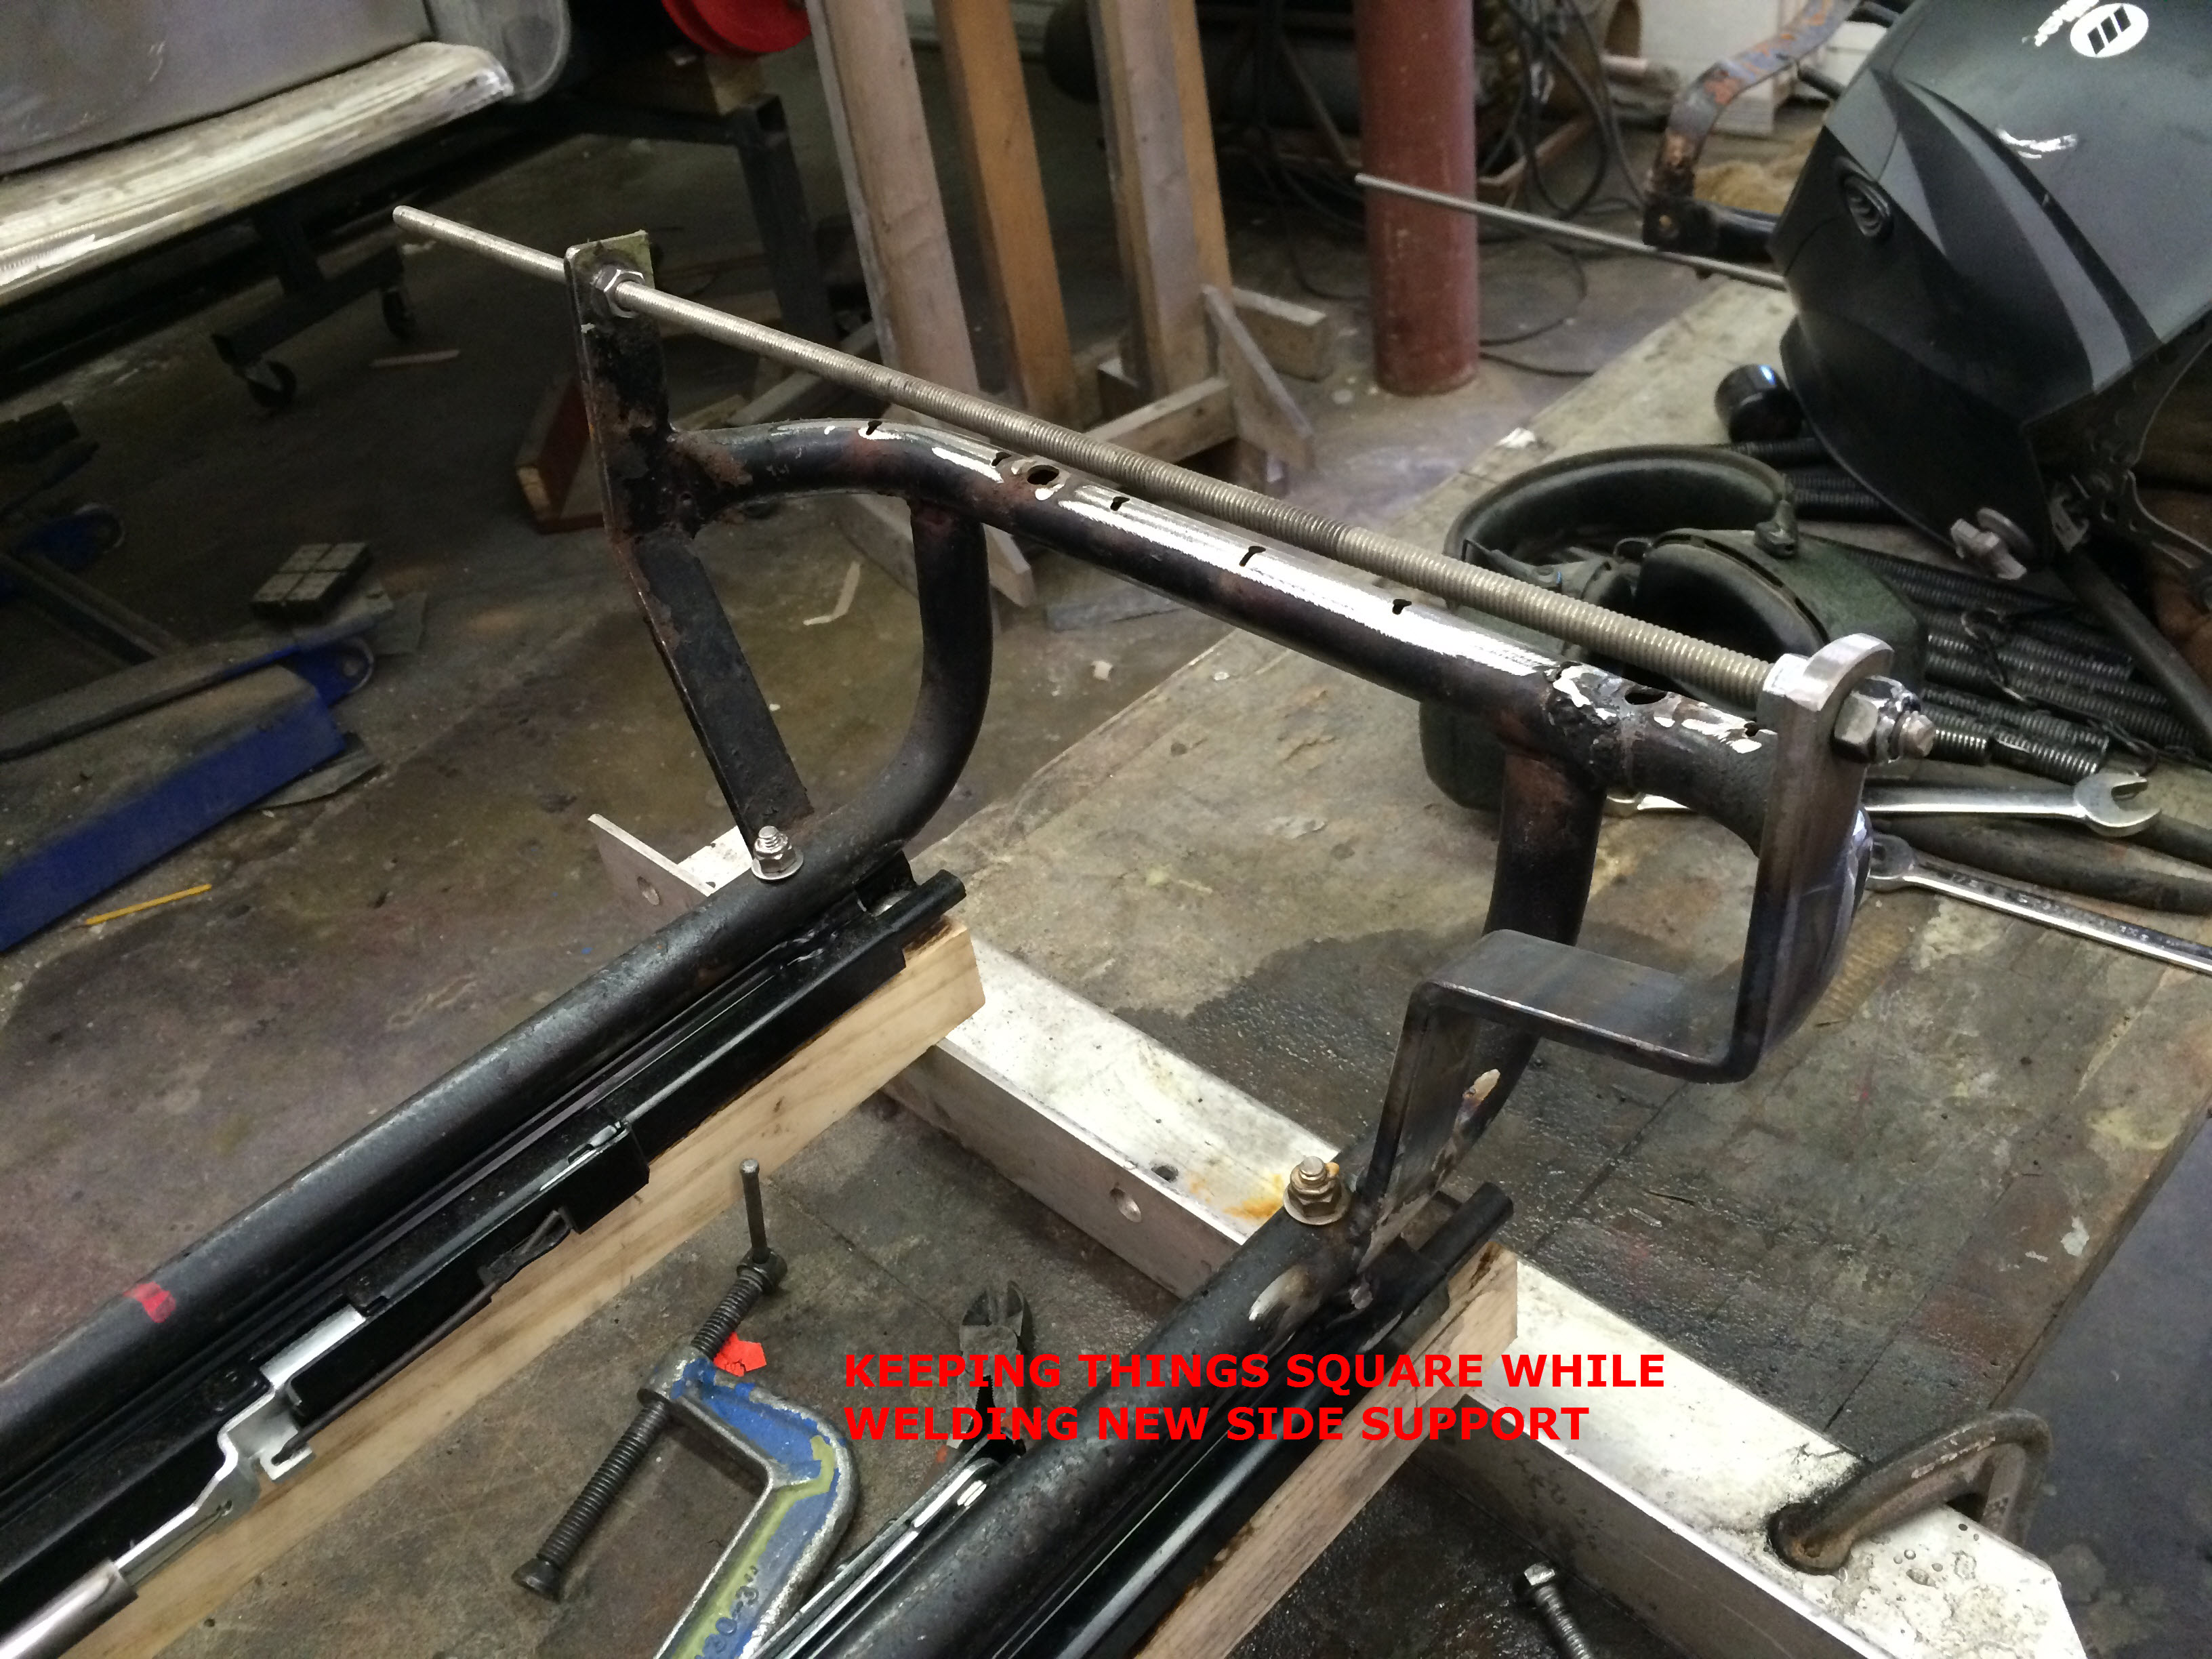
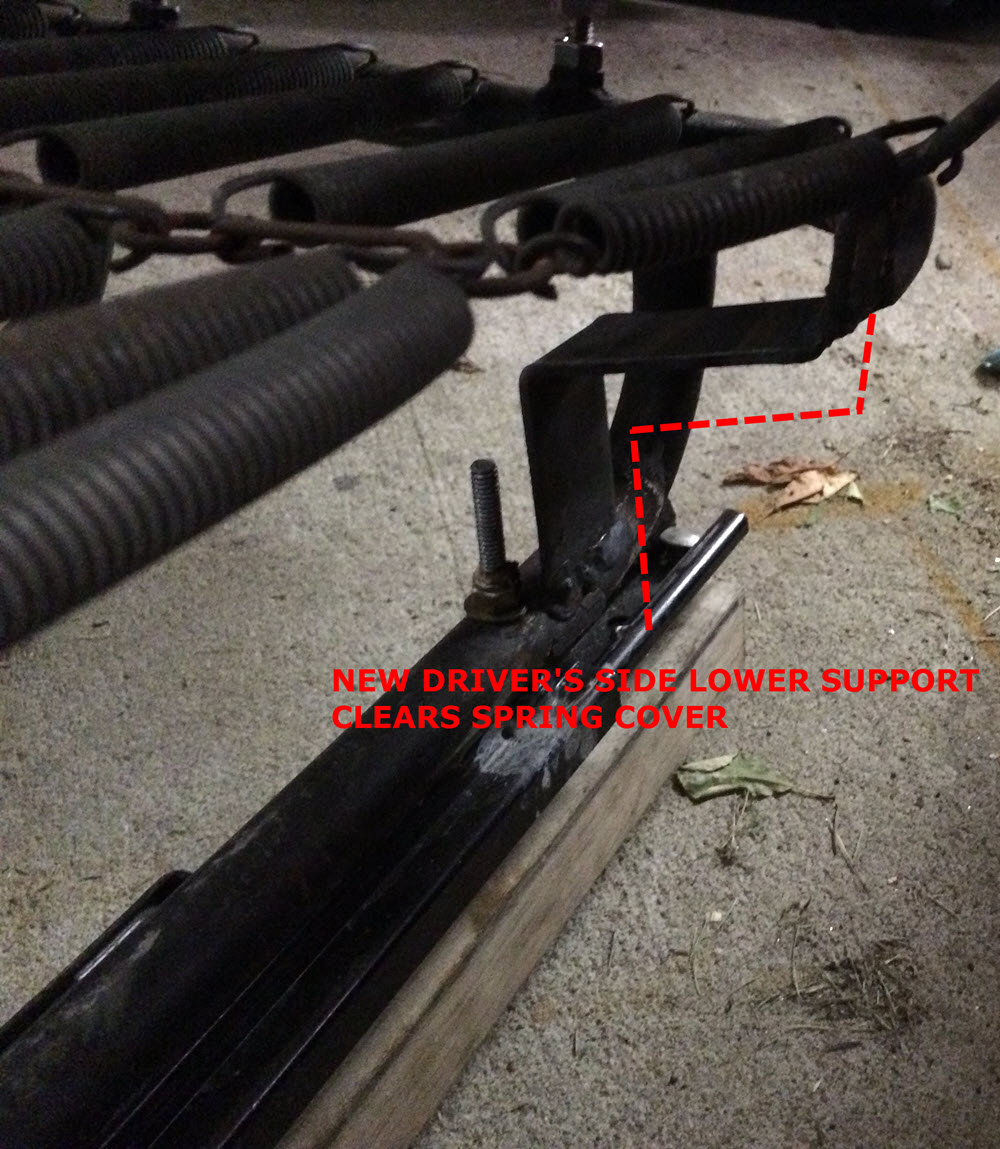
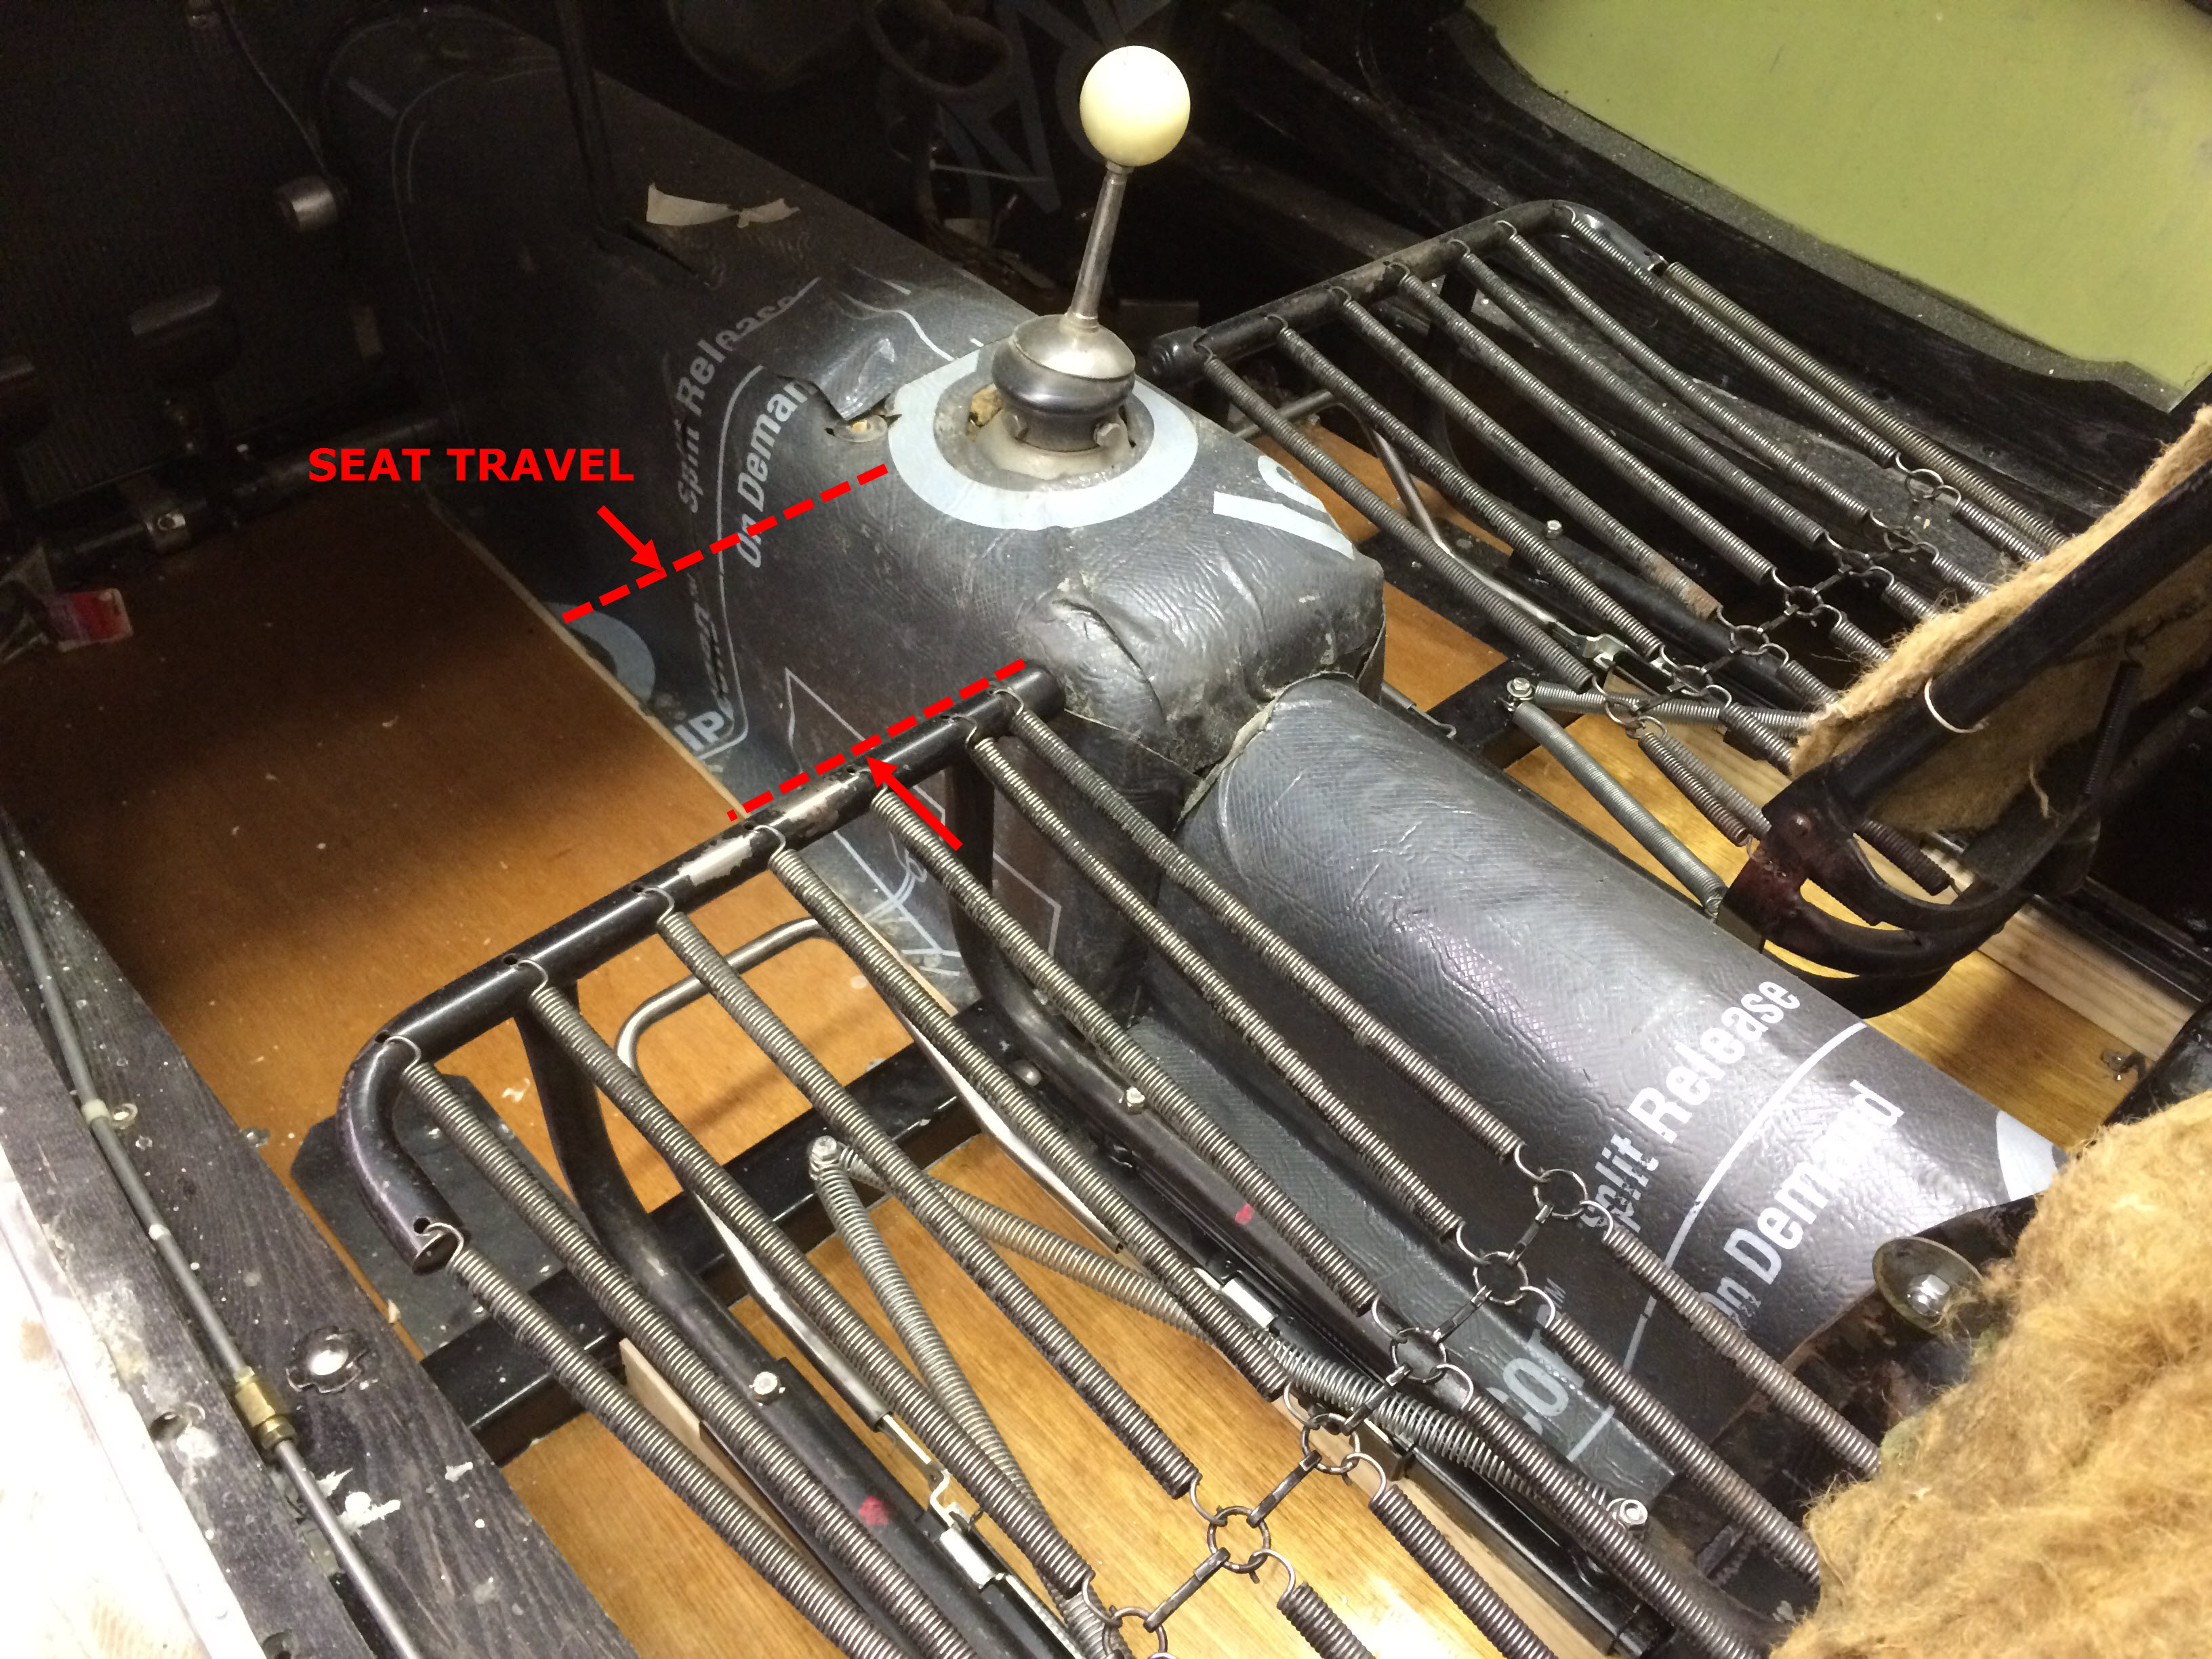
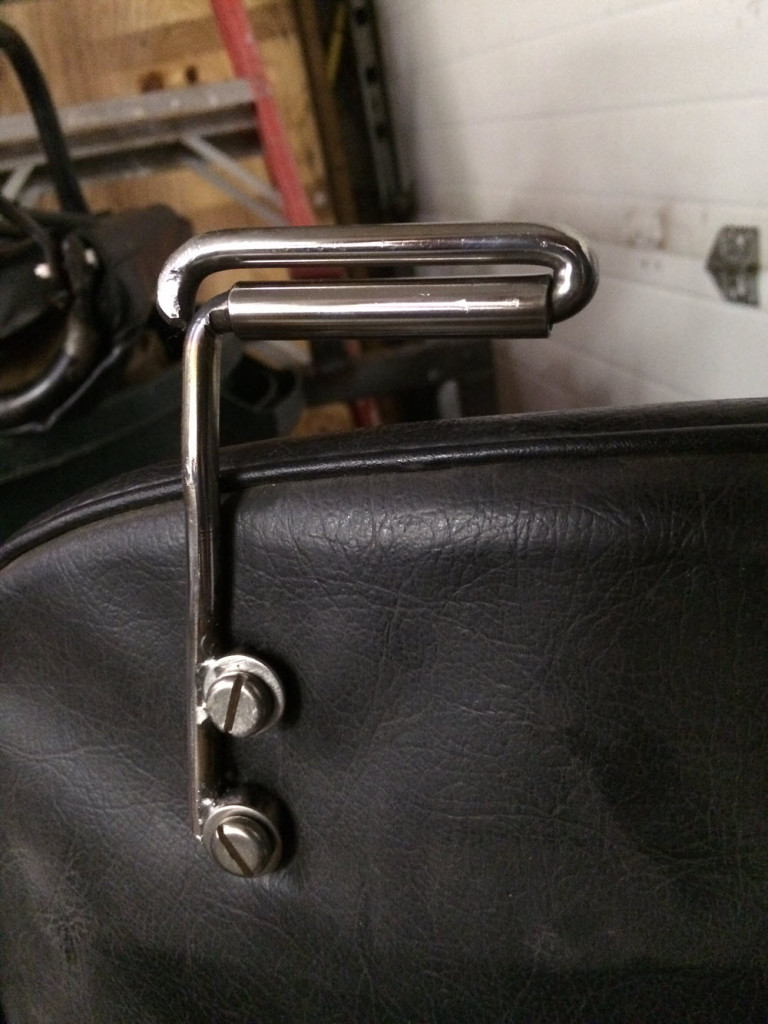
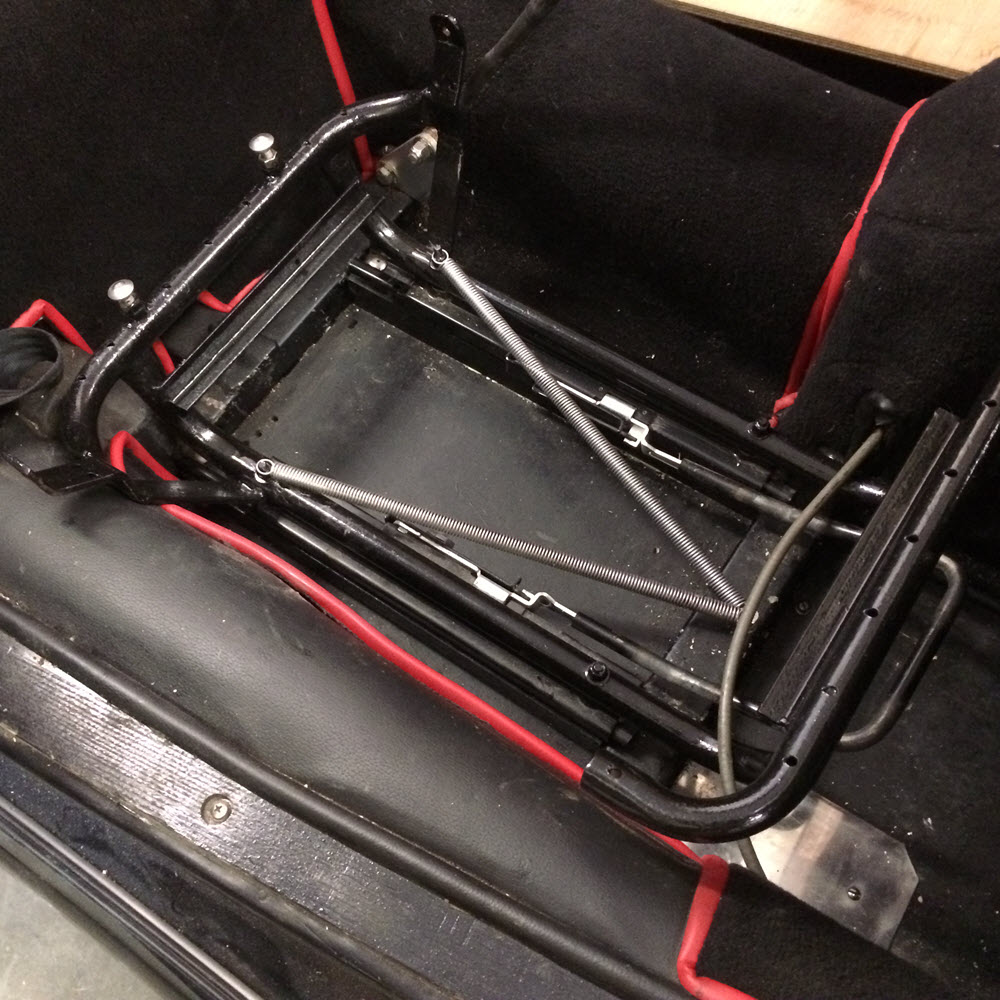
I’ve had multiple back injuries so standard 1960s era Morgan seating won’t do for extended periods. Also my wife, Kathi, drives the car so the seats need to accommodate both of us. Early in the restoration I had Barbara Willburn make standard bench seat upholstery. At the time I was not planning on keeping the car as dropheads were not my cup-o-tea. As time went on and my attitude changed I tried to make an adjustable version of the bench seat. It was an engineer’s worst nightmare: it looked great on the computer, worked terrific when bolted to the workbench and did not work at all in the car. I used it as a fixed seat until the decision to send the car abroad. On previous four-seat project cars I’ve used sliding tracks from other British cars that I purchased through Moss Motors. They worked to a degree but were not super. Recently I purchased universal track assemblies made by Sparco and installed them in the two four seaters currently in the shop. I was very happy with the results so it seemed like ‘a good idea at the time’ to put the four-seater sliding seats into the DHC. The Sparco seat slide worked well so I made additional modifications to the seats for comfort. I should mention that all the four-seater front seats that I have ever worked on have bent and distorted lower back rails. It is just a design flaw that the factory never bothered to fix. I either straighten or replace the bent part and then reinforce the back by welding a 3/16″ X 3/4″ piece of steel (on later examples I used tubing) top to bottom on each side of seat back. The reinforcement also provides a mounting point for my home-made seat belt shoulder guide (which looked great but didn’t work so good). The driver’s side seat needs the most travel so I also made a replacement support on the seat bottom frame to clear the rear spring cover.
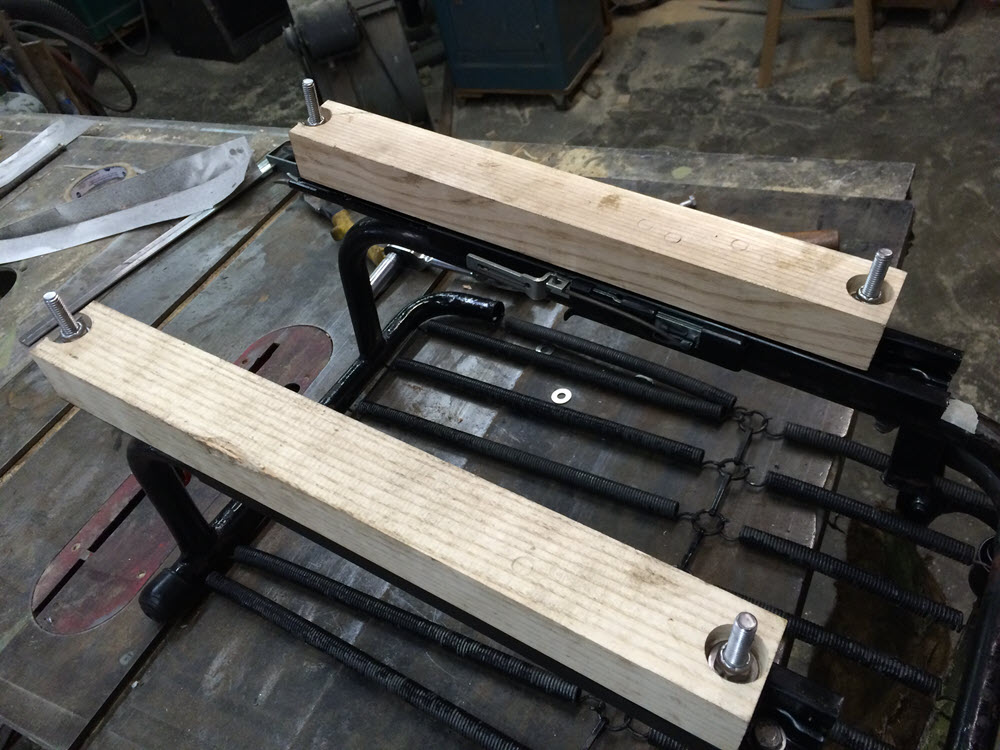
All that worked well so I continued fiddling. I made a sheet metal cover over the entire rear of the seat back. That allowed me to insert 1″ thick foam behind the stock coil springs for better support. When that change worked as planned I welded a piece of angle iron on the front and rear tubes of the seat bottom frame 2″ below the coil springs. A plywood platform completes the structure and supports two layers of 1″ foam. After driving with this set-up for a while I think it is a good compromise. The stock springs alone deflect too much initially whereas just solid foam compresses and becomes rock like. As installed the foam compresses but resilience is maintained by the springs. Check out the pics. Of course the final upgrade of replacing the factory spring set up with conventional upholstery spring made all this obsolete. See top picture.
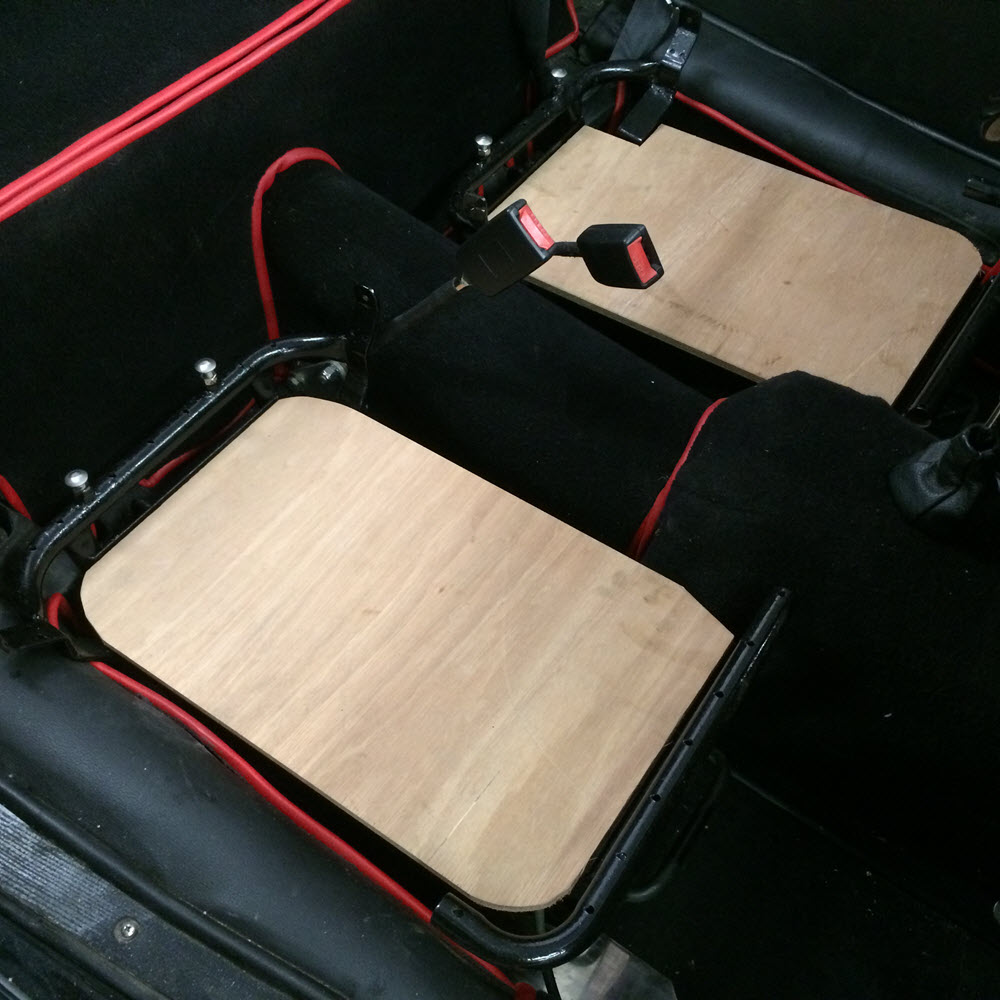
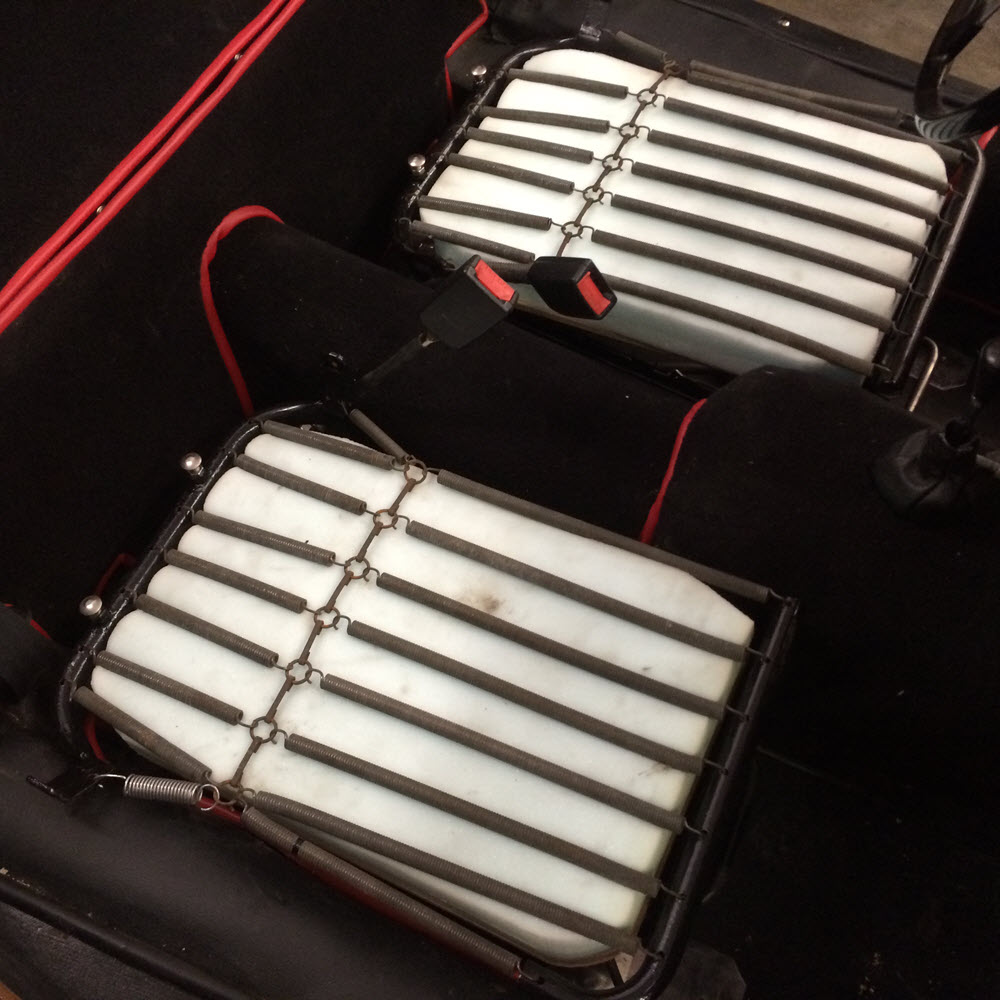
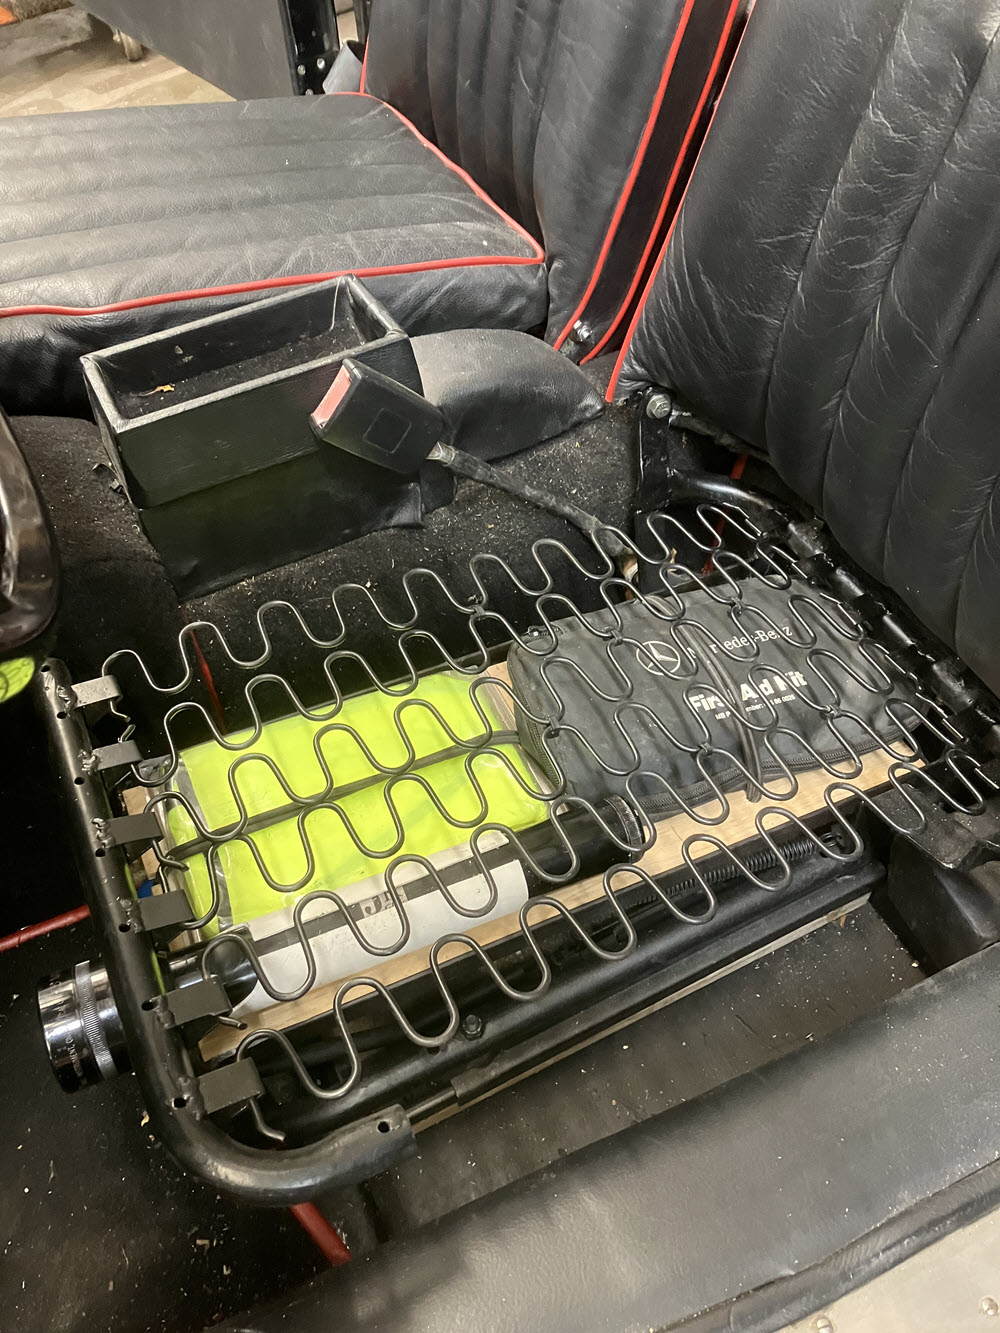
After the final change to upholstery type springs (top picture) the front and rear angle irons were removed and replaced with angle iron running fore and aft on either side of the seat frame below the springs. The plywood shelf was reinstalled but this time it carried emergency triangles under the passenger seat and Hi-Viz vests, flashlight, and first aid kit under the drivers side. The plywood shelf pulls out from the front. Aside from just being a good idea all these safety goodies are required by law in some European countries and they are supposed to be accessable from inside the car.
TOOLS:
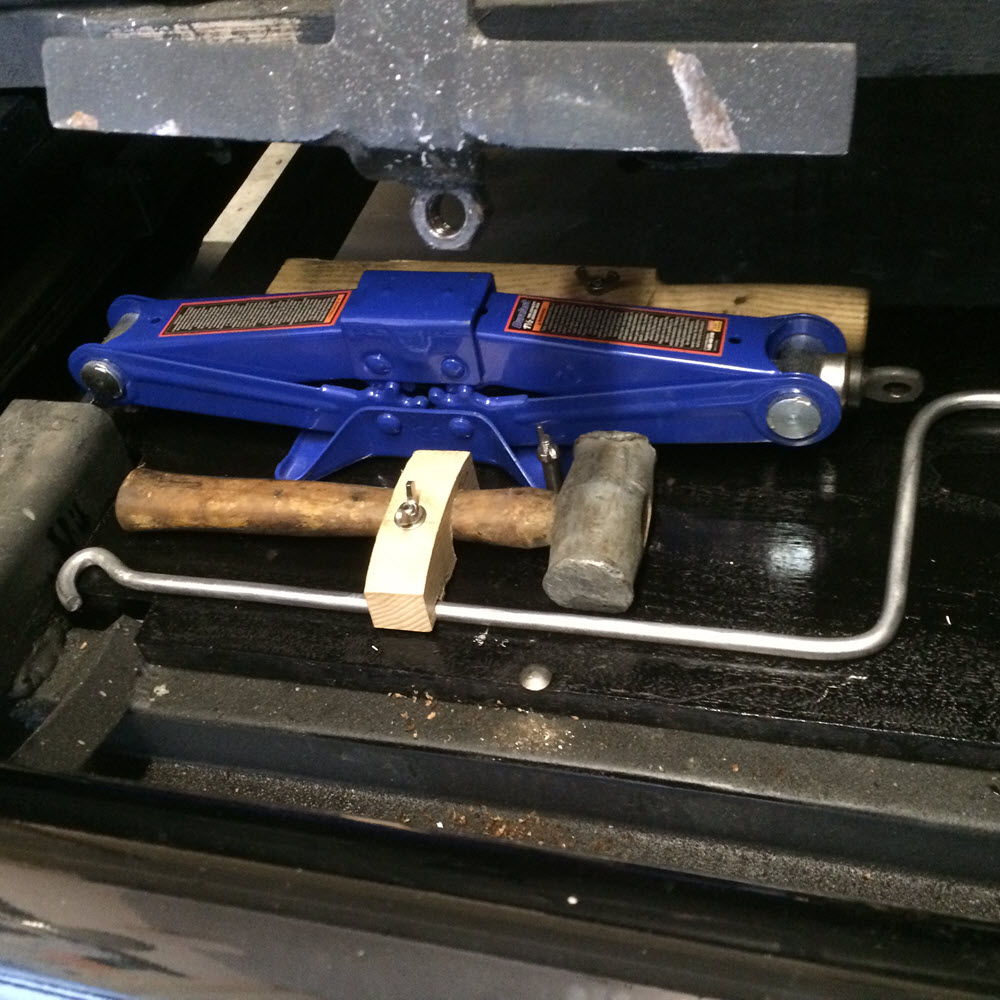
On two different trips with the DHC I got flat tires. Aside from dealing with a crappy jack it was not a problem to change wheels. I did learn to carry a spare tube because those are not available at every gas station (ultimately I changed to tubless wire wheels). I made an ash shelf behind the spare (DHC has a high gas tank) in the same place that the gas tank support shelf would be on a roadster. To this I clamped a large scissors jack, knock off hammer, crank and block of ash to hammer against the knock offs. A 1/8″ thick aluminum disc fits inside the rim of the spare wheel hiding everything.

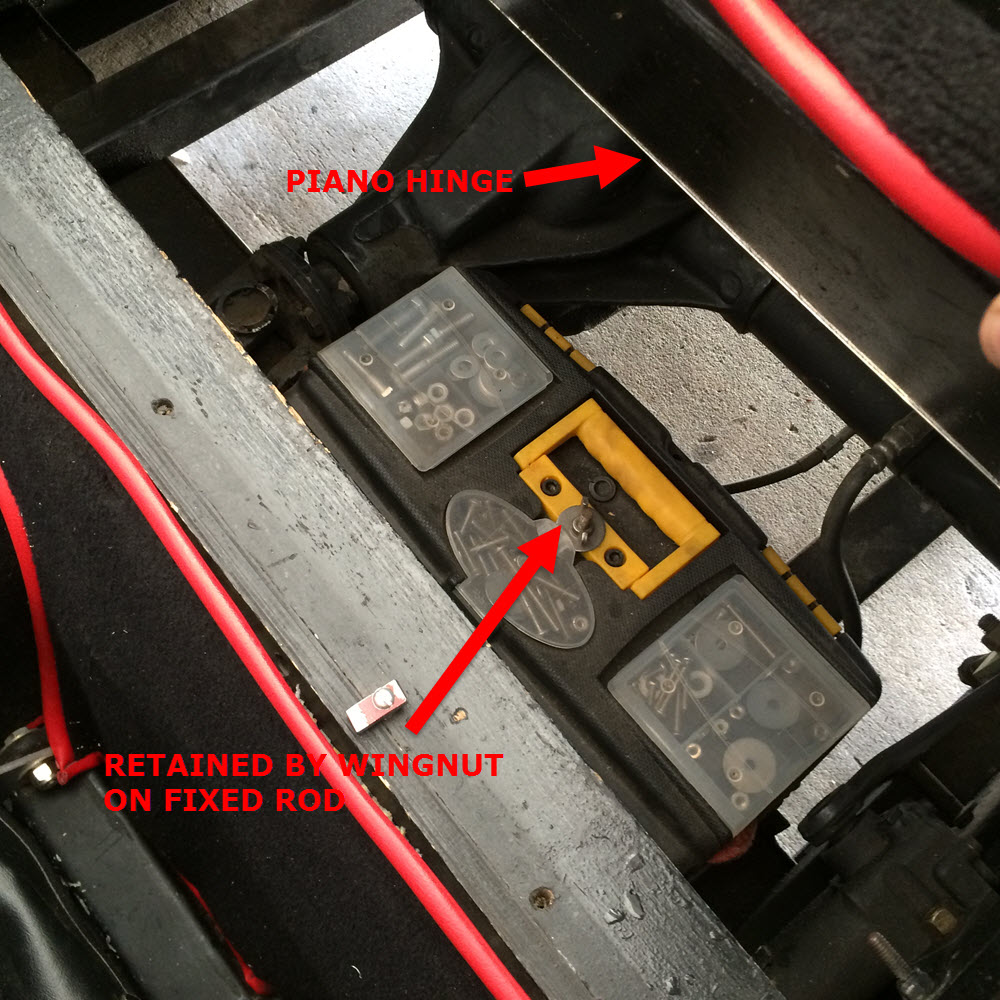
While not necessarily done for the upcoming European tour I did add a small toolbox from Harbor Freight under the package shelf, in front of the axel. I cut the package shelf in half across the car and hinged it to make it easier to lift the front half and access the toolbox that I hope to forget is even there. This space also stores my trailer tow-bar.
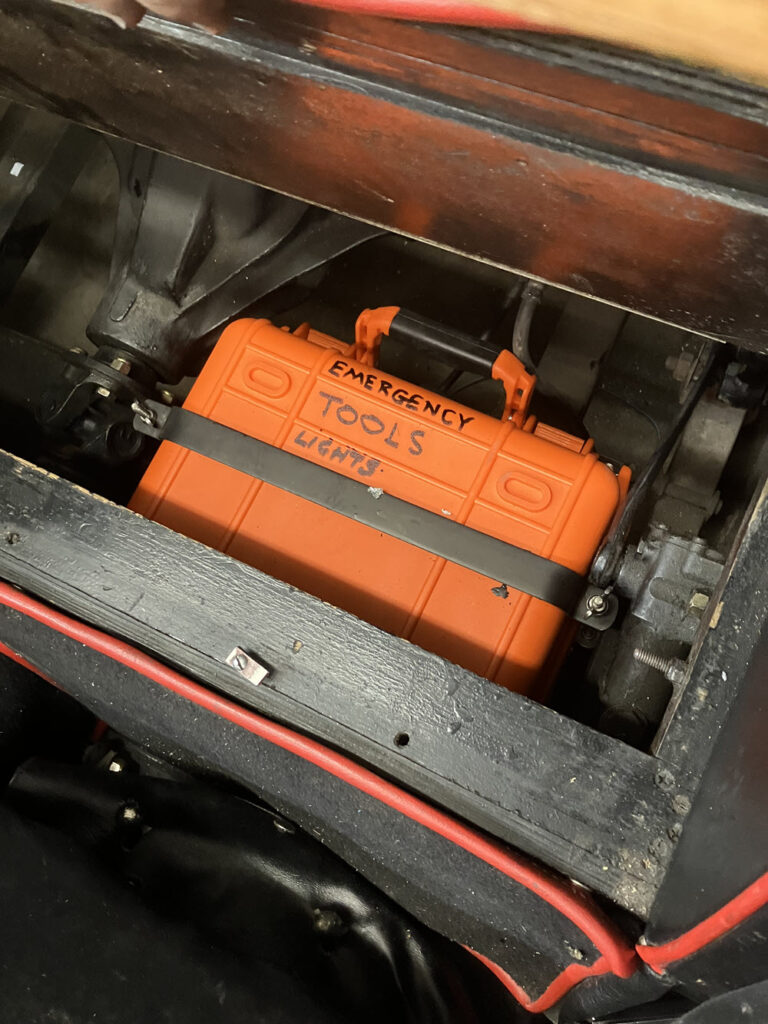
The tool box came in handy on a few tours (the time we blew head gasket for example) so I fitted a larger one.
LUGGAGE:

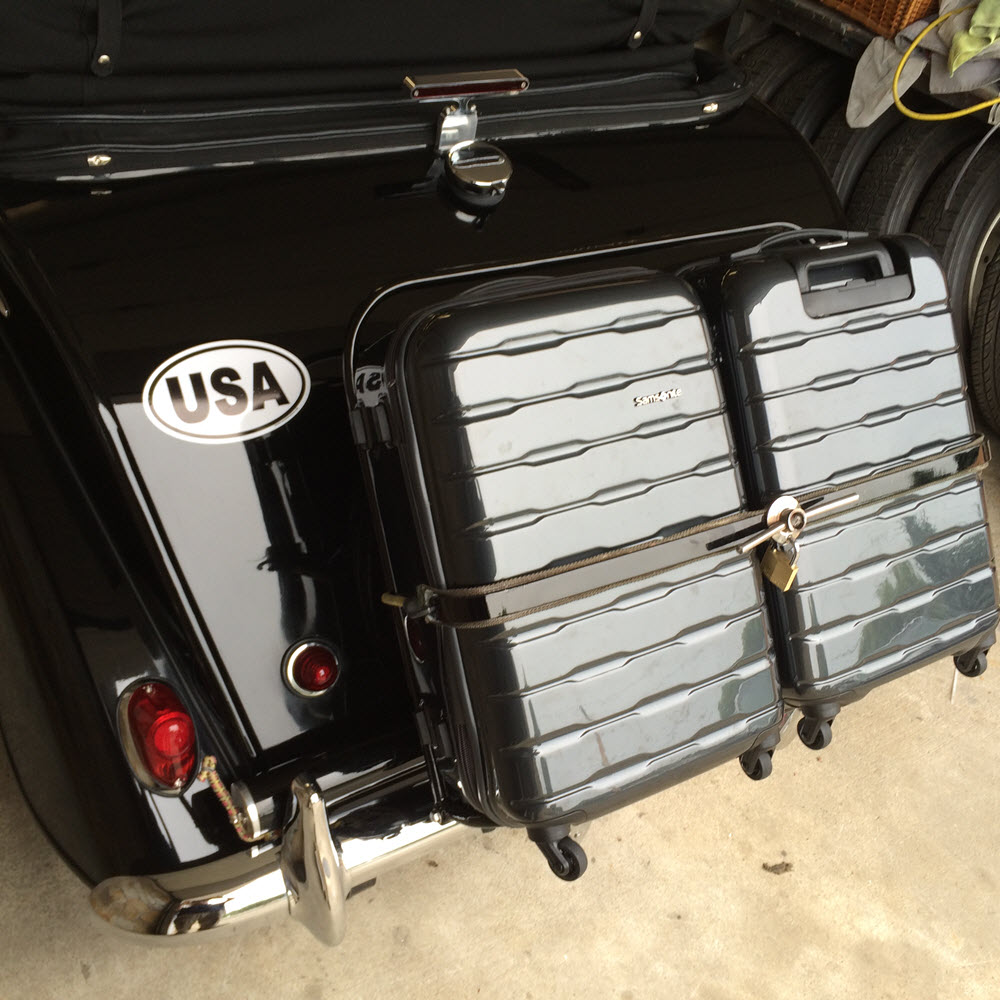
On our first visit to Europe with a Morgan we did not have any problems with leaving the luggage strapped to the rack with bungee cords. That does seem like tempting fate though. I feel I have a minimum responsibility to make it somewhat difficult to steal my stuff. My luggage rack is a home-made prototype that I made from EMT (electrical conduit) and liked well enough not to bother making a stainless steel version for several years. I added an additional upright on the center bracket and a threaded nut for a long wing-screw similar to the one that holds the spare. The longer wing screw passes through a cross bar, through the handles of the carry-on bags and has a lock to keep it all in place against a less than well equipped thief. When the luggage is not on the car, like for shipping, a short screw locks the crossbar in place. Spiffy indeed!
PARCEL SHELF COVER

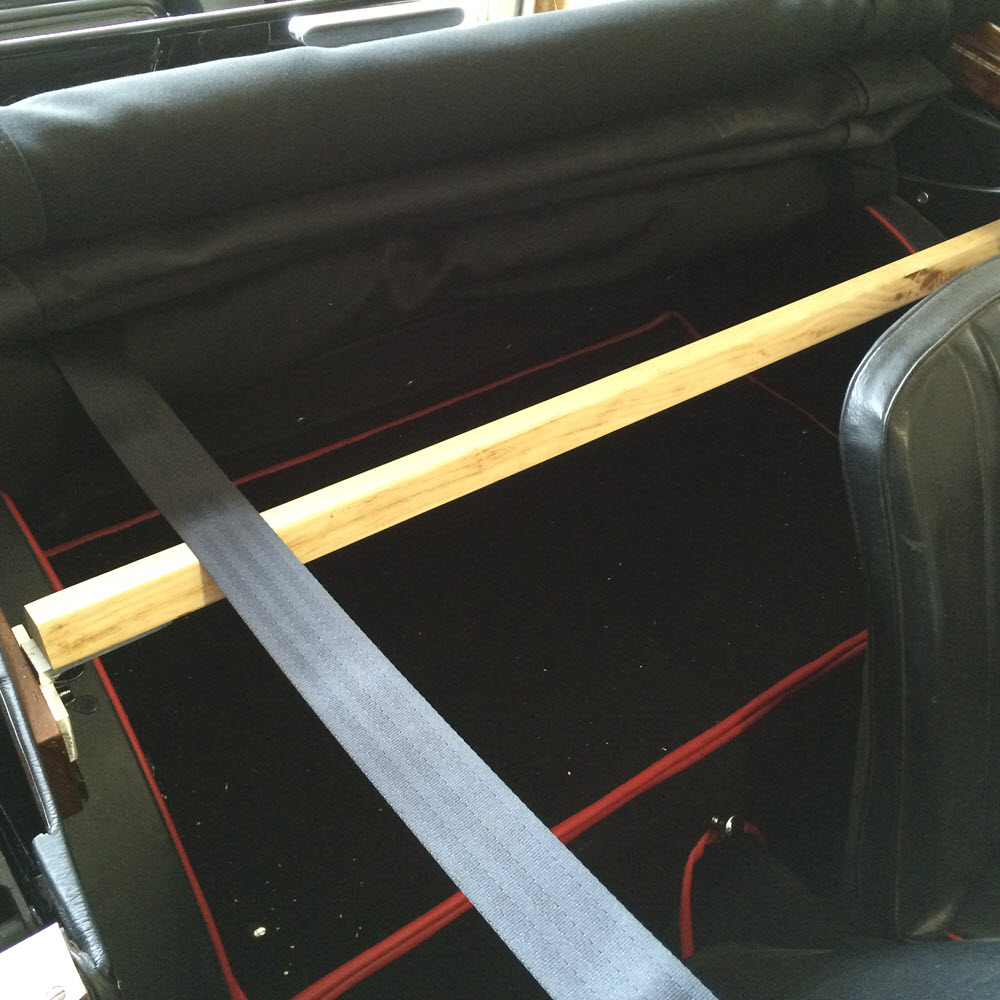
All modern hatchbacks come with a privacy cover over the boot area. I figured that the parcel shelf of the DHC will be filled with personal stuff that I would rather not have walk away. I made a cover of topping material and snapped it to an ash bar bridging the span between the wheel arches. There is a gap of several inches to allow the rear window to lie against the back wall of the parcel shelf. The canvas stretches over the standard ash bar behind the seats and clips to a hook on top of the drive shaft cover. the forward most edge of the cover is hemmed and hides a 1″ wide ash batten and the attachment to the hook is by bungee so it stays taut. I like it.
CENTER TAIL LIGHT

The need seems obvious doesn’t it.
Only problems were the gas filler neck and having luggage on the rack. A LED light from Moss and a home-made aluminum plinth solved both. Rather too soon the chrome started pitting. Experienced the same failure on several other cars I fitted these lights to. Won’t ever use the Moss part again.
POWER OUTLETS

GPS and charge phone can work at the same time. Negative ground required. Ultimately I added a third outlet so the GPS is always in one, a USB addapter in another and the third is available for whatever.
COLUMN MOUNTED, SELF-CANCELLING DIRECTIONAL SWITCH

This has nothing to do with the trip to Europe but it is a most worthwhile modification. No more eternally flashing directional lights. The basic unit is adapted from a TR6. I tried several solutions for self-cancelling but all failed after brief use. I still use it since the stalk is still much more convenient than the center switch. The electric fan switch now fills the original hole in the dash panel.
UMBRELLA

Totally frivolous but fun. While in Europe we met some people from the Irish Morgan Club. They all had tubes with umbrellas attached to their luggage rack. Great idea. Mine is 3″ diameter aluminum tube from McMaster-Carr with end caps I turned from 1 1/2″ thick aluminum. We first used it when caught in a downpour in Gettysburg at MOG 45. Parked, swooshed out the ‘brawlie and walked to the restaurant in style; almost dry.
Alternater….Grrrr.
Driving to some mountain top village in Italy at night can be challanging. On unpaved rutted roads with trees on both sides blocking the sky above it is DARK! the original lighting was less than adaquate so I wanted to add driving/spot lights. The original dynamo was marginal so I installed a Lucas alternator. And therein lies the rub. The first time the alternator crapped out was on the way to the Chunnel in England. The second time it was in Trapani Sicily. The third and final time was in Calais, France. Eventually I figured out that there was a short contact in the plug that goes into the alternator making intermittent contact and causing the unit to fail. My fault; but it did make for some interesting adventures.
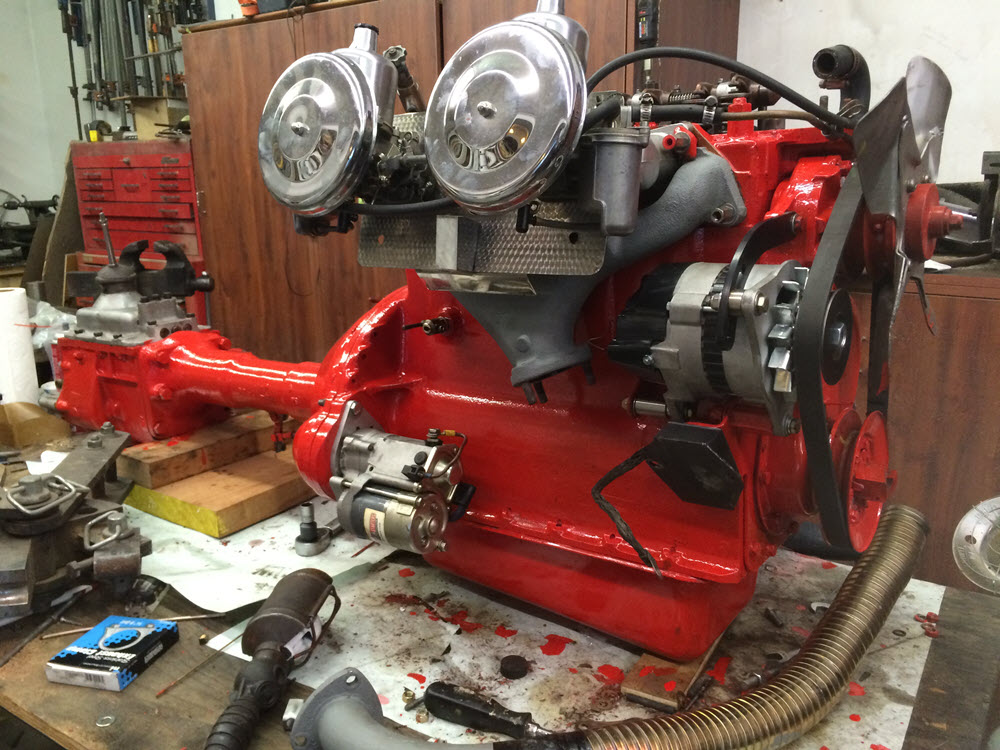
5 Speed Transmission
For the 2020 tours I installed the T9 5 speed conversion kit sold by Morgan Spares. There were teathing problems; notabley poor quality on the hydraulic slave cylinder actuating the clutch. The slave cylinder is conentric with the transmission input shaft and not easily accessable. After a total clutch failure (fortuantly at home) I replaced it with a unit from Summit Racing. NO clutch problems since the change (5 years and 3 European tours).