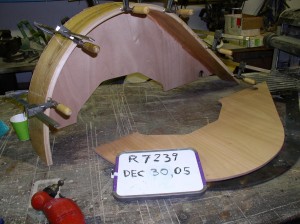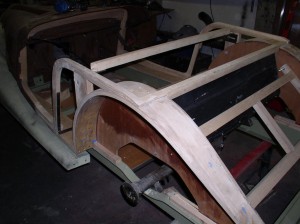
OK; so you have decided to replace your wheel arches and for some goofy reason you are not going to buy them new from the factory. Even goofier is that you want to make them yourself. Before you finalize that decision understand that it will take you several days if you go the cheapest route by starting from scratch. In addition to the usual hand tools like saber-saw, electric drill, electric plane (handy but not essential), you will also need access to a table saw, 6” band saw, a thickness planer and lots of clamps.
As for materials, Ash is preferred and there really is nothing in second place. I have used White Oak once or twice and it was satisfactory. I have seen, and replaced, wheel arches made from woods as diverse as mahogany, teak and most recently spruce (re-sawn 2”X 6” construction lumber). If these alternate woods were up to the task I would not have been replacing them; Caveat Emptor. Note that almost any wood would be “strong” enough. Ash wheel arches are far stronger, in terms of beam strength, tensile strength and the other engineering criteria, than necessary. The unique requirement of a wood in this application is its ability to take and hold nails/screws very close to the edge without propagating a split. This task is particularly challenging near the lower trailing edge where the arch tapers away to nothing. A Morgan body twists and flexes (but you know that) making it more difficult for the fasteners to stay put. The inner wheel arch panel can be made of almost any 3/8” plywood although my favorites are Okemo or Merranti marine grade* with Baltic Birch and Mahogany marine as second choices.
Many suitable types of glue are available. I believe that factory used hide glue and for many years I successfully used resorcinol resin. My preference today is Epoxy such as that made by West System and available at most marine supply stores worldwide. Epoxy is expensive and much messier than almost any other choice but it does a superb job.
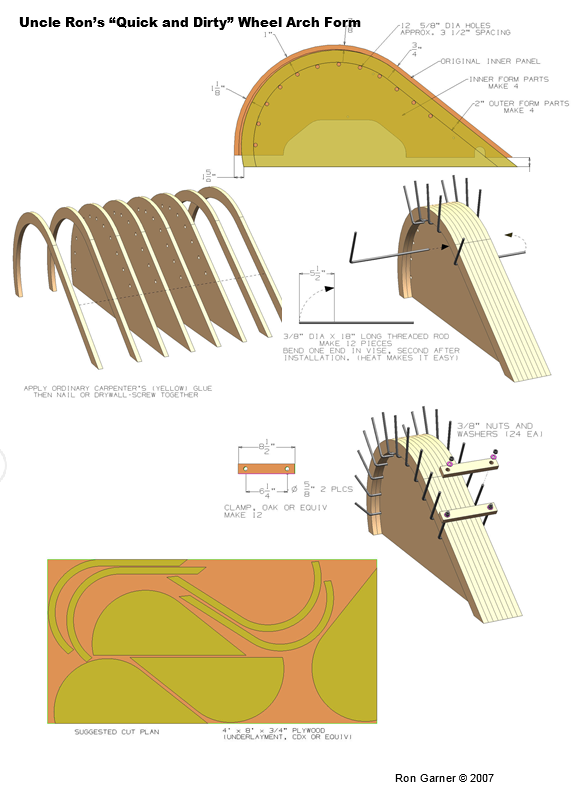
Step 1 Make the form: This is a one time job so you do not want to invest any more money and time making the tooling than necessary. I have included drawings of the form I use. It is made from ¾” plywood (used is fine) and 3/8” threaded rod. It takes an afternoon to fabricate. Use your existing inner wheel arch panel as a pattern. The actual arch will total ¾” thickness and the inner panel can be marked (if the original paint area isn’t enough) and trimmed to this size. The laminated ash will spring-back when it comes off the mold. The drawings show a spring back allowance. The factory uses three ¼” thick layers and that is what I typically use also. On occasion I have tried using four 3/16” thick layers instead. Thinner laminates bend easier and have less spring-back but making four pieces takes longer and there is more material wasted in the process. Cover the forming surface with thick plastic film or a 6” wide strip of Formica to prevent the glue from sticking to the form. Even though you will be very proud of your form it is unlikely that you will ever use it again and it takes up a lot of shop space. It is cheap enough that I prefer to salvage the rods and burn the used form. When I need to do another pair of arches I make a new one. (Ok, I changed my mind. I seem to need wheel arches every year so I finally started saving my form. The one I have now has produced six car sets so far and even though I say I am giving up restoring Morgans I will probably not throw it away.)
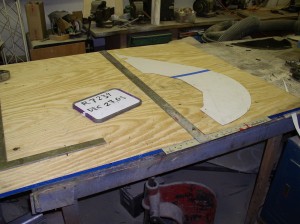
Step 2 Get the stock. Lay some stiff paper on your original arch and make a pattern that you can use later to trim the new arch. If you do not have access to machinery most lumber suppliers can mill the stock to size for you but don’t expect it to be cheap. Depending on the year of your car you might need up to 6” of rough width by about 5’-6” length. Remember that it is easier to make wood shorter than to make it longer. Because the arches taper toward the rear you can economize a little on the stock by overlapping two tracings of your paper pattern on a single 9’-0 long piece of stock. I don’t recommend this economy if you are planning to do your own sawing. It is just too much of a chore to push a tree (see the eleven footer in the picture) through the bandsaw. Five foot pieces are easier to manage.
 To make your own laminates, start with rough stock 6 quarters (hardwoods in the US are sold by the ¼” rough thickness) thick by whatever width you need and 5’+ long. Square and clean it by running it through the joiner, table saw and thickness planer in that order. Set your band saw up for re-sawing. Re-sawing is the term used for making skinny boards out of thick ones. The blade needs to be ½” thick with about 4 teeth per inch. Use scrap lumber to make full length (5’ both in-feed and out-feed) extensions on the bandsaw table. Make a long (6-8’) fence and square it to the blade. Set it at least 1/8” thicker than needed (3/8” for 1/4” finished). Make and fit finger boards (pieces of wood with a series of lengthwise sawcuts) to act a springs to keep the stock against the fence as you feed it into the blade. (note: the arches on pre-1959 narrow body cars are skinny enough to re-saw by making two, top/bottom, passes through most table saws). Set the thickness planer up near the saw. After each pass of the stock through the saw redress the cut side by running it through the thickness planner. Lastly, set the thickness planner for 1/4” or 3/16” (3 or 4 laminates) thickness and mill the one undressed face of the laminates.
Step 3 Apply Epoxy to all faces of the laminates; stack them up (wear rubber gloves). Place plastic film or Formica on the top surface of the stack and place the stack on the form. Install and tighten the clamp that is at the 10:00 o’clock position first. 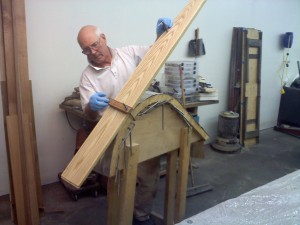
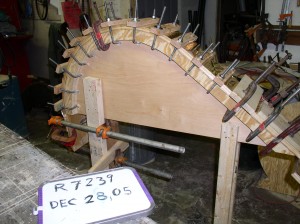
Add and tighten clamps working out from there. Add additional C (G) clamps as necessary. Remove the clamps in 48 hours or so.
Step 4 Dress the edges with an electric plane. Use your paper pattern as a guide and cut to shape with a saber saw or portable circular saw. If you got this far the rest is easy. Congratulations. Don’t you wish you bought them from the factory?
